Complete SKYLOC Prepaid Lease Application and Payment Process Complete SKYLOC Prepaid Lease Application and Payment Process

Complete SKYLOC Prepaid Lease Application and Payment Process

Complete SKYLOC Prepaid Lease Application & Payment — Skylight Installer Guide
Step-by-step guide

Complete SKYLOC Prepaid Lease
Application & Payment Process

This guide walks your customer through the full application — from receiving the lease email all the way to submitting payment into escrow via PayKeeper.
5
Sections
37
Steps
~20
Minutes
How this process flows — start to finish
Send lease email Customer registers Review & disclose Sign documents Submit payment
Who does what in this process?
You (the installer) handle Steps 1–2 inside the Skylight portal — sending the application email. Everything from Step 3 onward is completed by your customer on their own device. Walk them through the steps so they know what to expect, but the actions must be taken by them directly.
2 steps
1
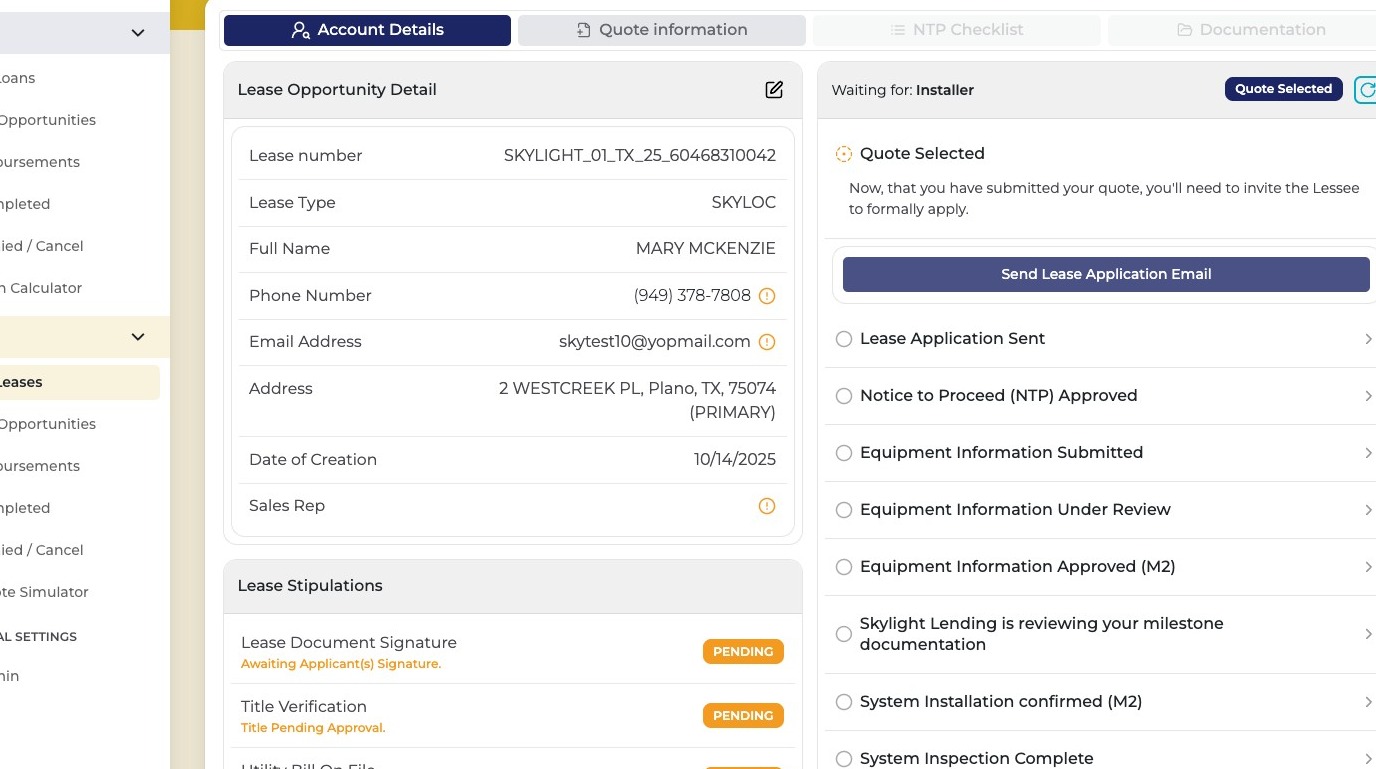
Navigate to the lease opportunity in the Skylight portal
Log into the Skylight Lending installer portal and open the specific lease opportunity you created for this customer. This is where you'll trigger the application email.
Lease opportunity in Skylight portal
2
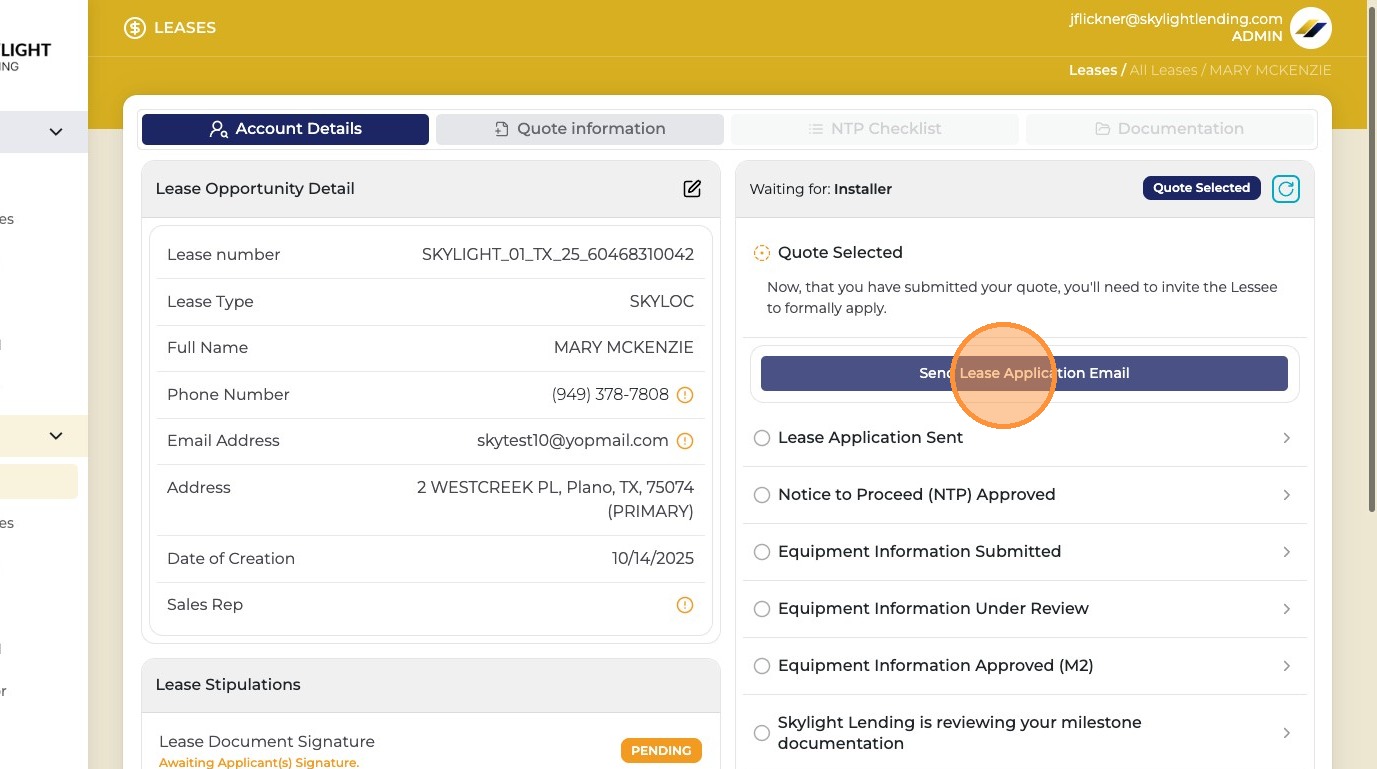
Click "Send Lease Application Email"
Click this button to send the official lease application email to your customer. The email will contain a unique link for them to begin the registration and signing process. Make sure their email address is correct before sending.
Send Lease Application Email button
Heads up

Once you send the email, let your customer know to check their inbox right away — including their spam or junk folder. The link in the email is how they begin the entire application process.
5 steps
3
Customer clicks the link in their email to open the registration page
Your customer will receive an email from Skylight Lending. They need to click the link inside to be taken to the registration page where they'll set up their account.
Registration page
4
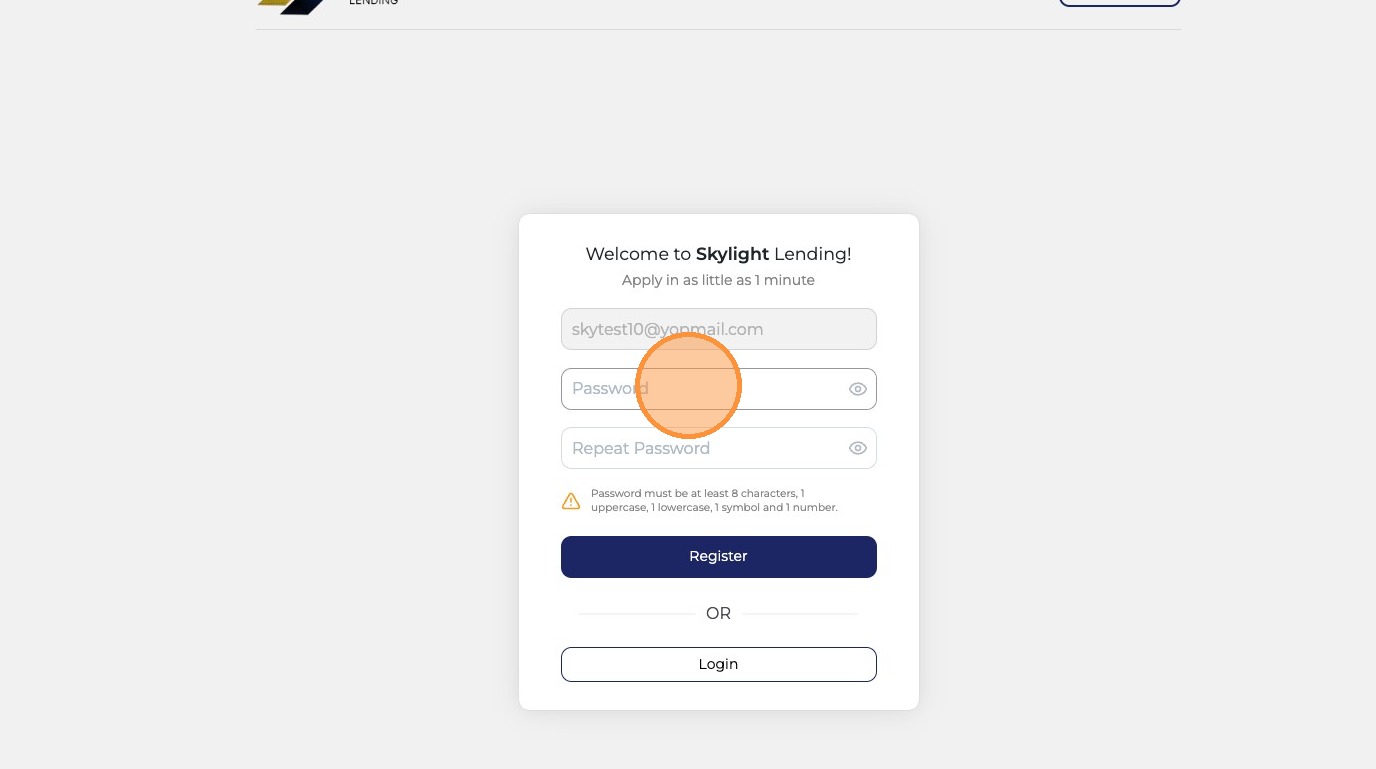
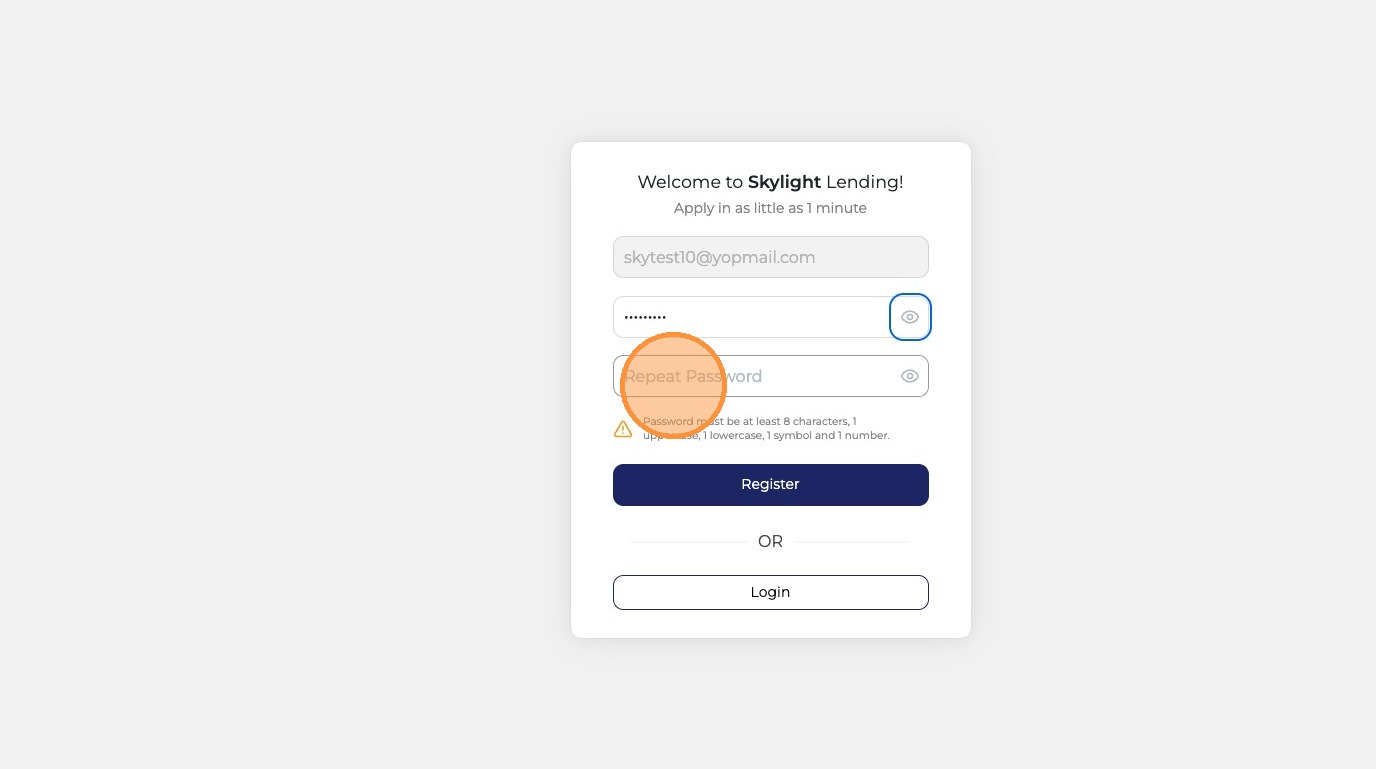
Customer creates a password
On the registration page, the customer creates a password for their account. This will be used to log back in if they need to return to the application.
Create password
Remind your customer

Tell your customer to save or remember their password — they'll need it if they close the window and need to come back to finish the application.
5
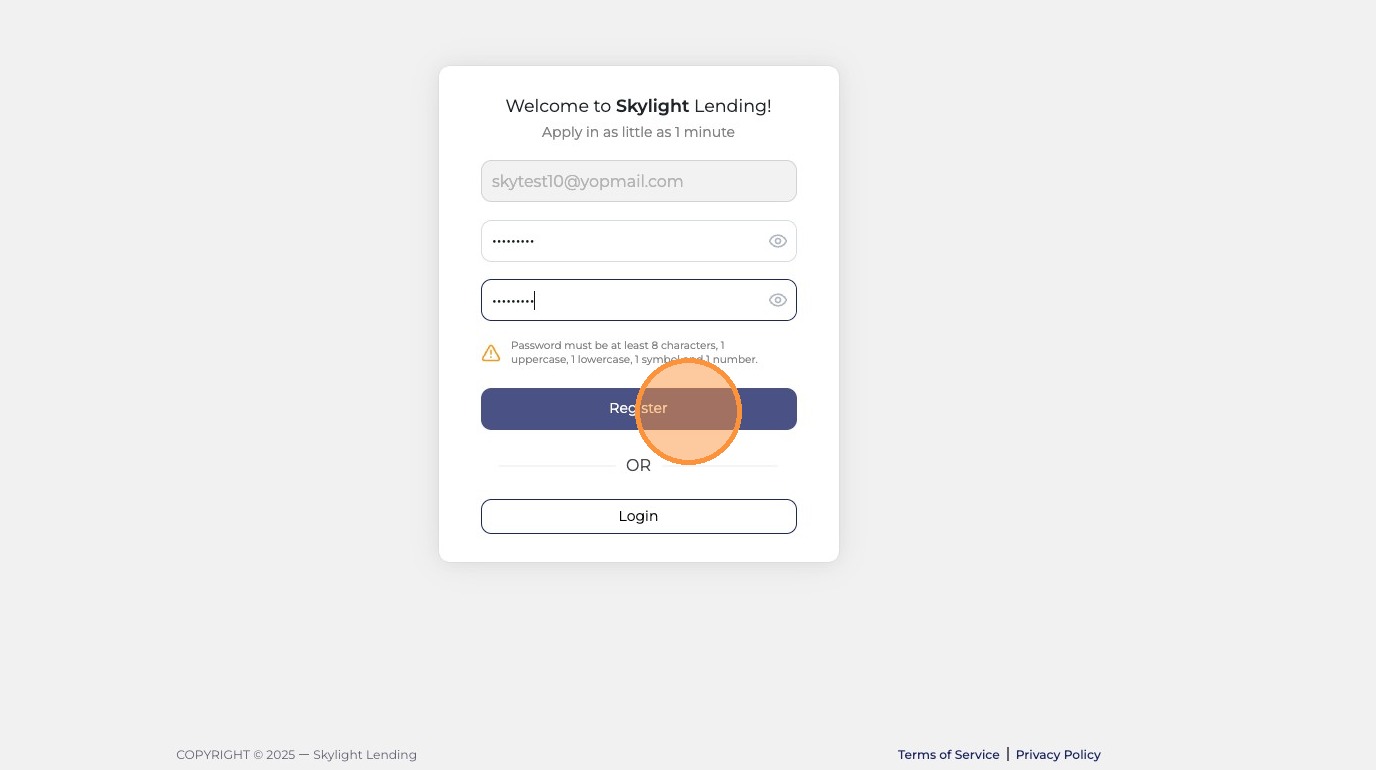
Customer clicks "Register"
After creating the password, the customer clicks Register to create their account and move to the login page.
Register button
6
PayKeeper redirects the customer to the login page
After registering, the system (powered by PayKeeper) automatically redirects to the login page. The customer is now ready to log in and begin their application.
PayKeeper login page
7
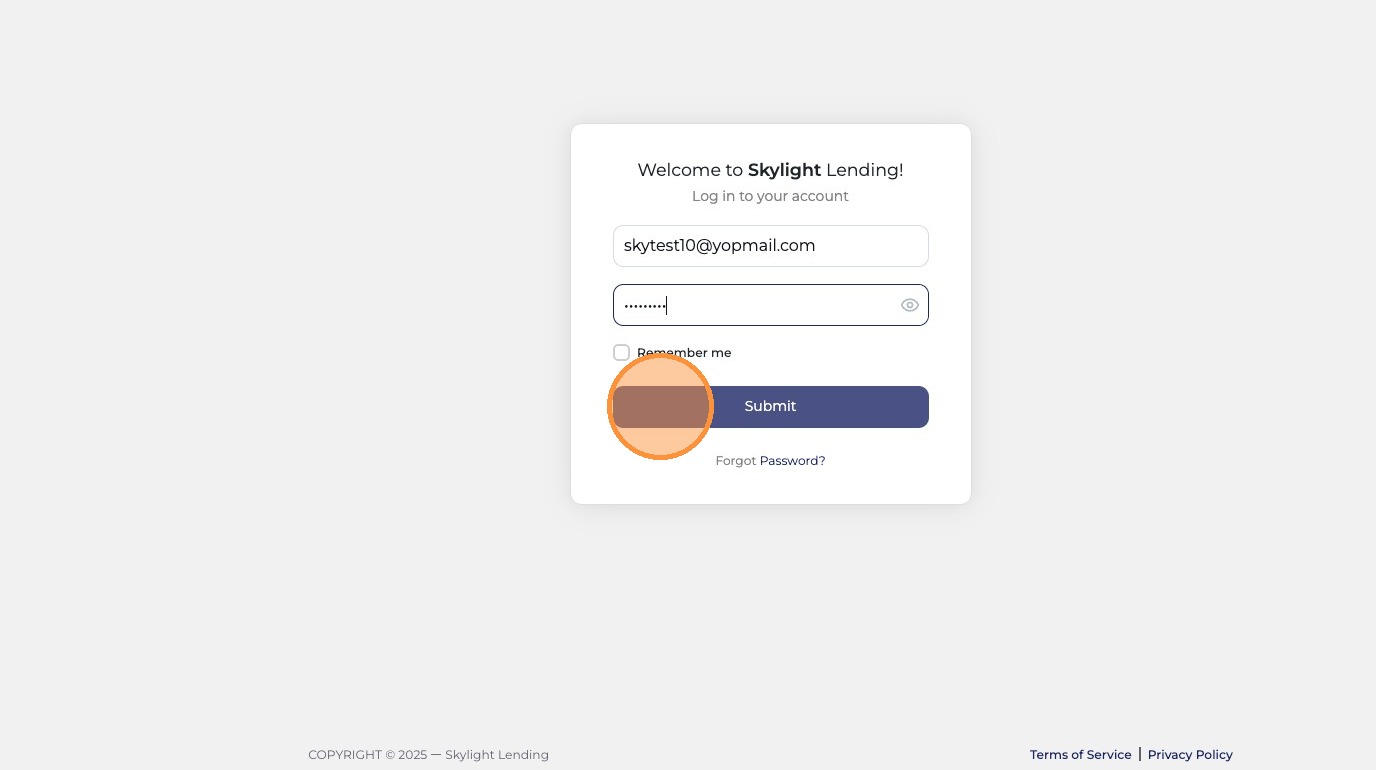
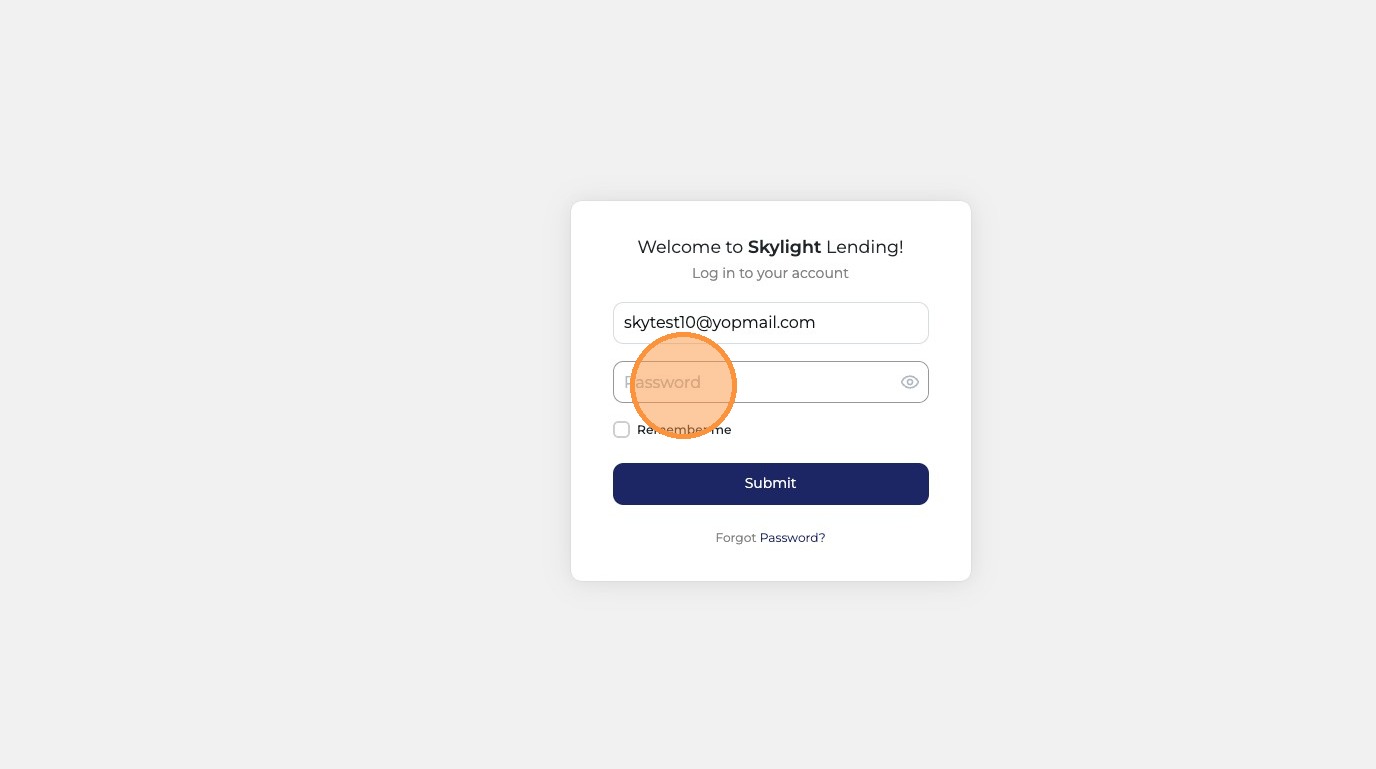
Customer enters their password and clicks "Submit"
The customer enters the password they just created and clicks Submit to log in and access their lease application.
Enter password and submit
12 steps
8
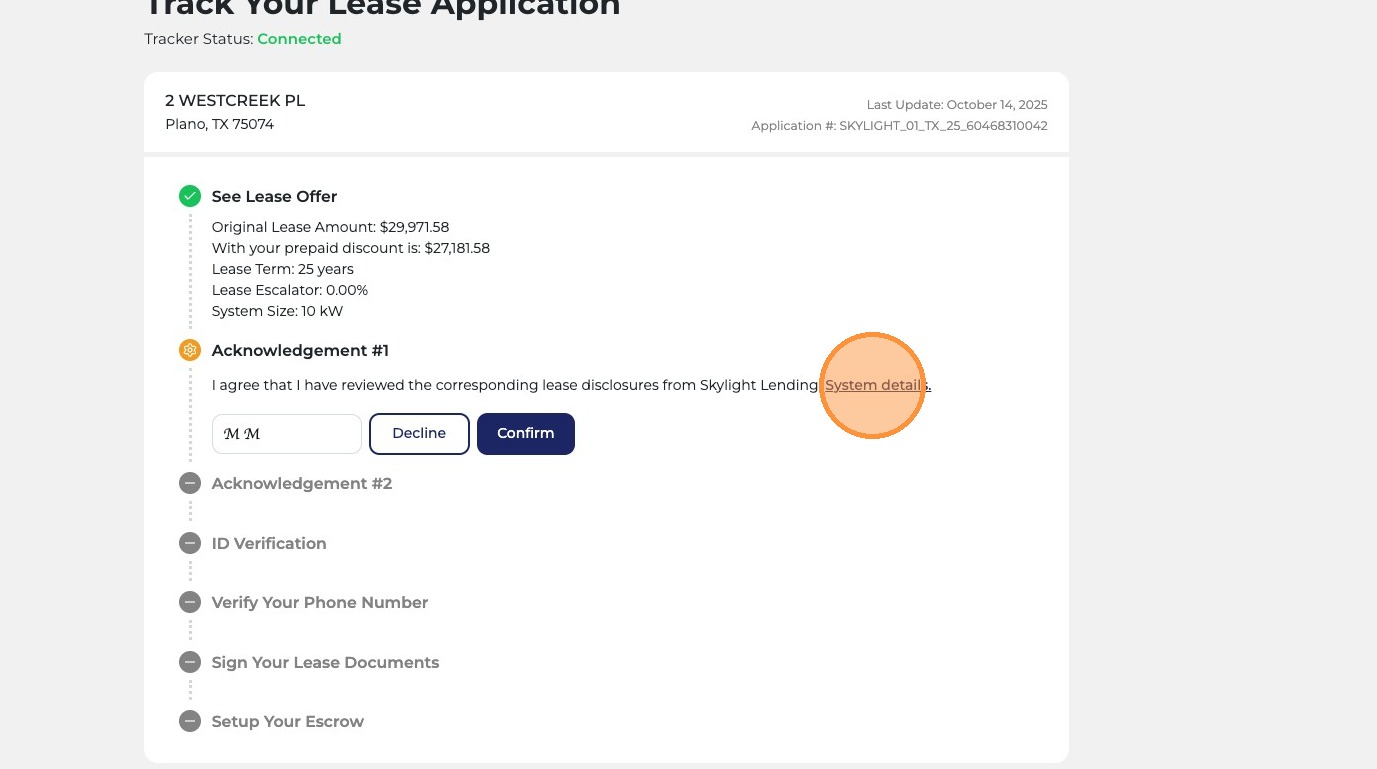
Customer clicks and reviews "System Details"
The first step inside the application is to review the solar system details — including system size, production estimates, and the prepaid lease amount. The customer should carefully read through everything to confirm it matches what was discussed.
System Details review
9
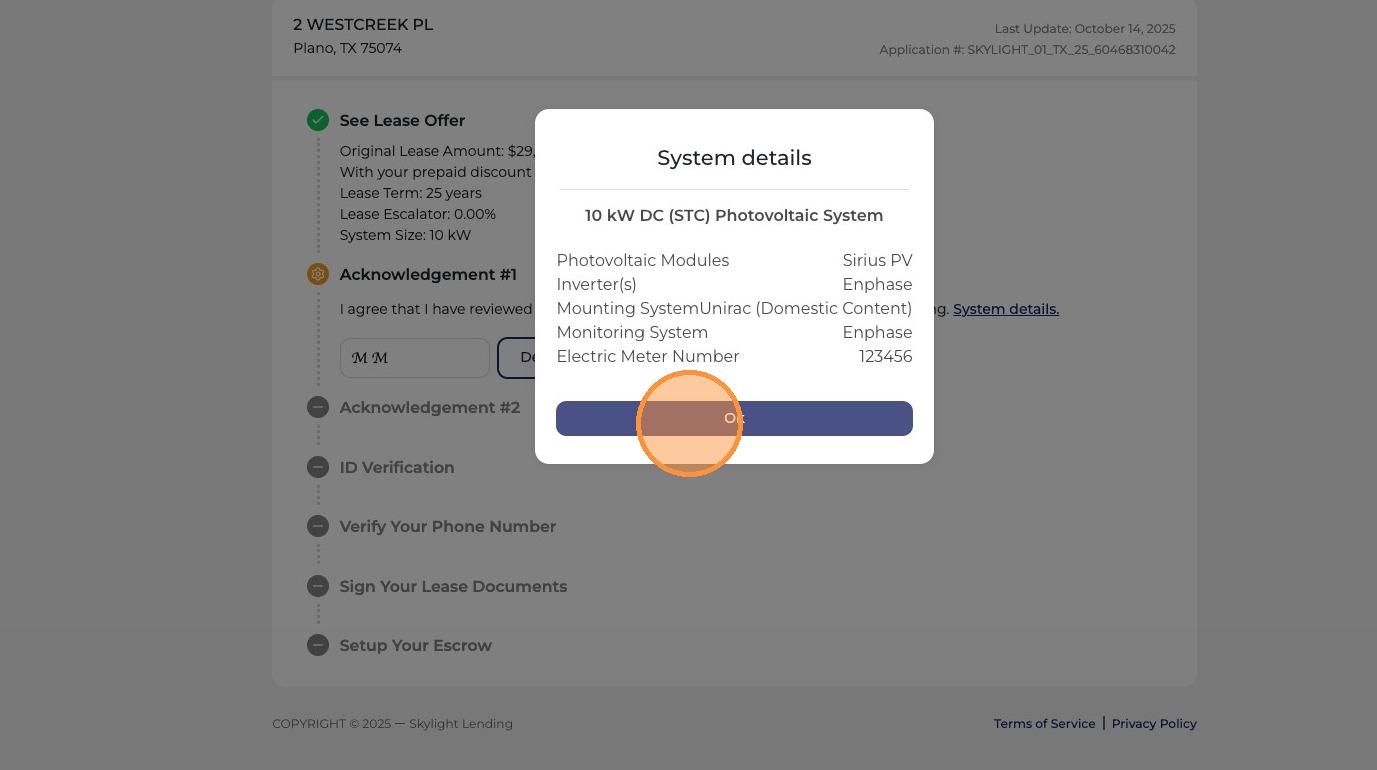
Customer clicks "Ok" to validate
After reviewing the system details, the customer clicks "Ok" to confirm they've read and understood the information.
Ok to validate
10
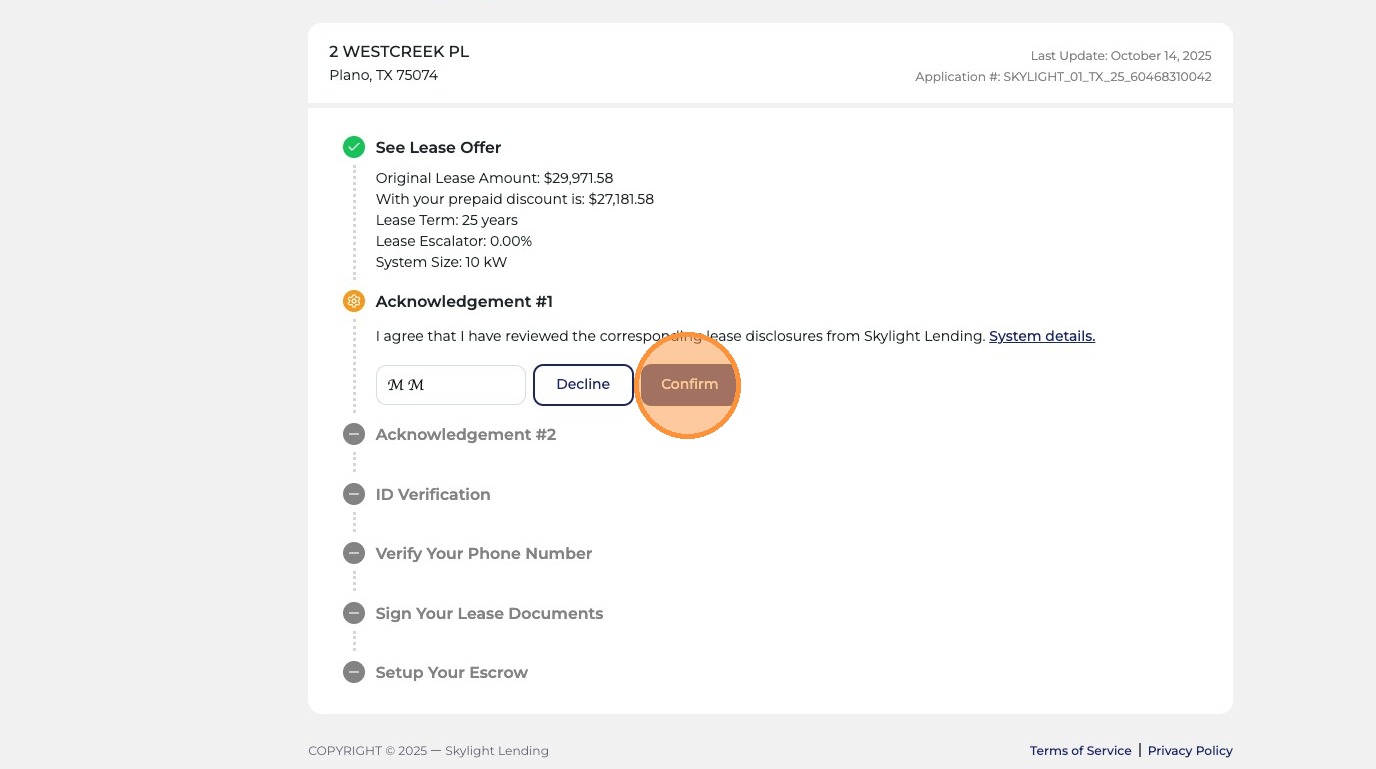
Customer clicks "Confirm" to acknowledge system details
A final confirmation step for system details. The customer clicks "Confirm" to formally acknowledge they've reviewed and accepted the system specifications.
Confirm system details
11
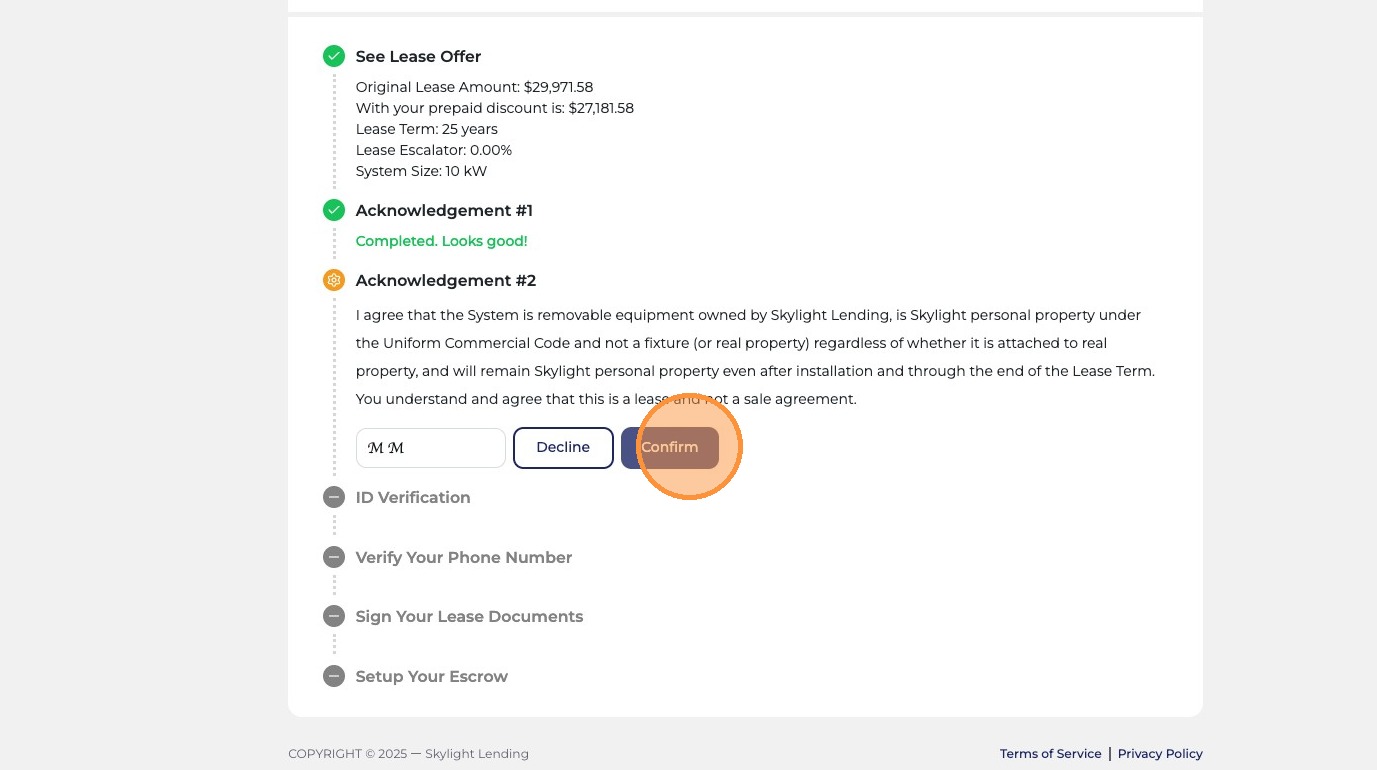
Customer clicks "Confirm" after reviewing disclosure #2
A second disclosure will appear for the customer to review. After reading through it carefully, they click "Confirm" to acknowledge and move forward.
Disclosure 2 confirm
Encourage your customer to read these

These disclosures are legally important. Encourage your customer to read each one fully before clicking Confirm — don't rush this step.
12
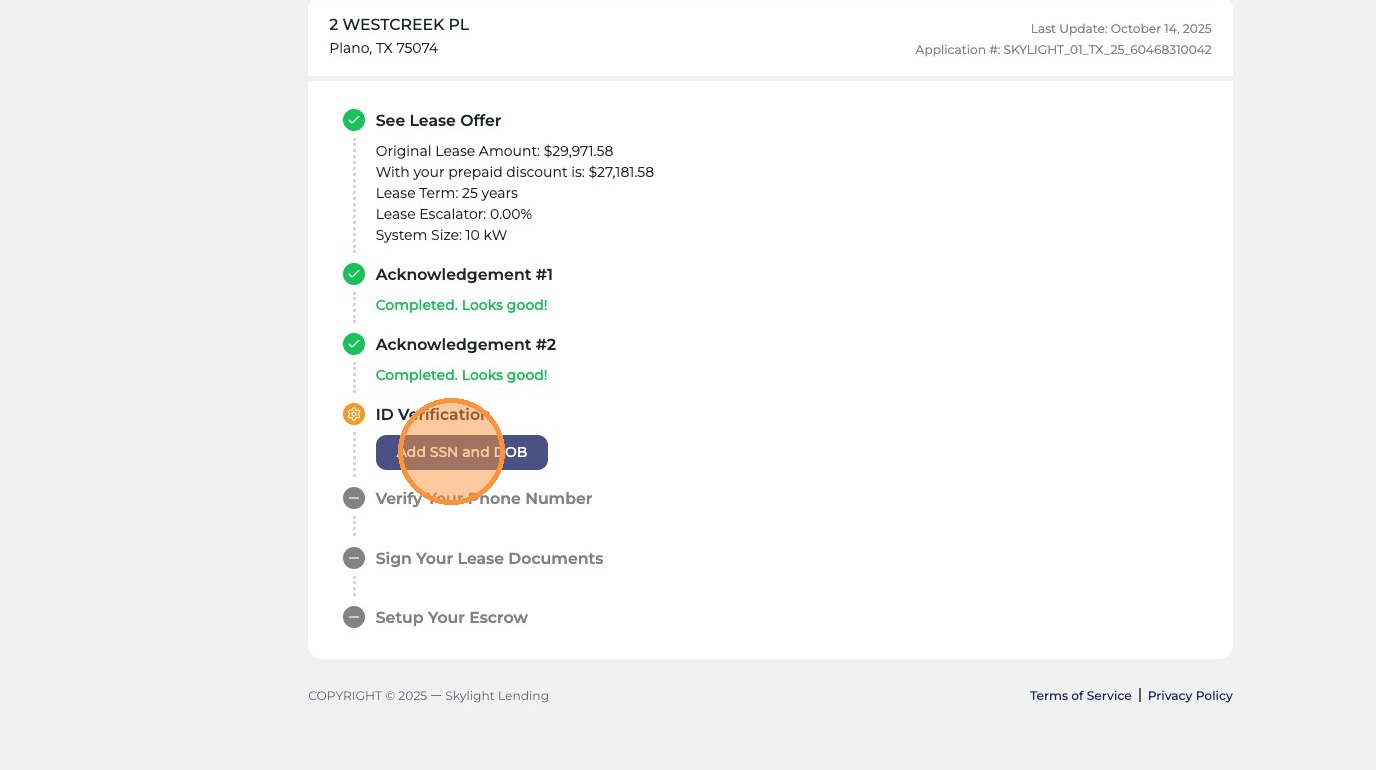
Customer clicks "Add SSN and DOB"
The next step requires the customer to enter their Social Security Number and Date of Birth for identity verification. They click "Add SSN and DOB" to open the entry form.
Add SSN and DOB button
13
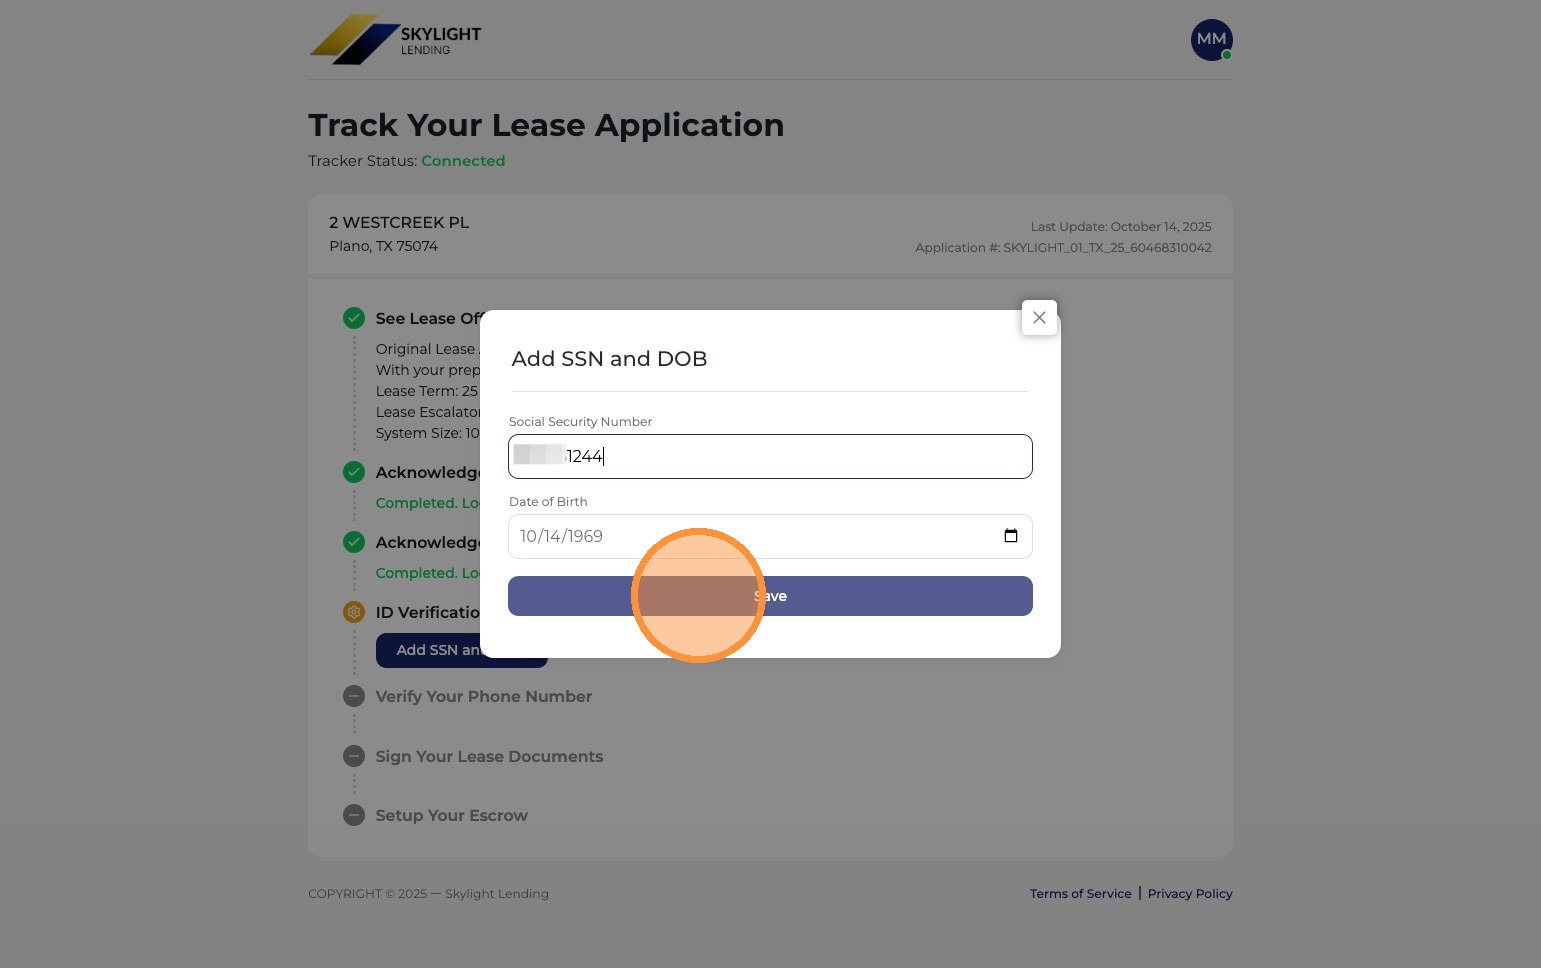
Customer enters SSN and DOB, then clicks "Save"
The customer types in their Social Security Number and Date of Birth, then clicks Save. This information is used for identity verification only and is handled securely.
SSN and DOB entry
Privacy reminder

This information is entered by the customer directly and is encrypted and secure. As the installer, you should never enter or view this information on their behalf.
14
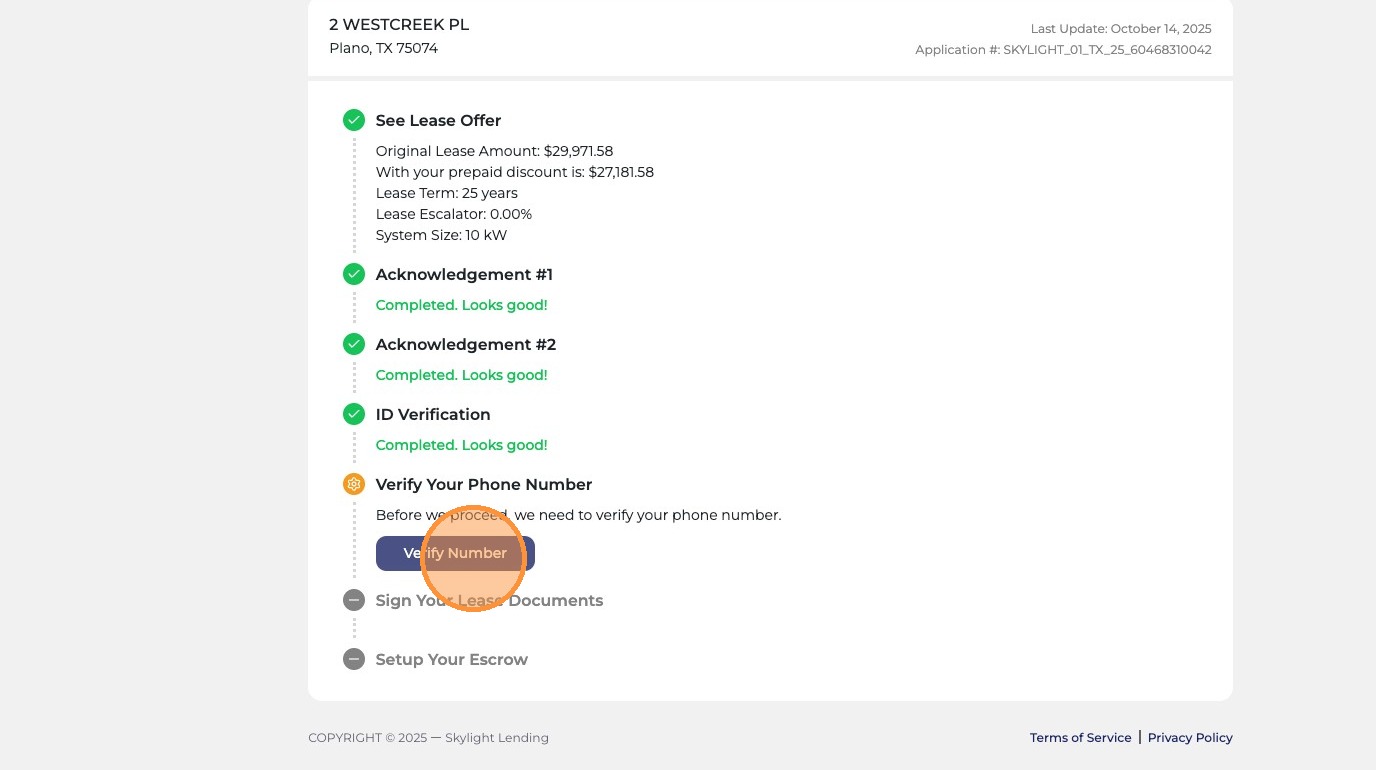
Customer clicks "Verify Number" to validate their phone number
The system needs to verify the customer's phone number for two-factor authentication. The customer clicks "Verify Number" to begin the phone verification process.
Verify Number button
15
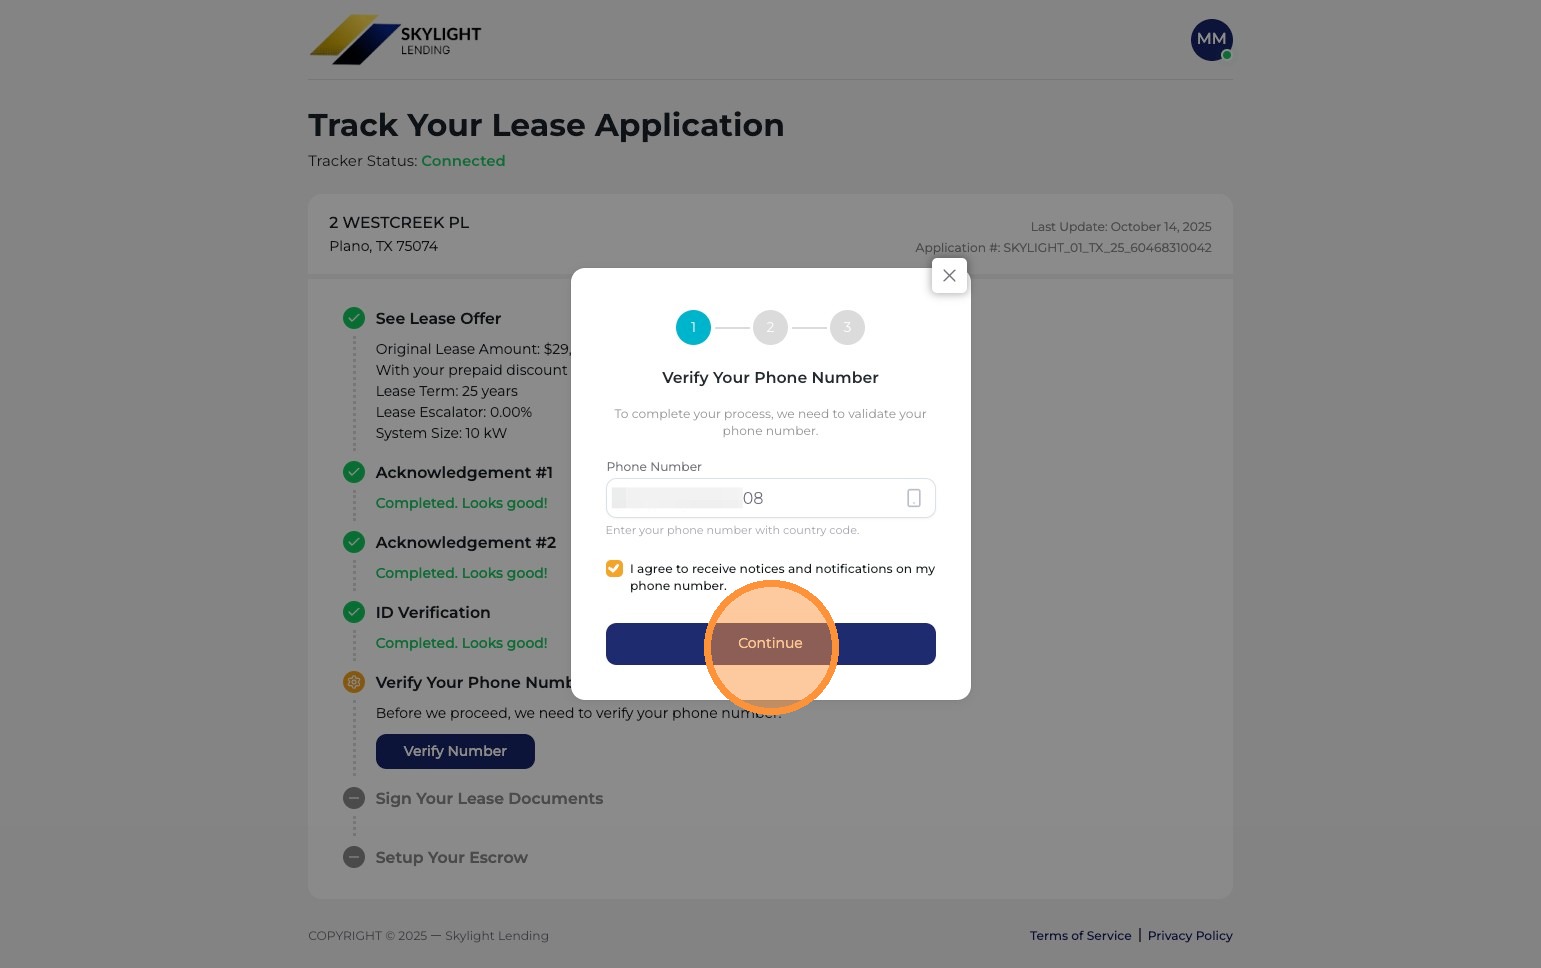
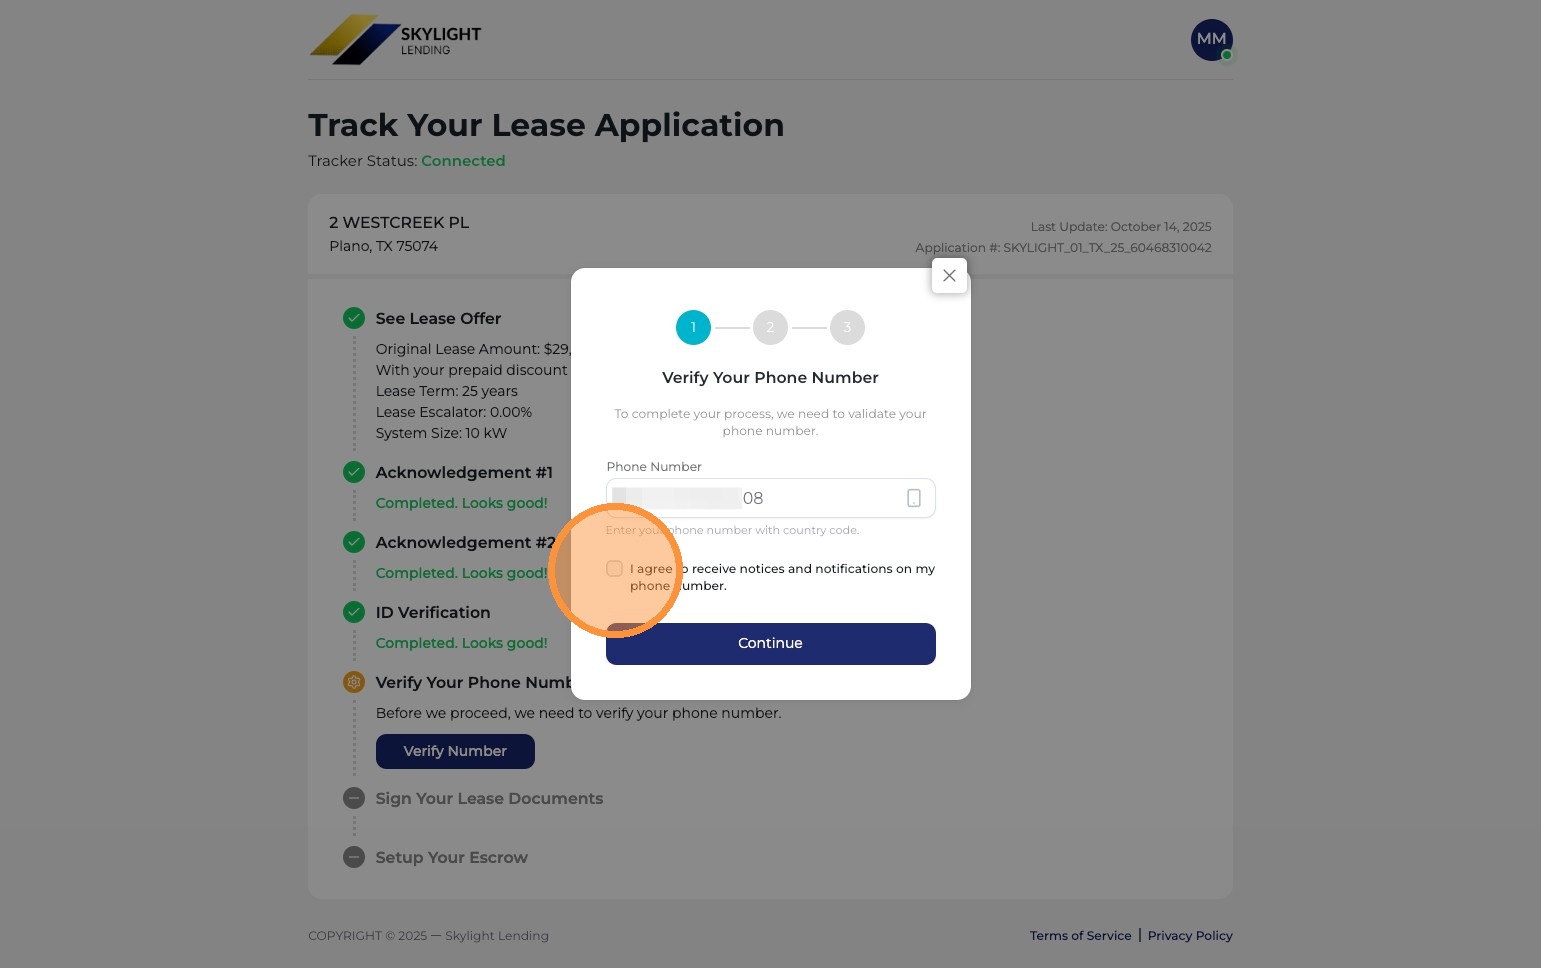
Customer checks the box to agree to receive notices on their phone number
The customer must check the box agreeing to receive notices and notifications at their phone number. This is required to proceed with phone verification.
Phone notification agreement
16
Customer clicks "Continue" if the phone number shown is correct
The system displays the phone number on file. If it's correct, the customer clicks Continue. If the number is wrong, they should update it before proceeding.
Phone number confirmation
17
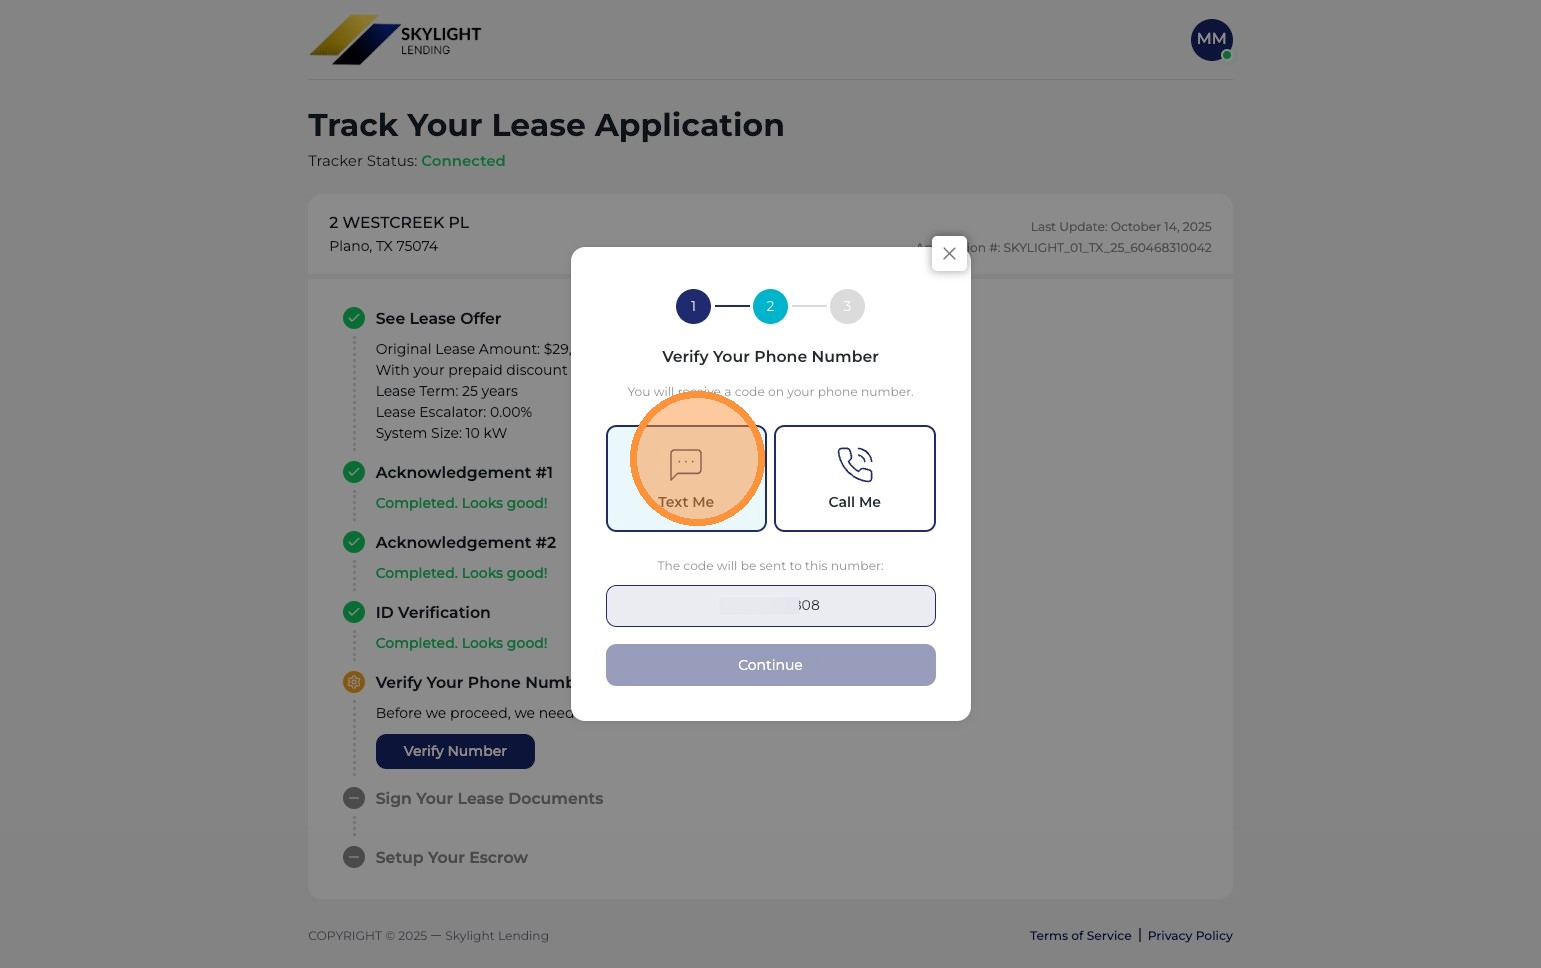
Customer chooses to receive the verification code by text or phone call
The customer selects how they want to receive their 6-digit verification code — either via text message (SMS) or a phone call. Most customers prefer text.
Text or call option
18
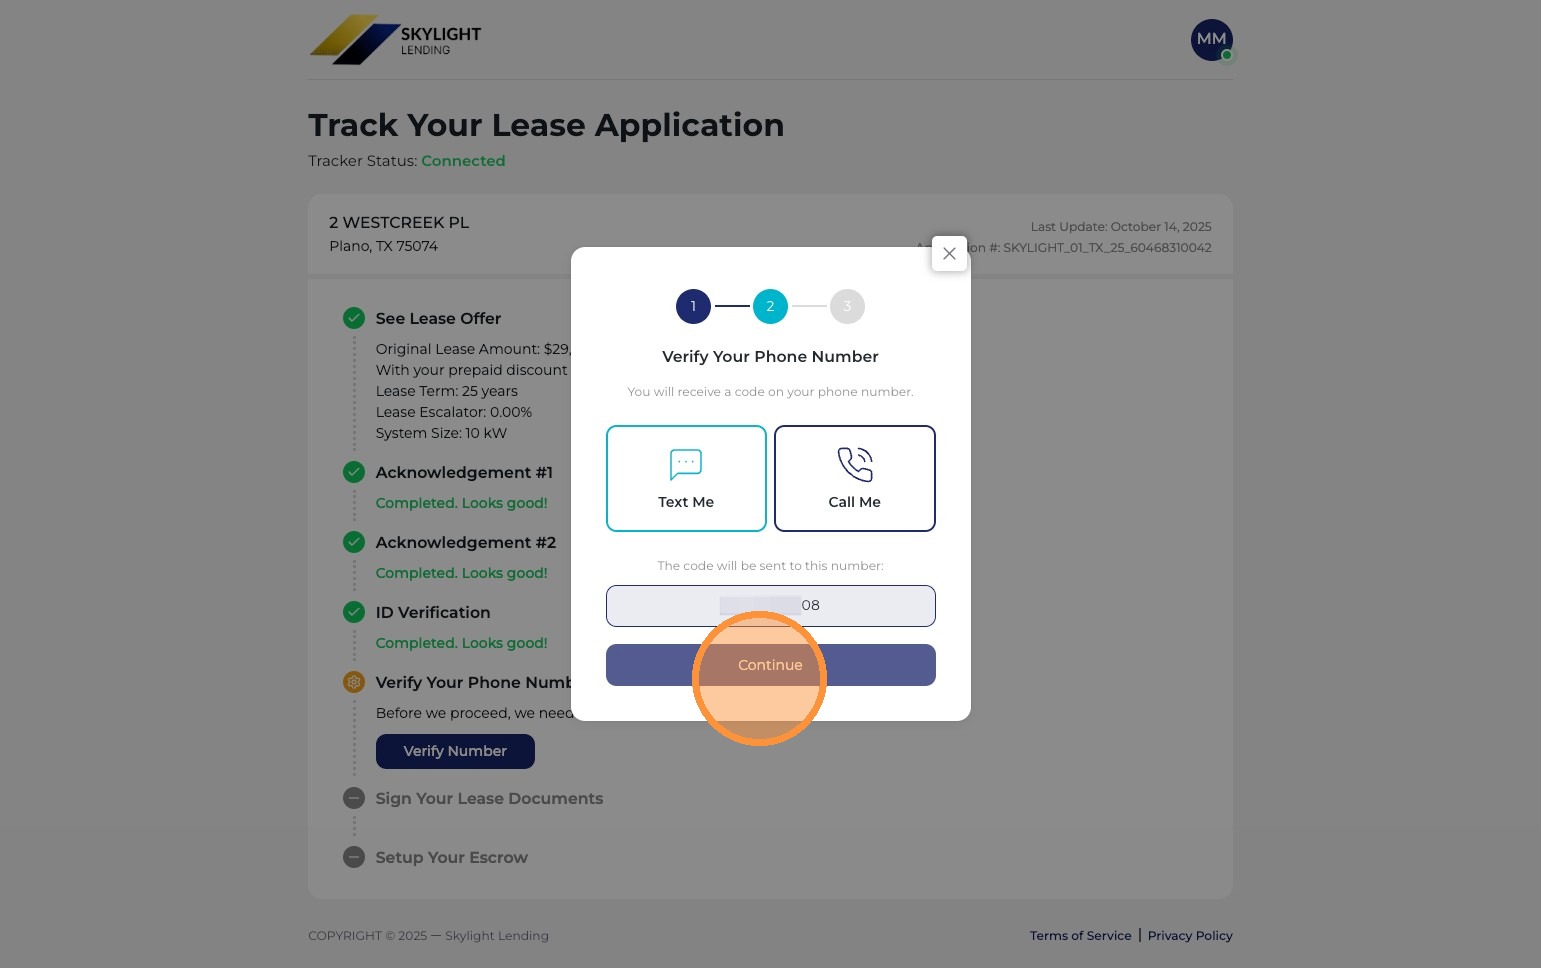
Customer clicks "Continue"
After choosing their preferred verification method, the customer clicks Continue to have the code sent to their phone.
Continue to send code
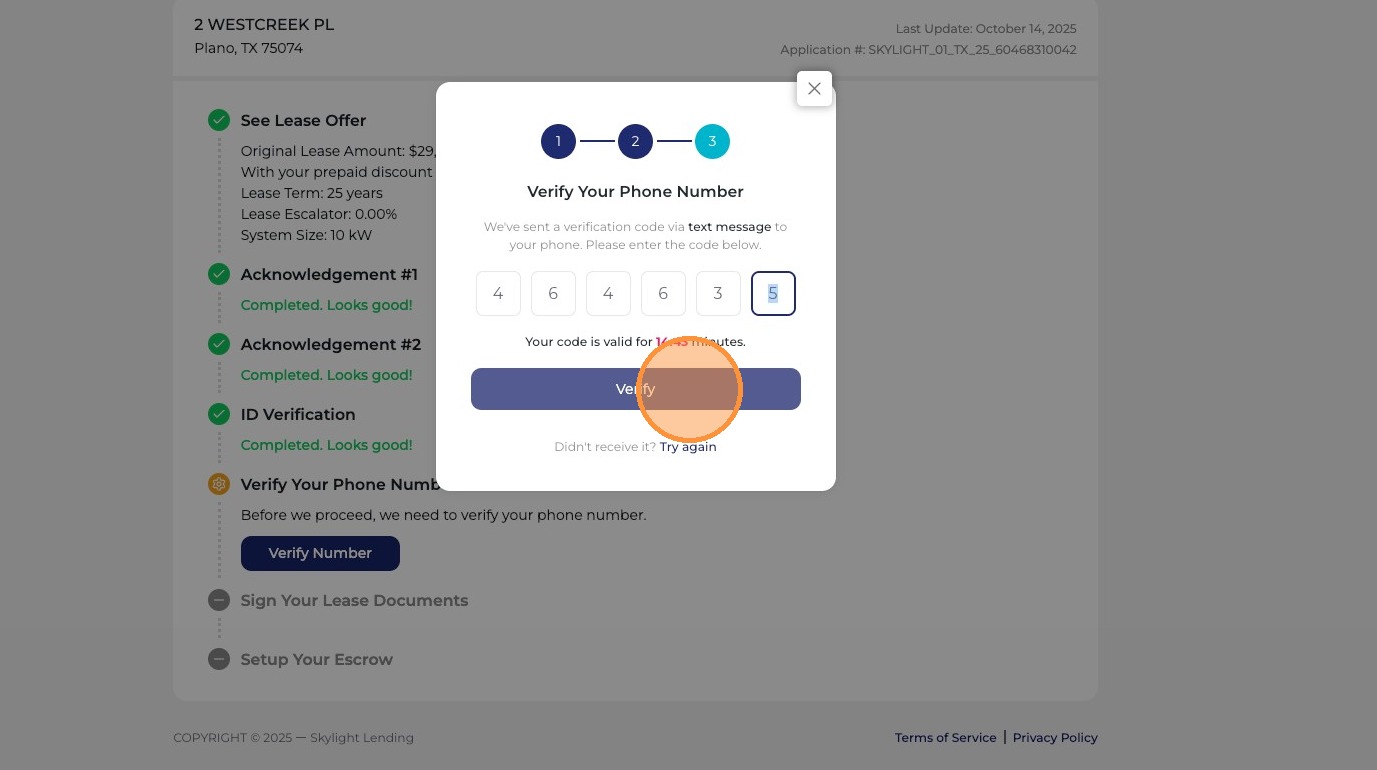
19
Customer enters the 6-digit validation code and clicks "Verify"
The customer enters the 6-digit code they received by text or phone call, then clicks Verify. This confirms their phone number and identity.
6-digit verification code
Code not arriving?

If the customer doesn't receive the code within a minute, have them check that their phone number on file is correct, then try resending. Codes typically arrive within 30 seconds.
8 steps
20
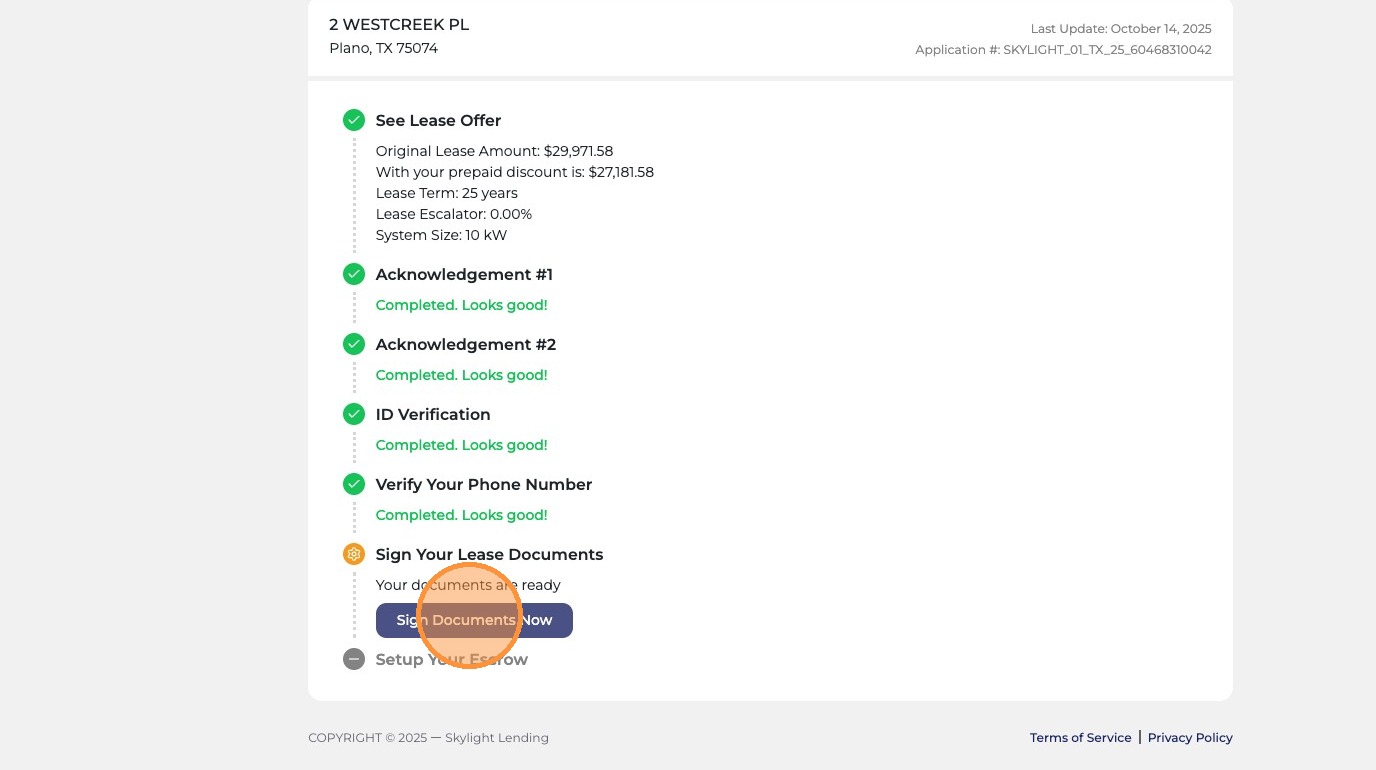
Customer clicks "Sign Documents Now"
After completing identity verification, the customer is ready to sign the lease documents. They click "Sign Documents Now" to begin the e-signature process.
Sign Documents Now
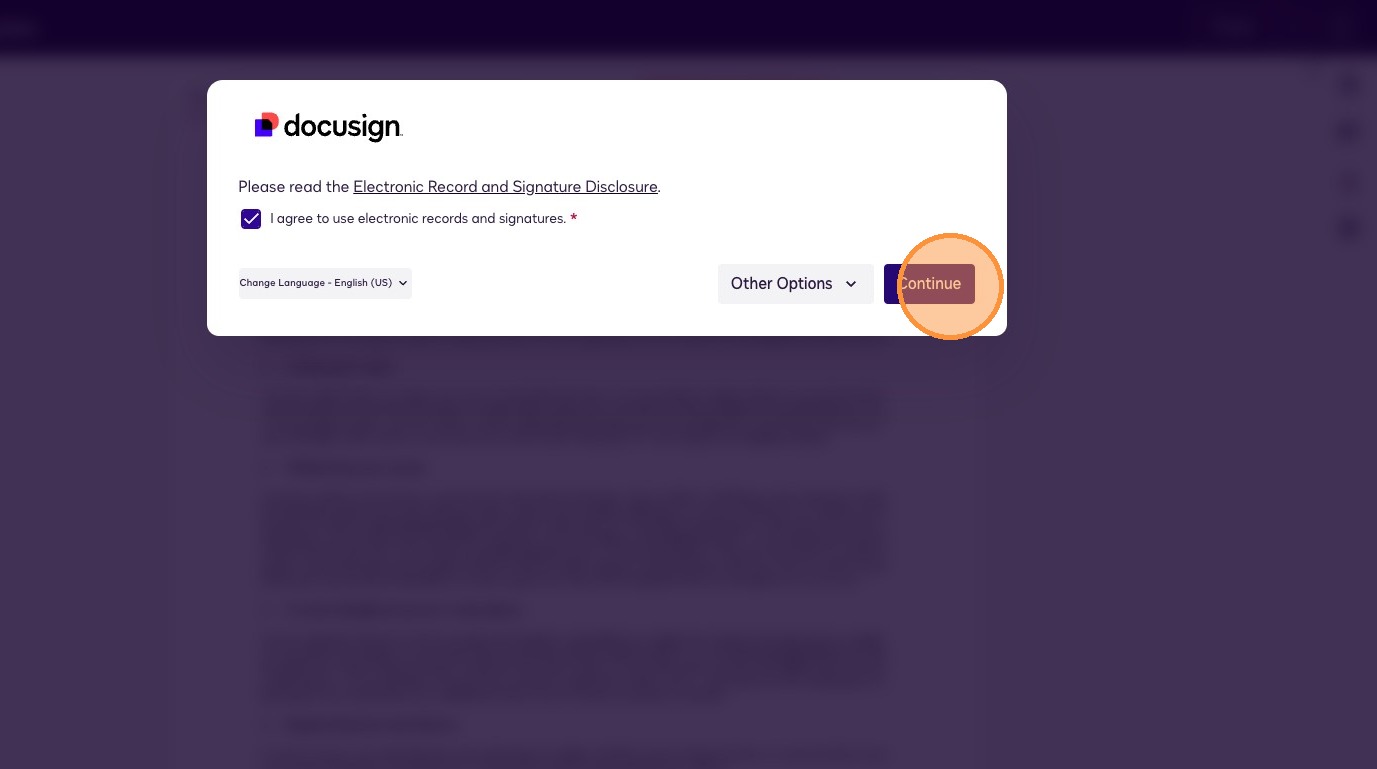
21
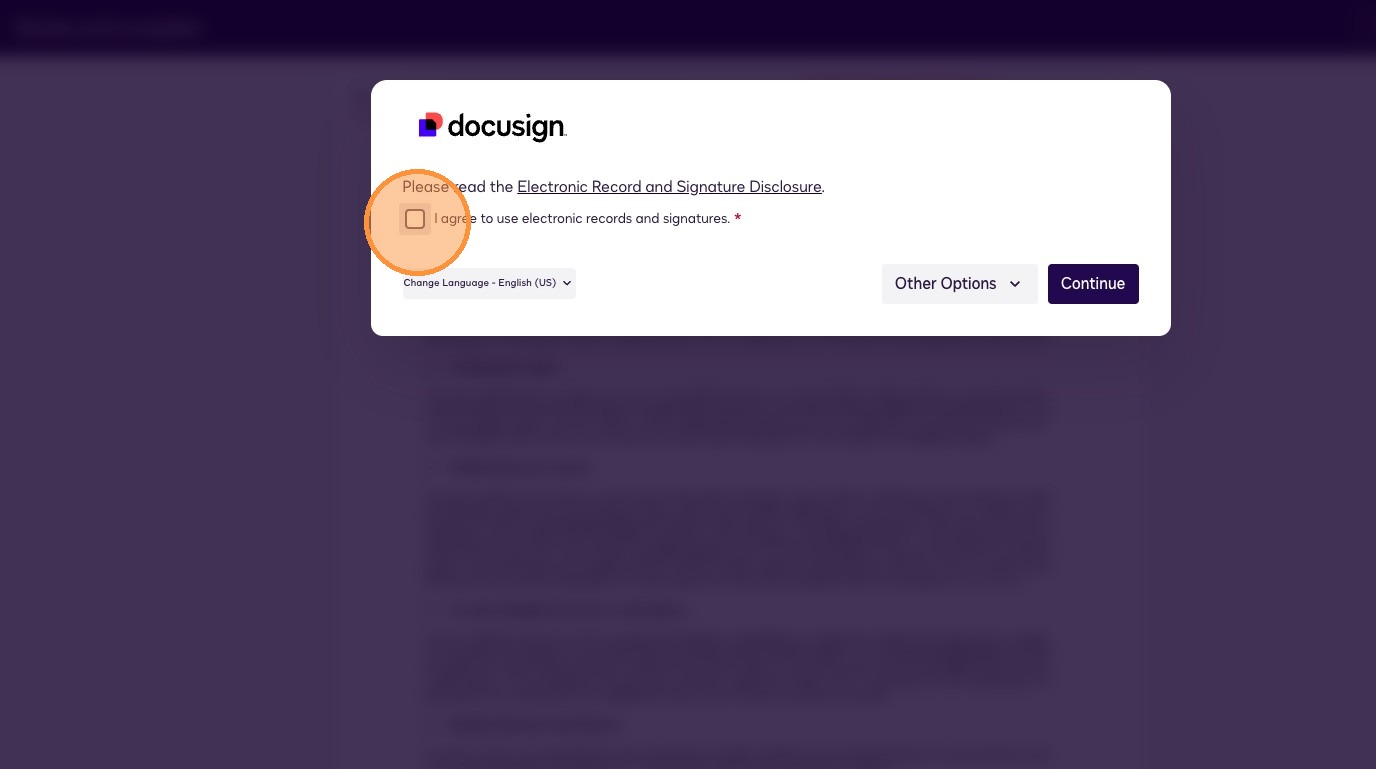
Customer checks the box agreeing to use electronic records and signatures
Before signing, the customer must agree to use electronic records and signatures. They check the box that reads "I agree to use electronic records and signatures." This is legally required before e-signing can begin.
Electronic signature agreement
22
Customer clicks "Continue"
After agreeing to electronic signatures, the customer clicks Continue to proceed to the document signing interface.
Continue to signing
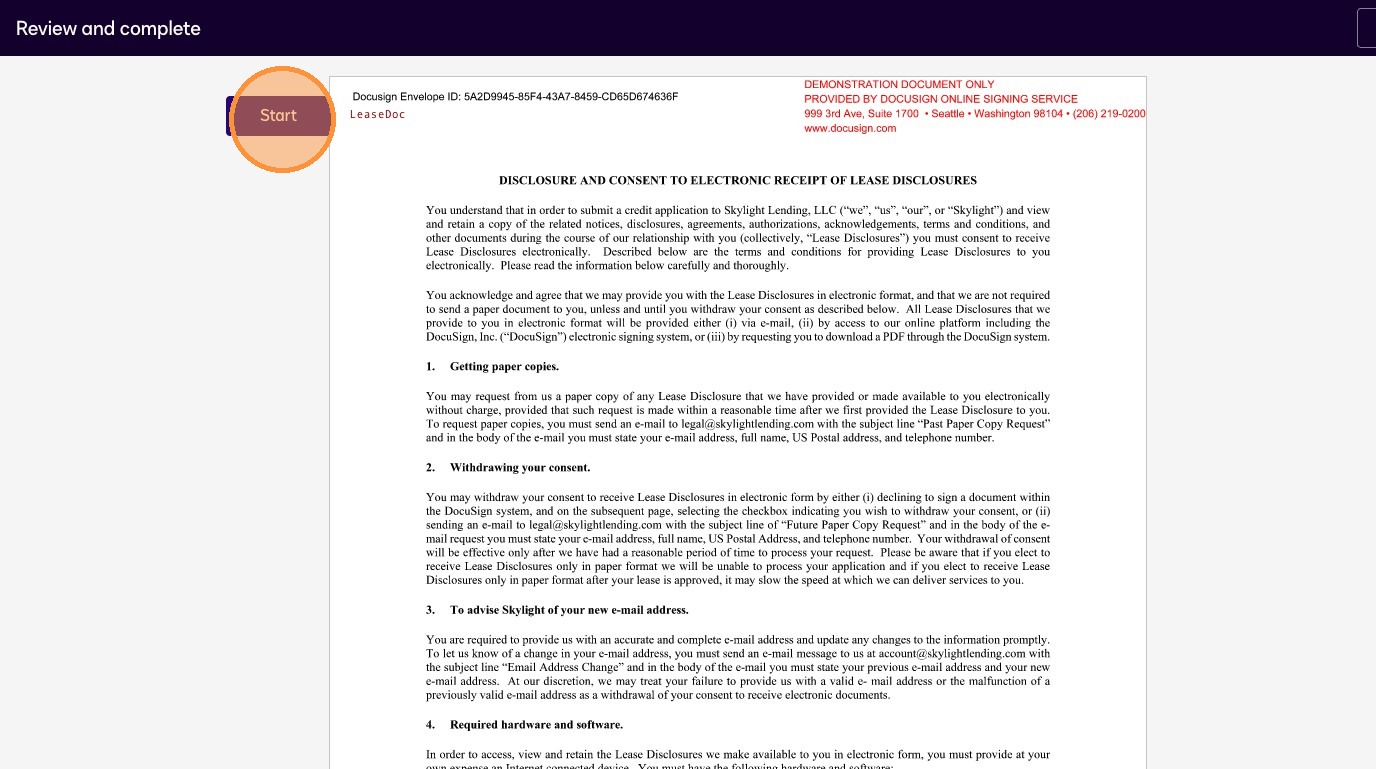
23
Customer clicks "Start" to begin signing
The document viewer opens. The customer clicks "Start" to begin working through the lease agreement and placing their signatures and initials.
Start signing
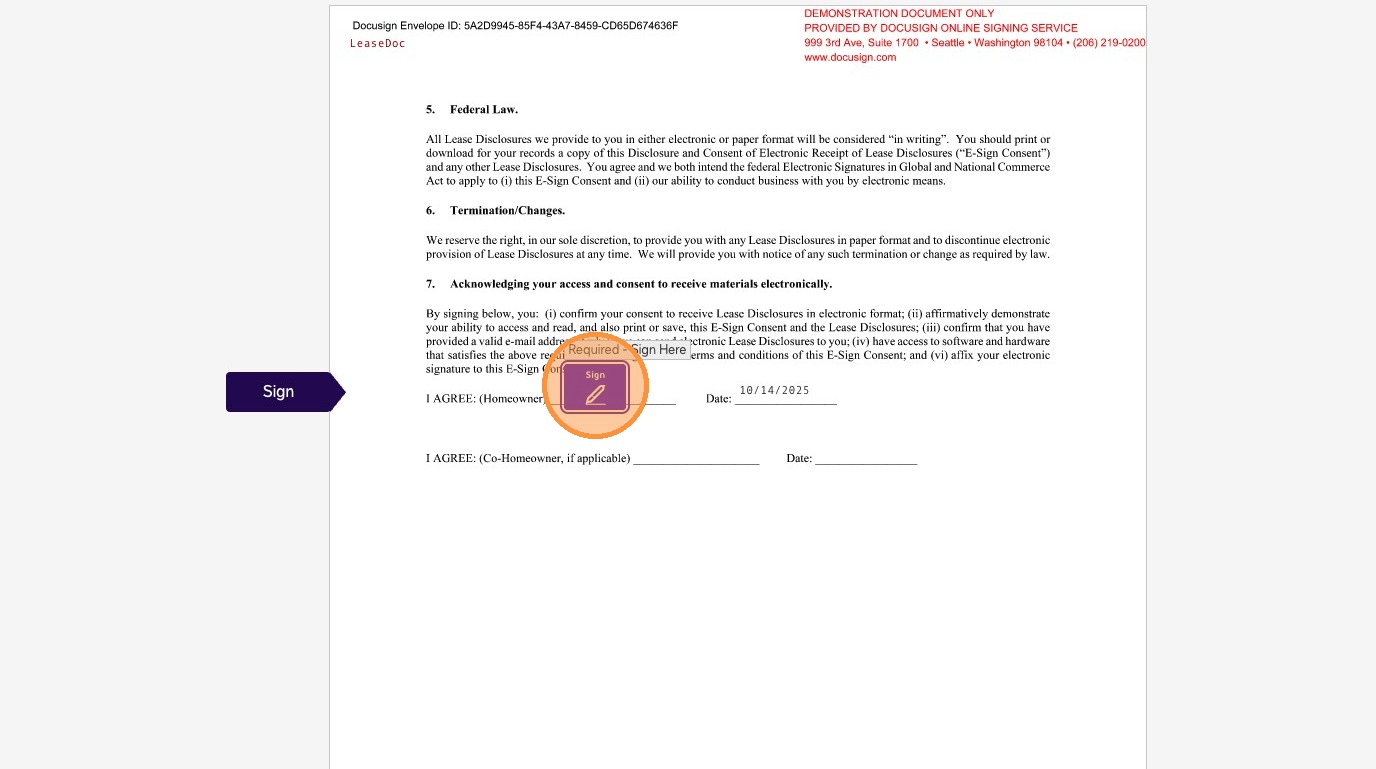
24
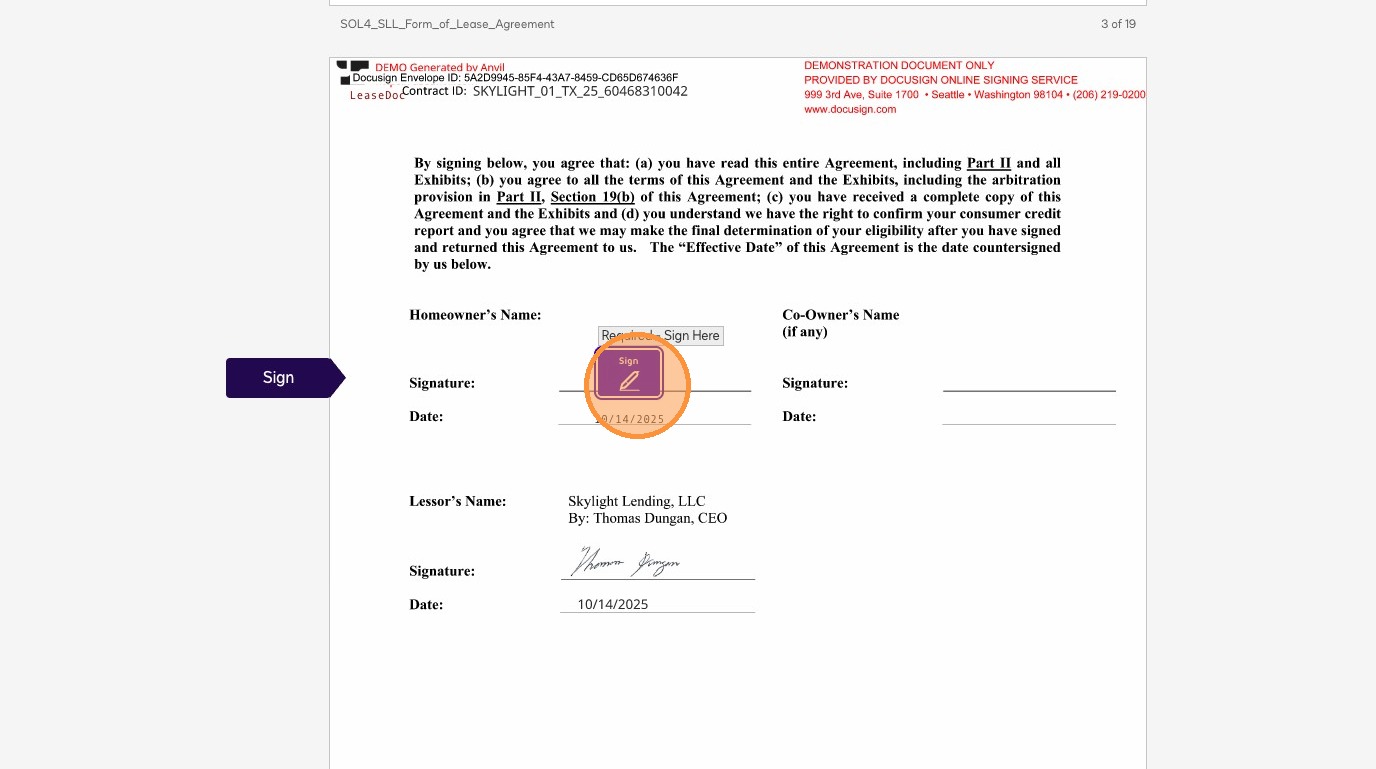
Customer clicks "Sign" at the first signature field
The system will guide the customer to each signature location in the document. They click "Sign" at each field to place their signature.
Click Sign
25
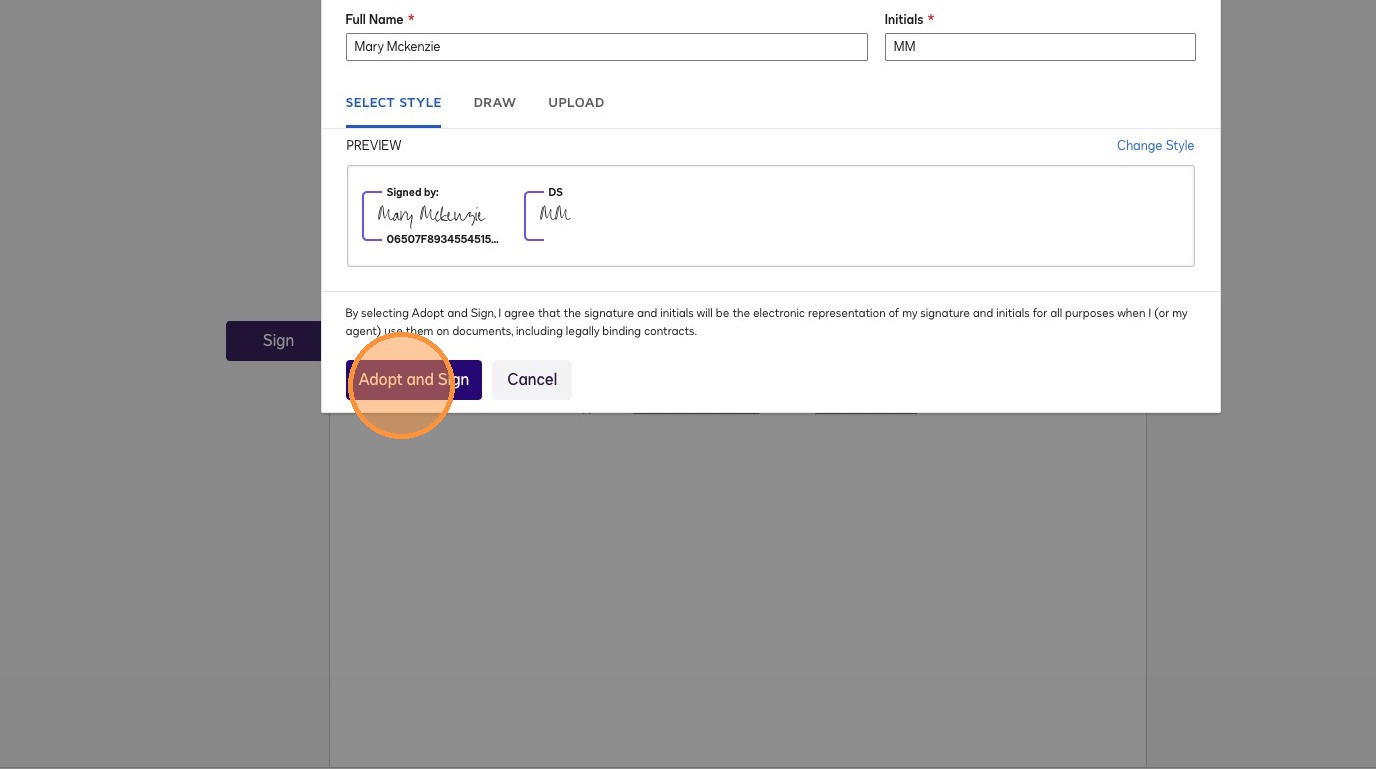
Customer clicks "Adopt and Sign" to confirm their signature style
The system generates a signature for the customer to adopt. They click "Adopt and Sign" to confirm and apply their e-signature to the document.
Adopt and Sign
26
Customer completes all remaining signatures and initials throughout the document
The system will prompt the customer to sign and initial at every required location in the lease agreement. They must complete all of them before they can finish. The navigation arrow helps them jump between required fields.
Complete all signatures
Don't skip any fields

The customer must complete every signature and initial field before they can click Finish. If any are missed, the system will highlight them in red and prevent submission.
27
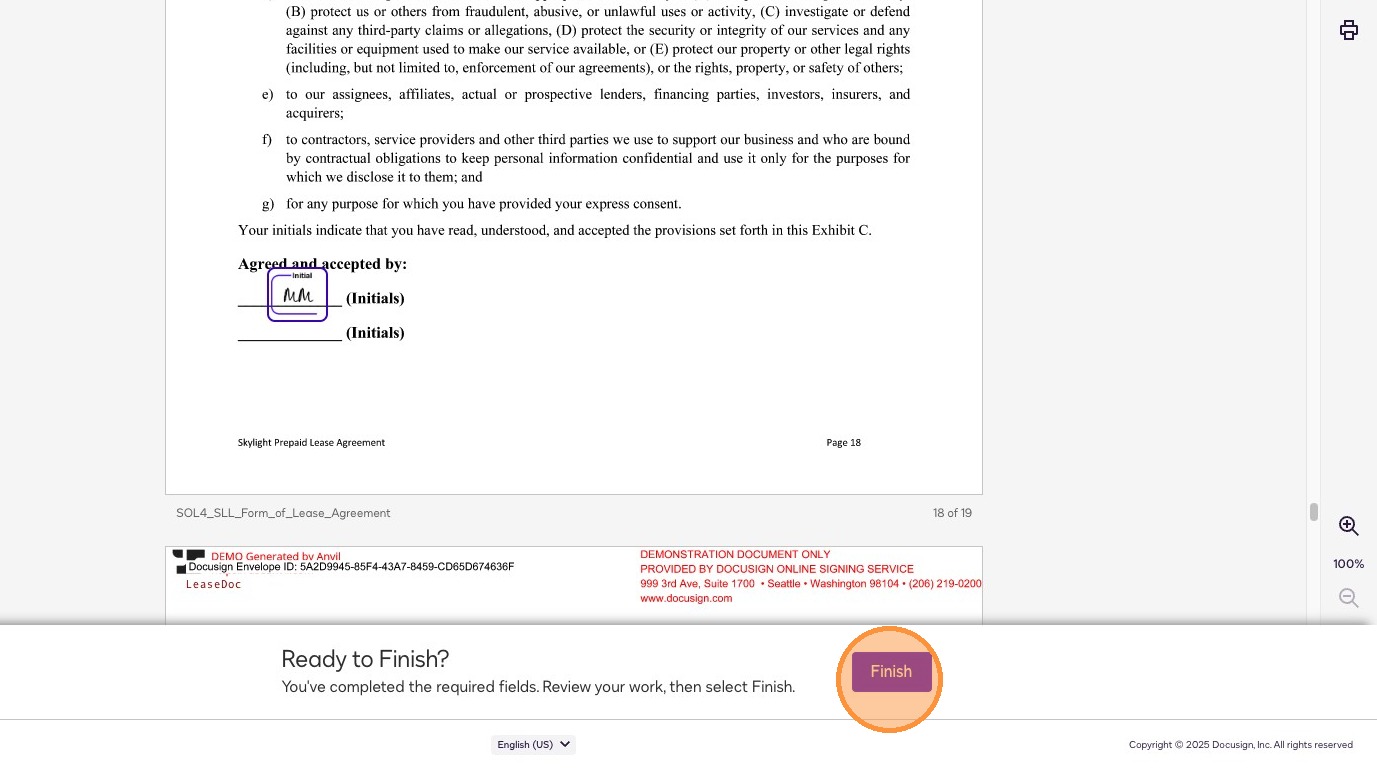
Customer clicks "Finish"
Once all signatures and initials are complete, the customer clicks "Finish" to submit the signed lease documents. The documents are now officially signed and saved.
Finish signing
10 steps
28
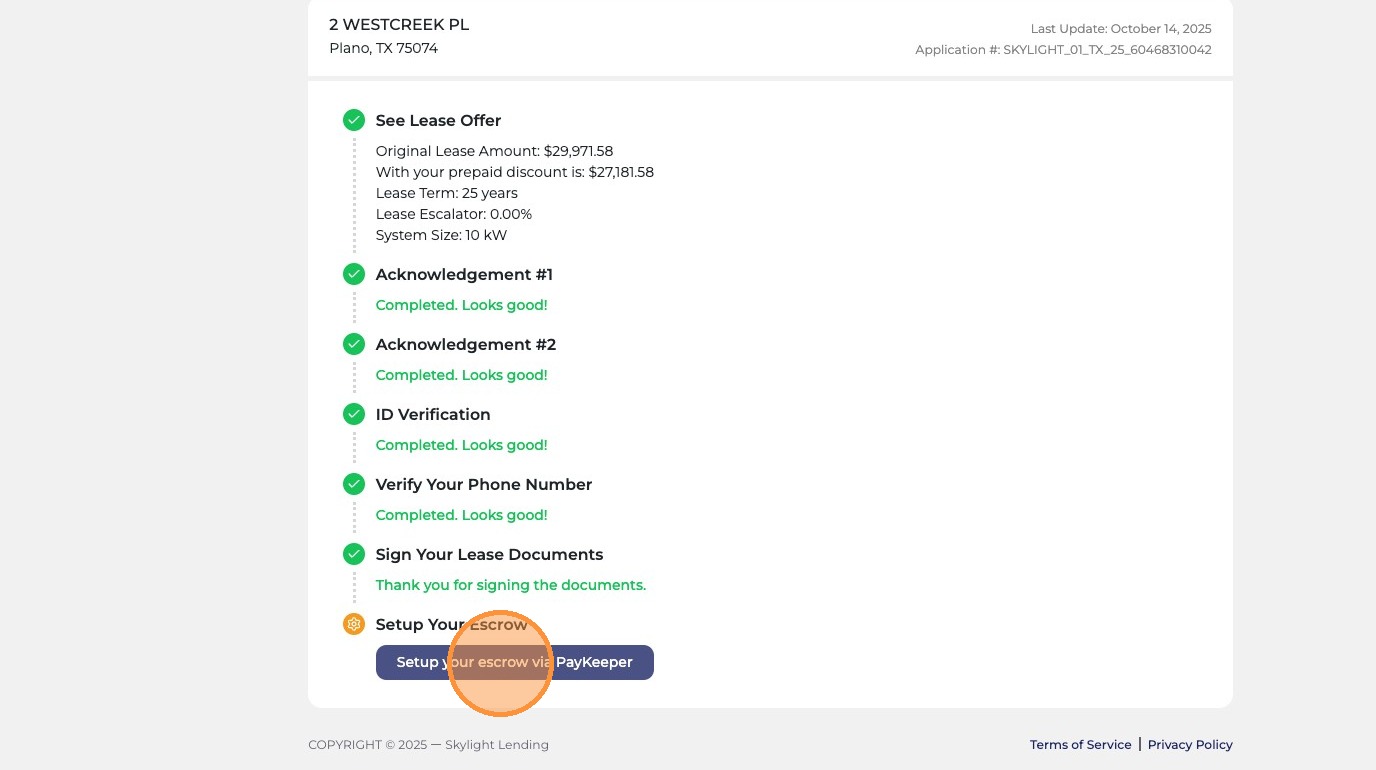
Customer clicks "Setup your escrow via PayKeeper"
After signing the documents, the customer is directed to set up their escrow payment through PayKeeper. This is where they'll submit the prepaid lease amount. They click the button to begin.
Setup escrow via PayKeeper
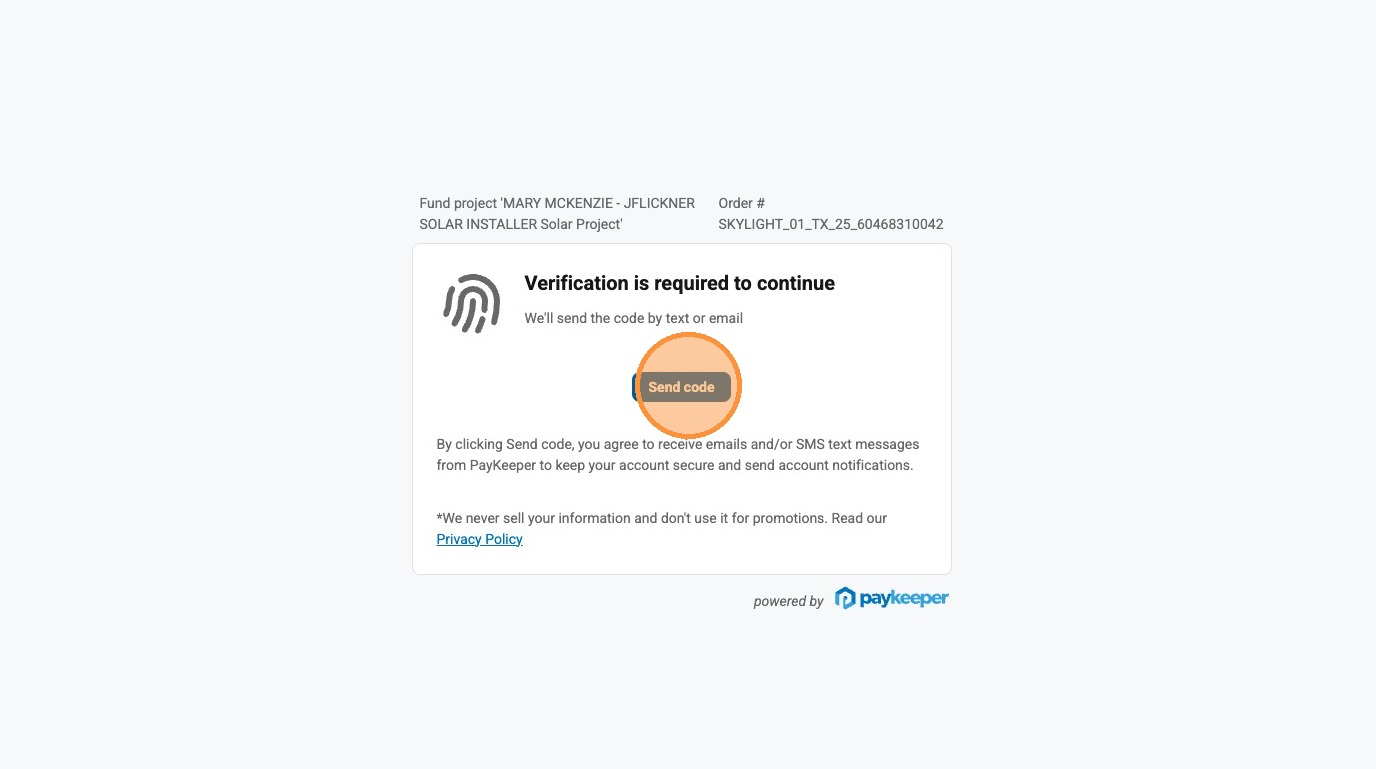
29
Customer clicks "Send code" to receive an email verification code
PayKeeper sends a verification code to the customer's email to confirm their identity before allowing them to set up payment. The customer clicks "Send code" to request the code.
Send code button
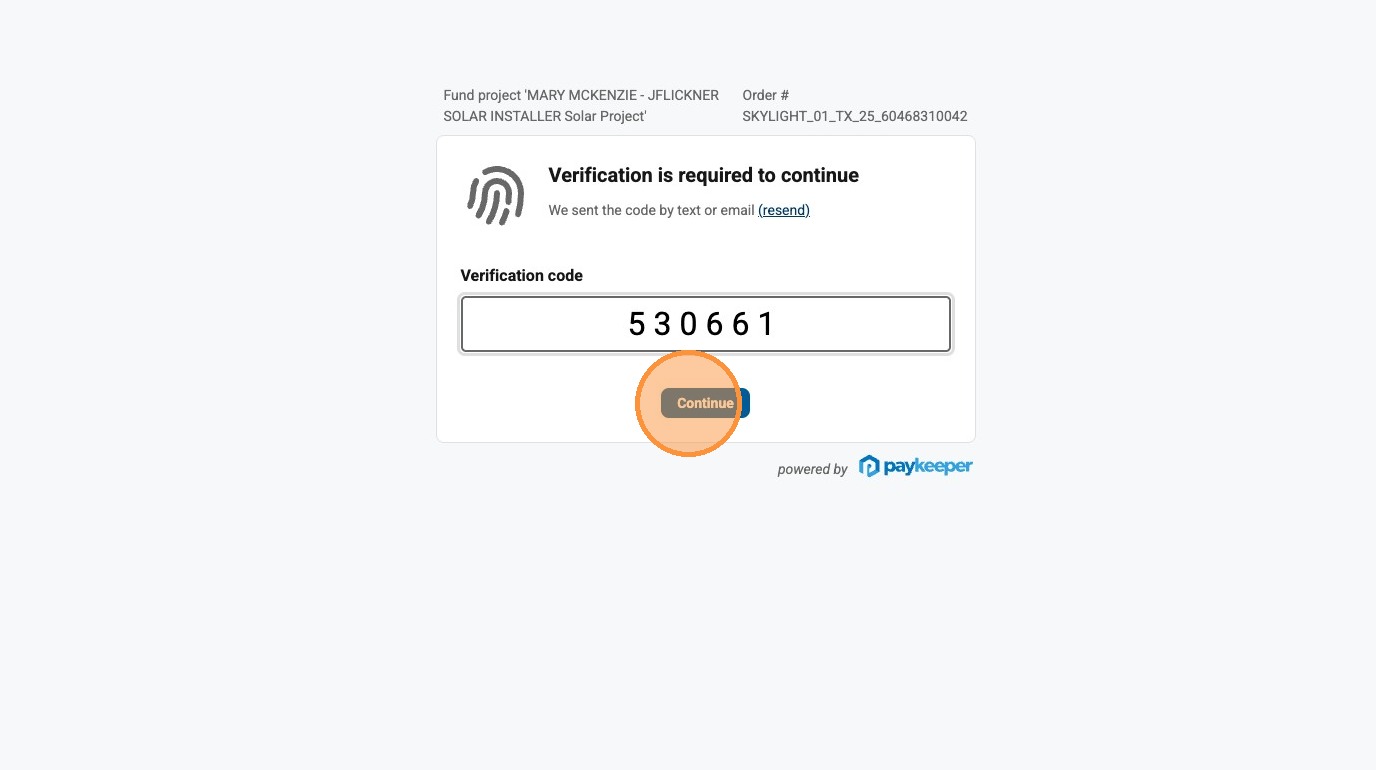
30
Customer enters the validation code from their email and clicks "Continue"
The customer checks their email for the code, enters it in the field, then clicks Continue to verify their identity and proceed to the payment setup.
Enter validation code
31
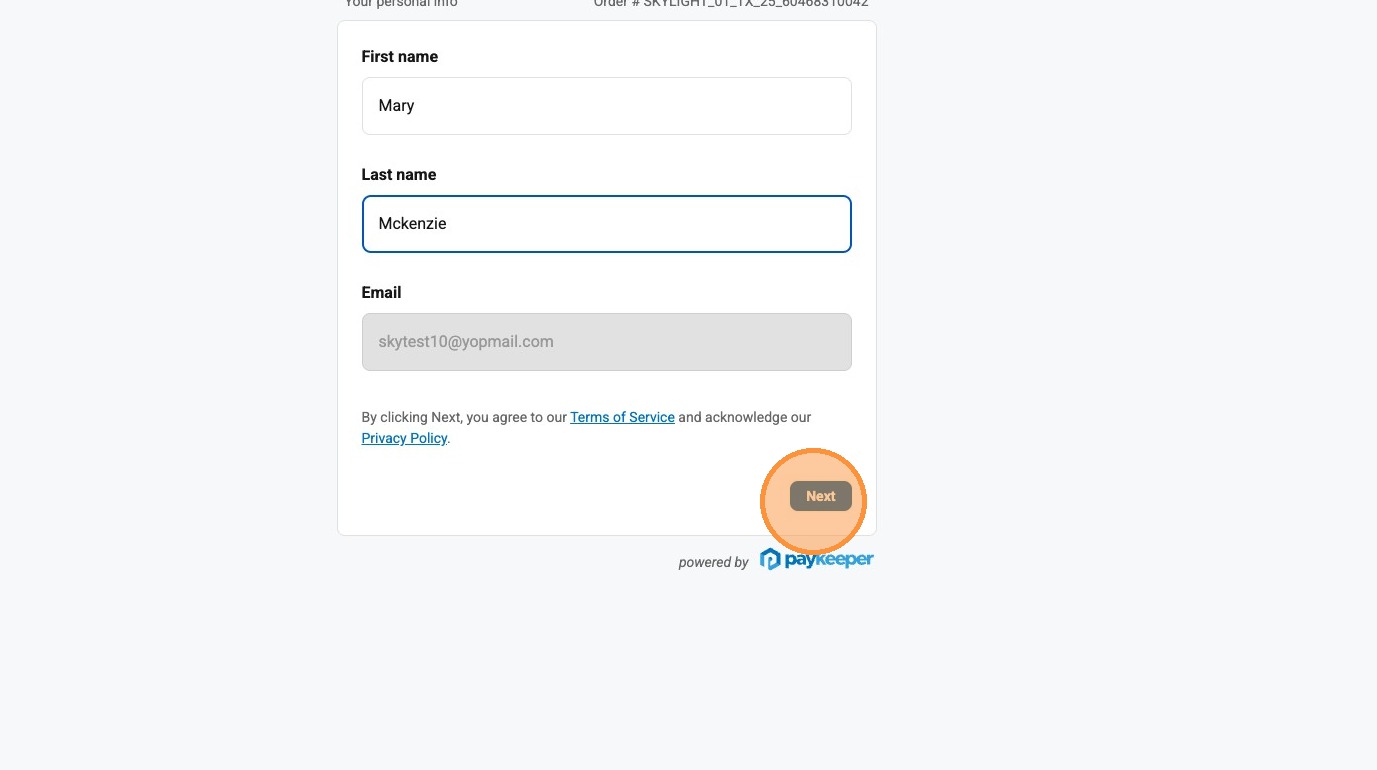
Customer enters their information as it appears in the Skylight opportunity, then clicks "Next"
PayKeeper requires the customer's personal information to match the Skylight Lending records. The customer fills in their details exactly as they were entered in the Skylight opportunity, then clicks Next.
Customer information entry
Info must match exactly

The name, address, and contact info entered here must match exactly what was entered in the Skylight opportunity. Any discrepancy may cause a delay in the payment being processed.
32
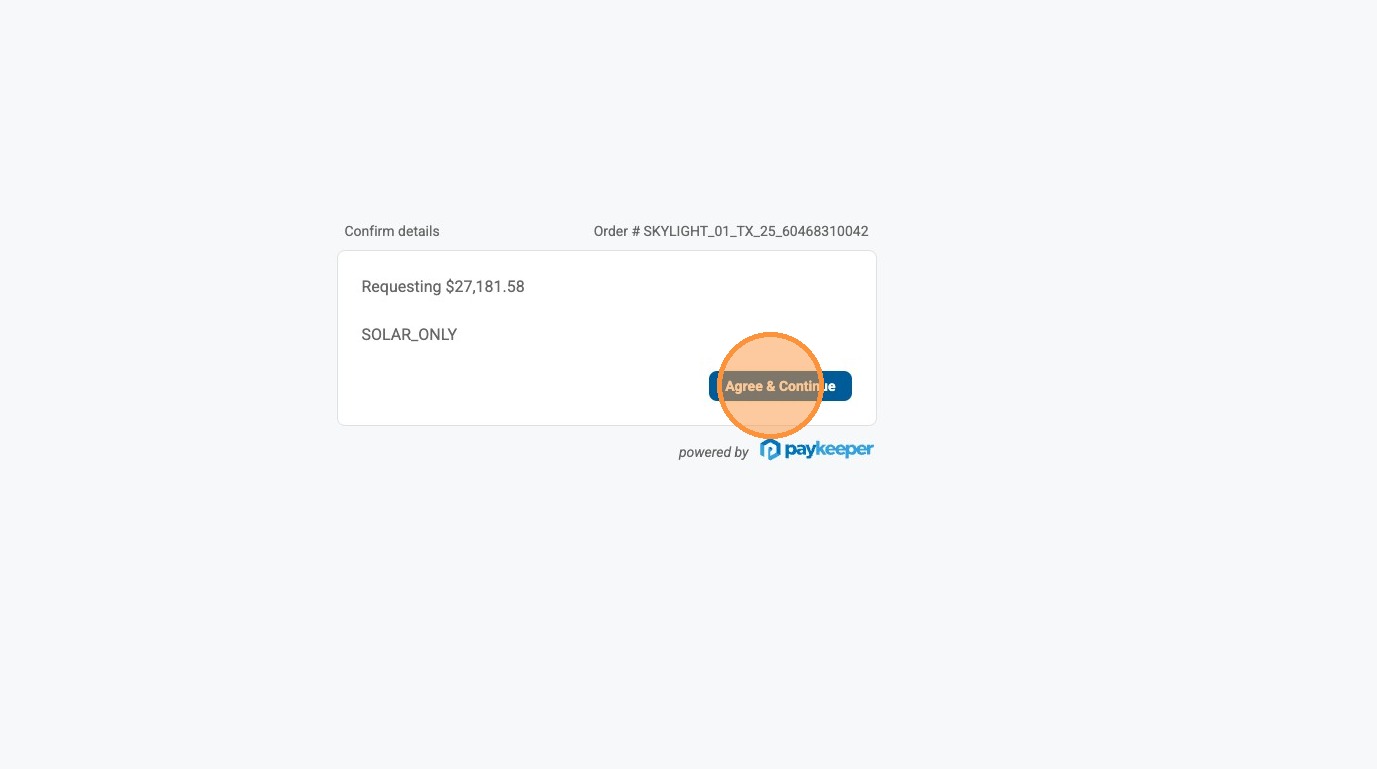
Customer clicks "Agree & Continue"
The customer reviews PayKeeper's terms and clicks "Agree & Continue" to proceed to the payment method selection screen.
Agree and Continue
33
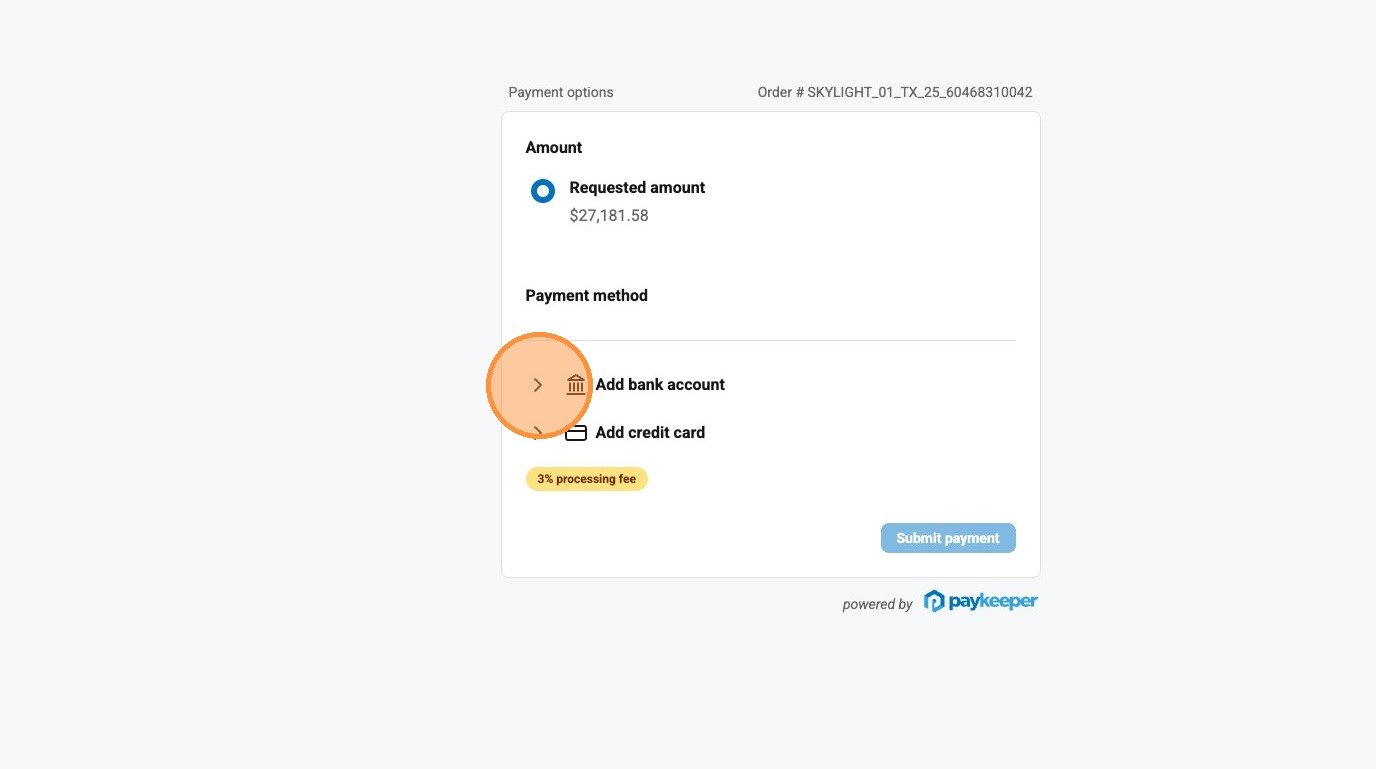
Customer validates the amount and chooses to add a bank account or credit card
The prepaid lease amount is displayed for the customer to confirm. They then choose their payment method — either a bank account (ACH) or a credit card. Make sure they know about the processing fee for credit cards before they decide.
Payment method selection
Payment method options
Bank account (ACH)

No processing fee. Requires routing number and account number. Takes 1–3 business days to process.

Credit card

Subject to a processing fee on top of the lease amount. Faster processing but costs more overall.
34
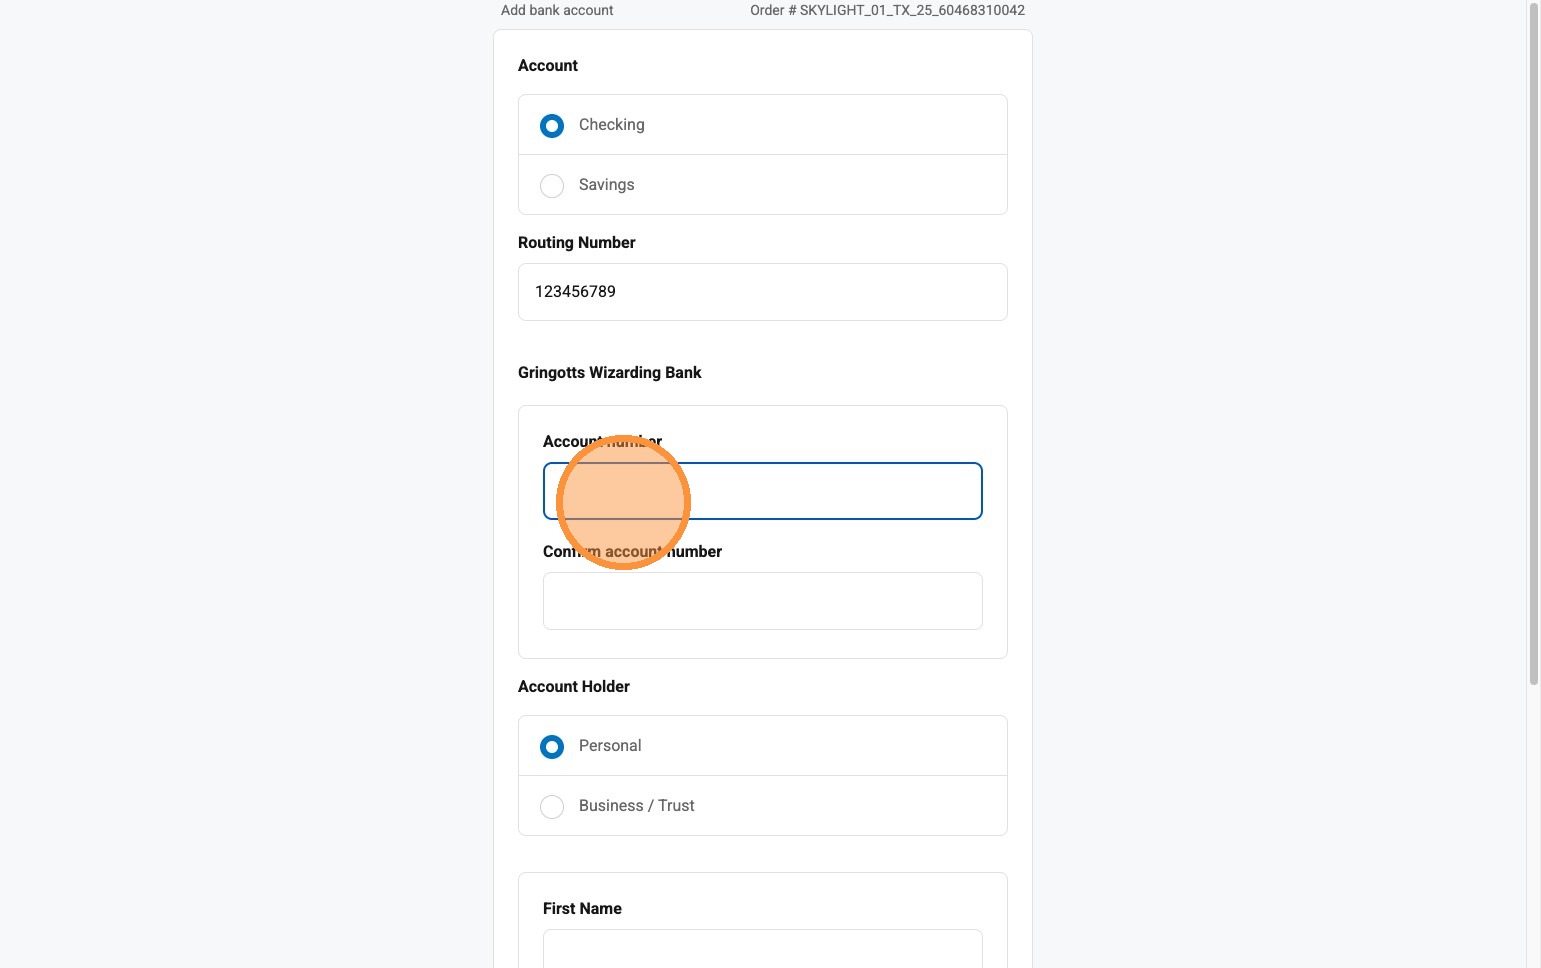
Customer enters their routing and account number
If paying by bank account, the customer enters their bank routing number and checking account number. These are found on the bottom of a personal check or in their online banking portal.
Routing and account number
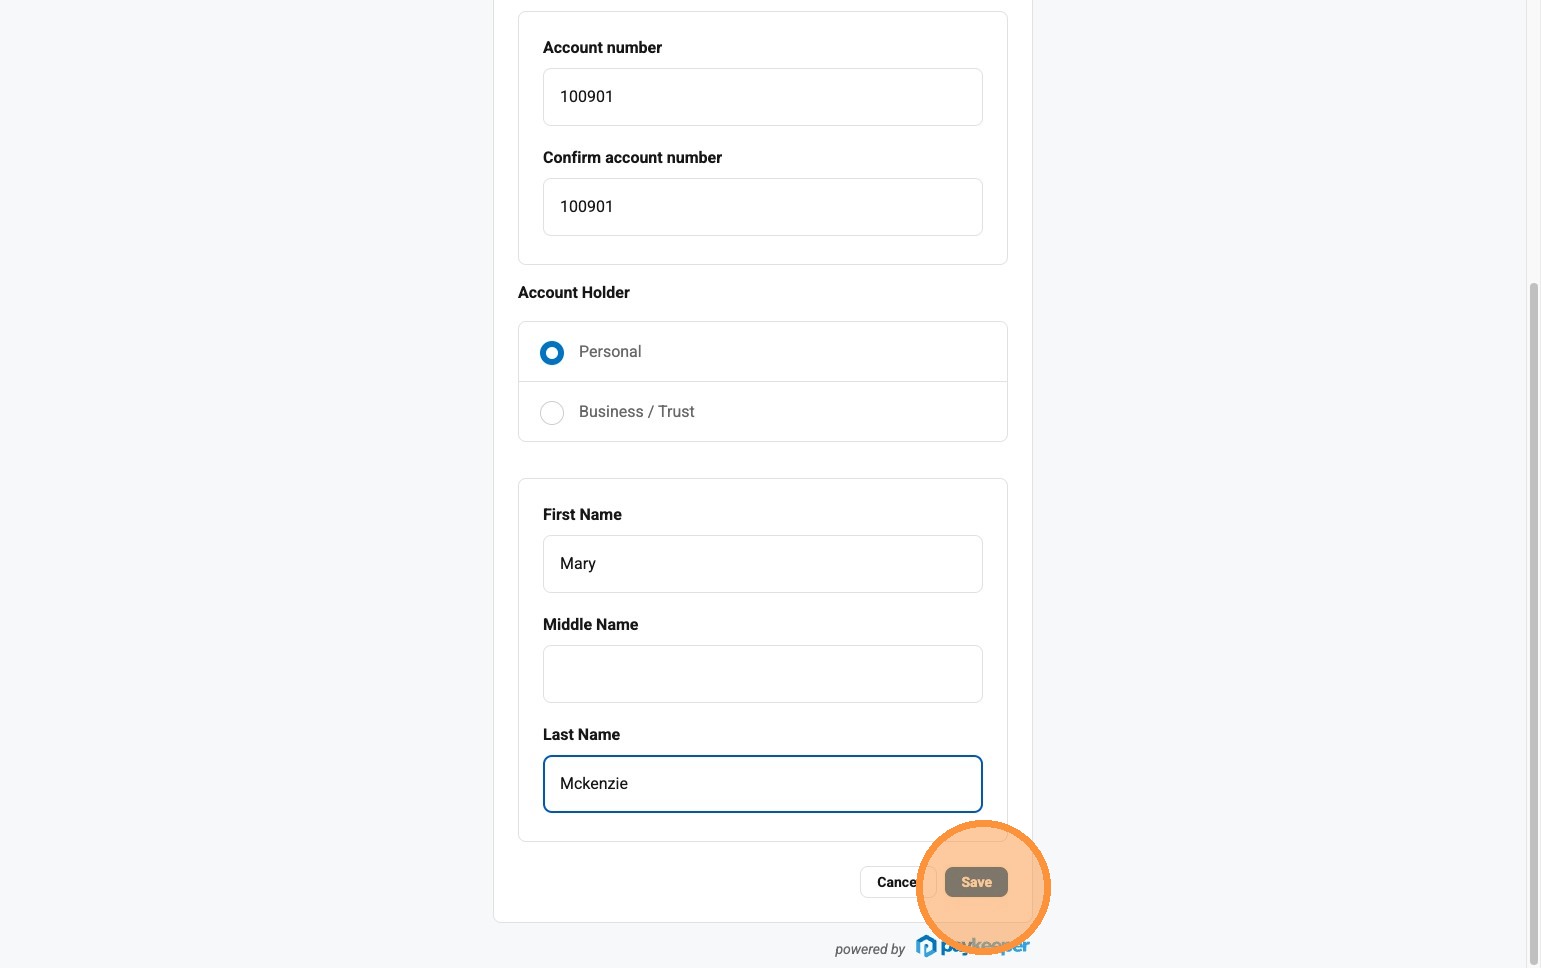
35
Customer enters account holder first and last name, then clicks "Save"
The customer enters the name on their bank account exactly as it appears, then clicks Save to store the payment information before submitting.
Account holder name
36
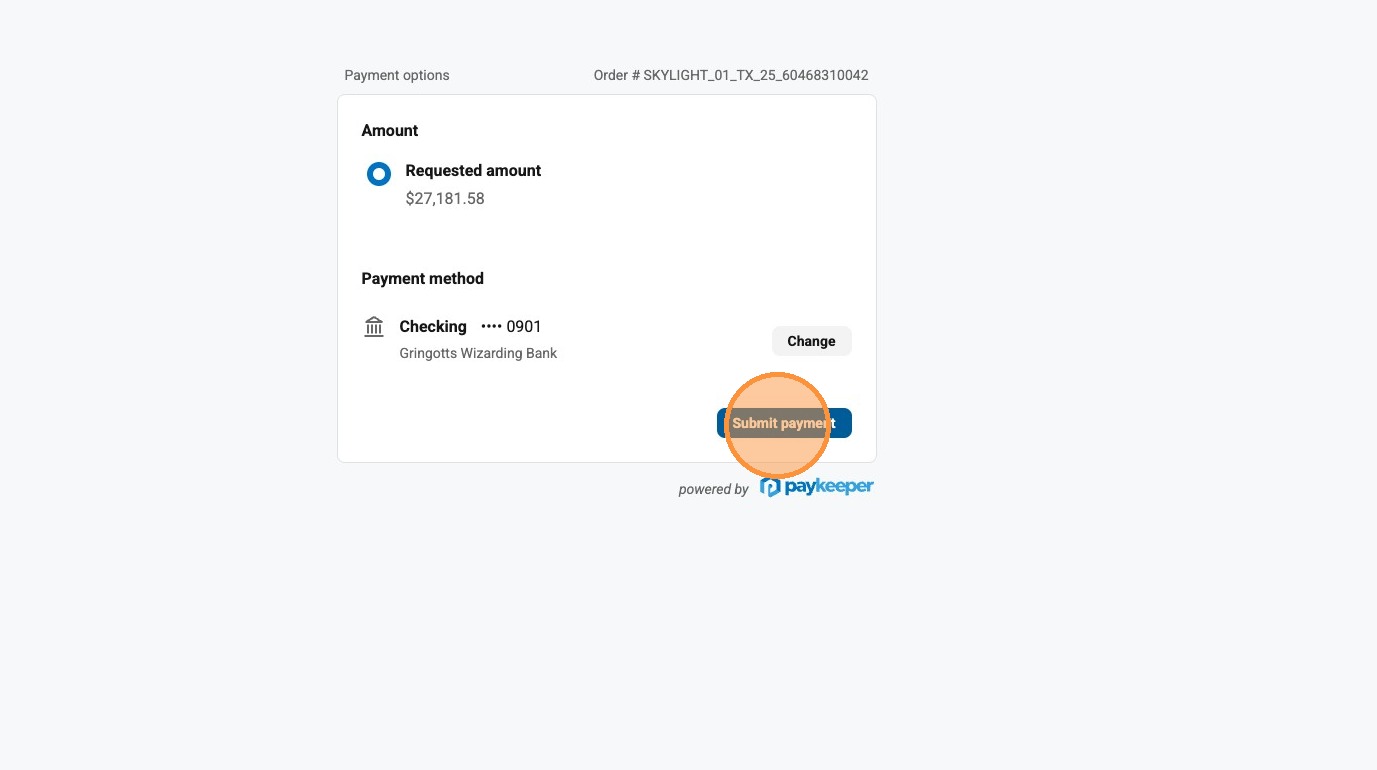
Customer clicks "Submit payment"
With all payment details entered and confirmed, the customer clicks "Submit payment" to initiate the transfer of funds to the escrow account.
Submit payment button
37
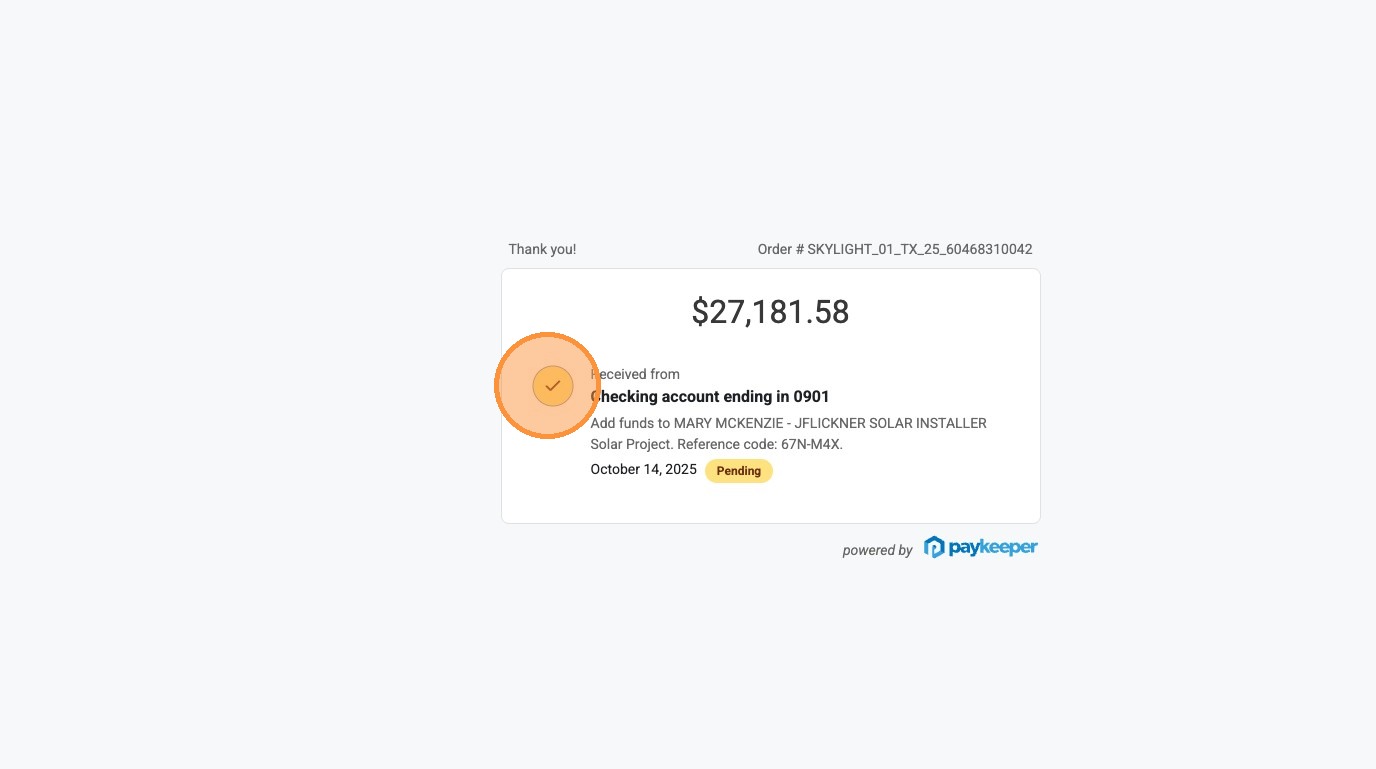
Transfer to escrow initiated — the customer portion is complete!
A confirmation screen appears letting the customer know the transfer to the escrow account has been successfully initiated. The customer's portion of the SKYLOC Prepaid Lease process is now complete. Skylight Lending will process the payment and proceed with the next steps on their end.
Transfer initiated confirmation
What happens next?

Skylight Lending will process the escrow payment and move the opportunity forward. Keep an eye on the Skylight portal for updates on the next steps toward NTP. Great work!