Create a New Solar + Battery Lease — Skylight Lending Installer Guide
Step-by-step guide

Create a new Solar + Battery lease

Follow this guide to build a complete Solar + Battery lease quote in the Skylight Lending portal — from system setup all the way to a confirmed, selected quote.
6
Sections
43
Steps
~15
Minutes
Complete this first before starting
You must first create a lease opportunity using the "Creating A Lease Opportunity Online (without Quote)" guide in the Skylight Lease & Prepaid Lease Resource Center. Come back here once that's done.
What you'll need to have ready
Customer's utility provider name
Meter number & percent offset
Panel make, series & wattage
Inverter manufacturer & series
Racking manufacturer
Battery make & series
System size in kW
1st year annual production (kWh)
2 steps
1
Open your existing lease opportunity
From the All Leases dashboard, find and open the opportunity you already created. Complete the "Creating A Lease Opportunity" guide first if you haven't done so.
2
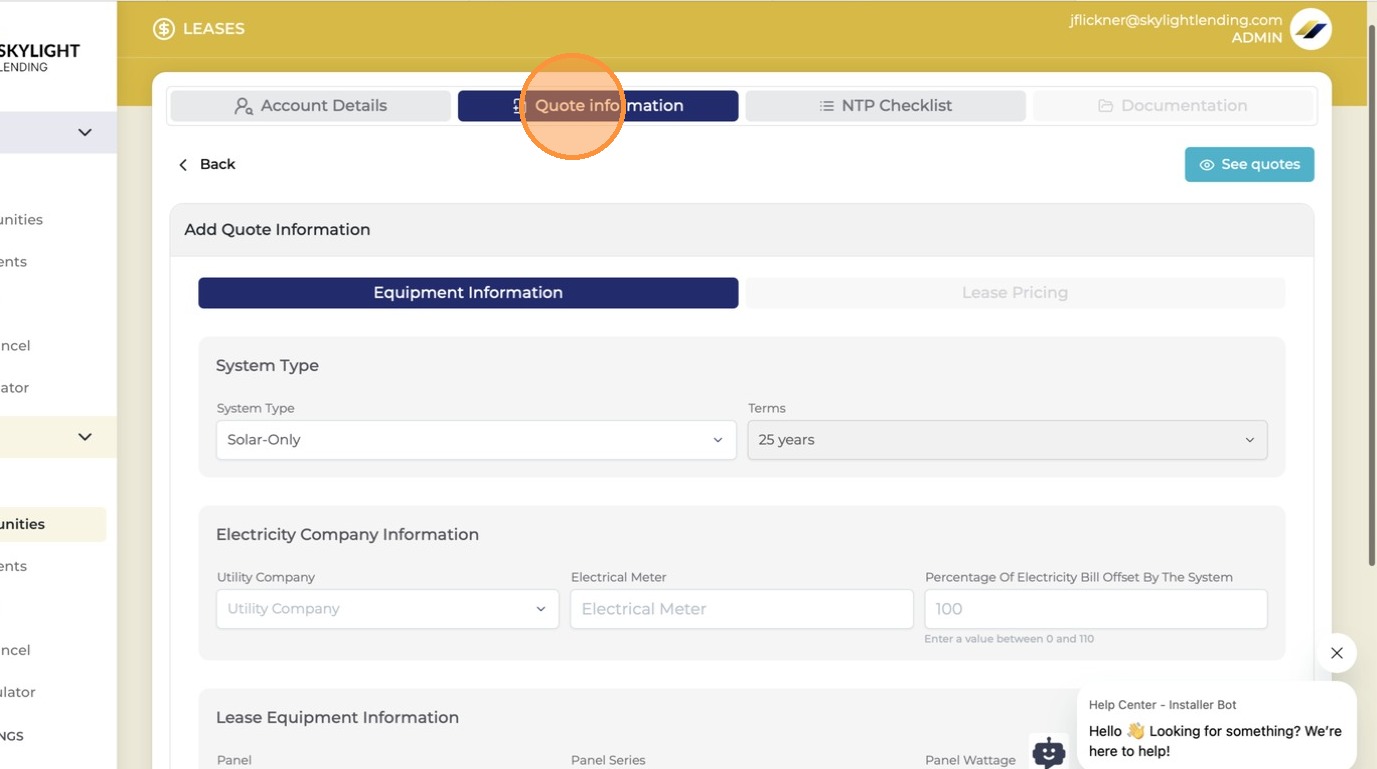
Click "Quote Information" on the opportunity page
Inside the opportunity, look for the "Quote Information" section or tab. This is where you'll build out the full Solar + Battery quote.
Quote Information tab
4 steps
3
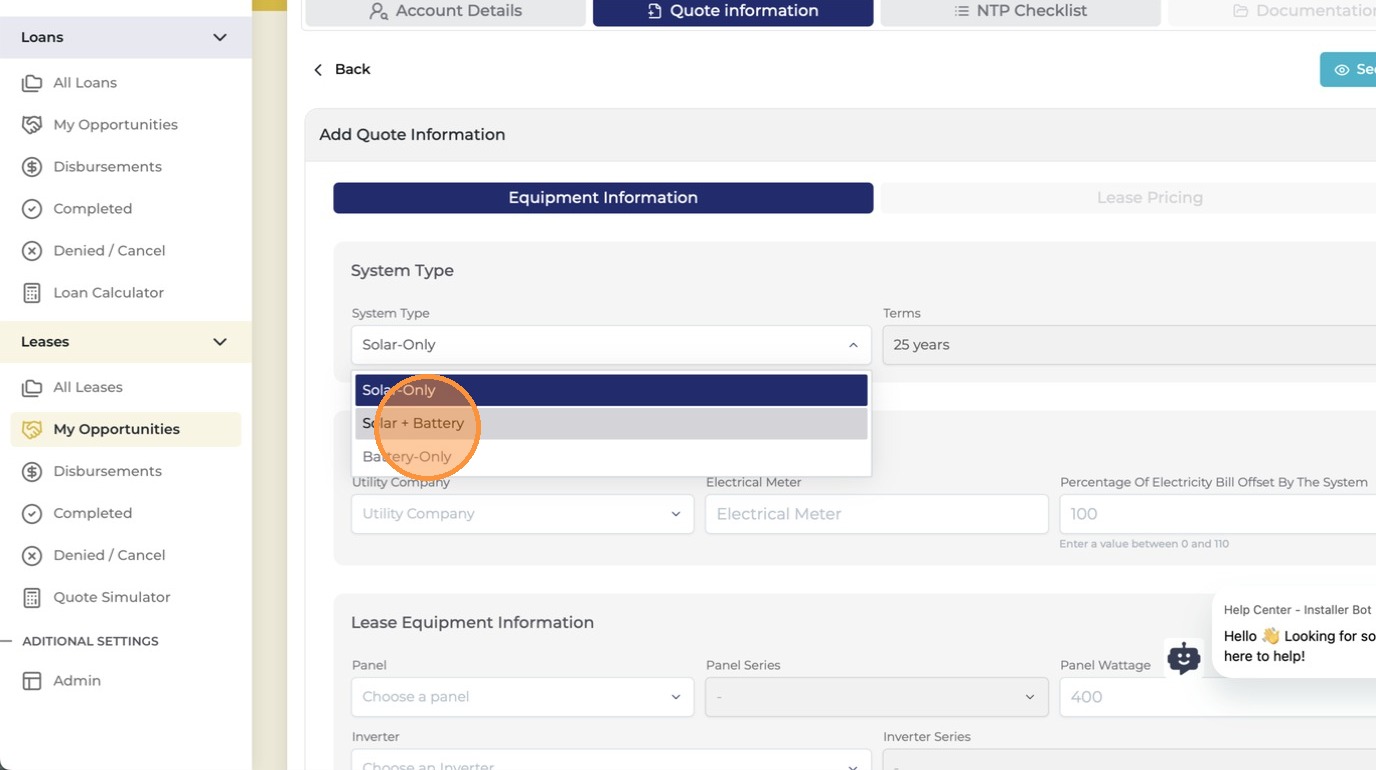
Select "Solar + Battery" under System Type
This tells the system the quote includes both solar panels and a battery. Make sure to select "Solar + Battery" — not just "Solar" — or the battery pricing section won't appear.
Solar + Battery system type
4
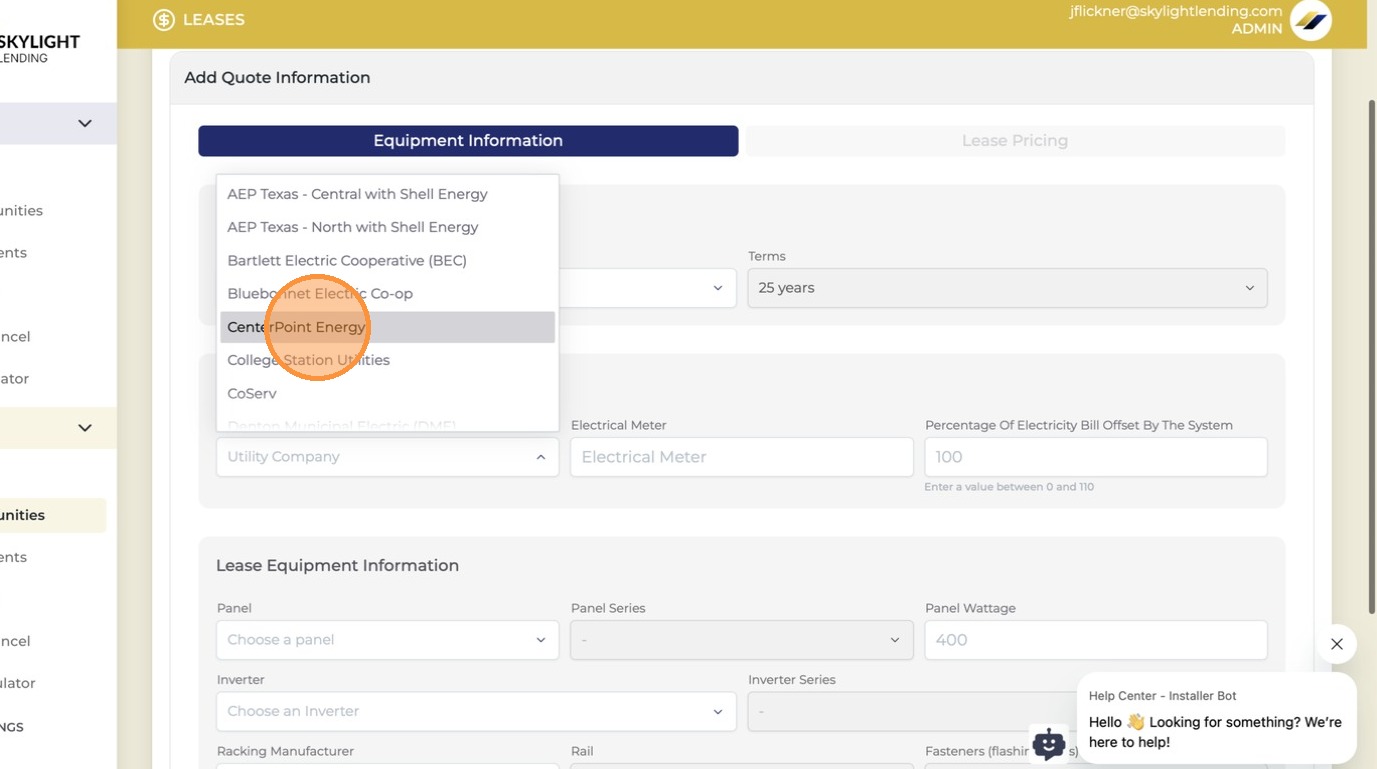
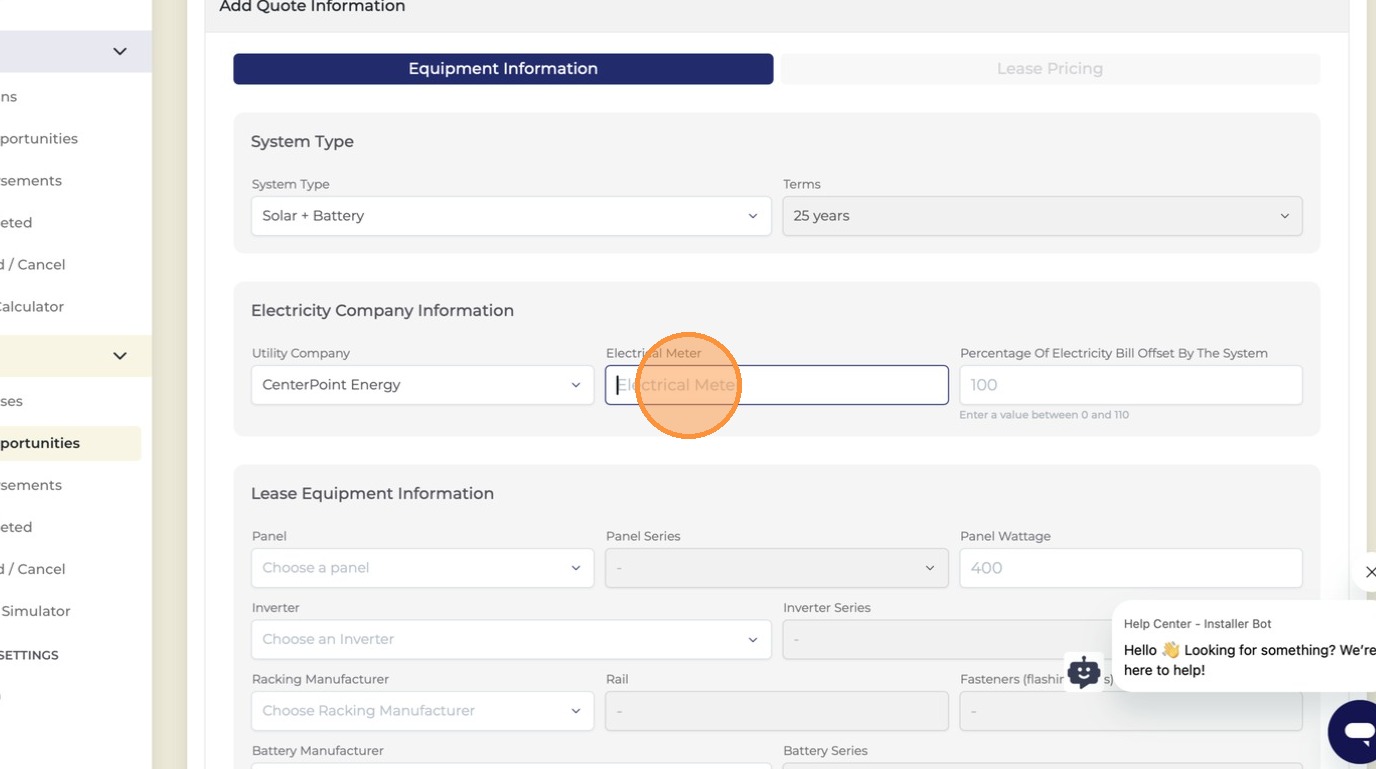
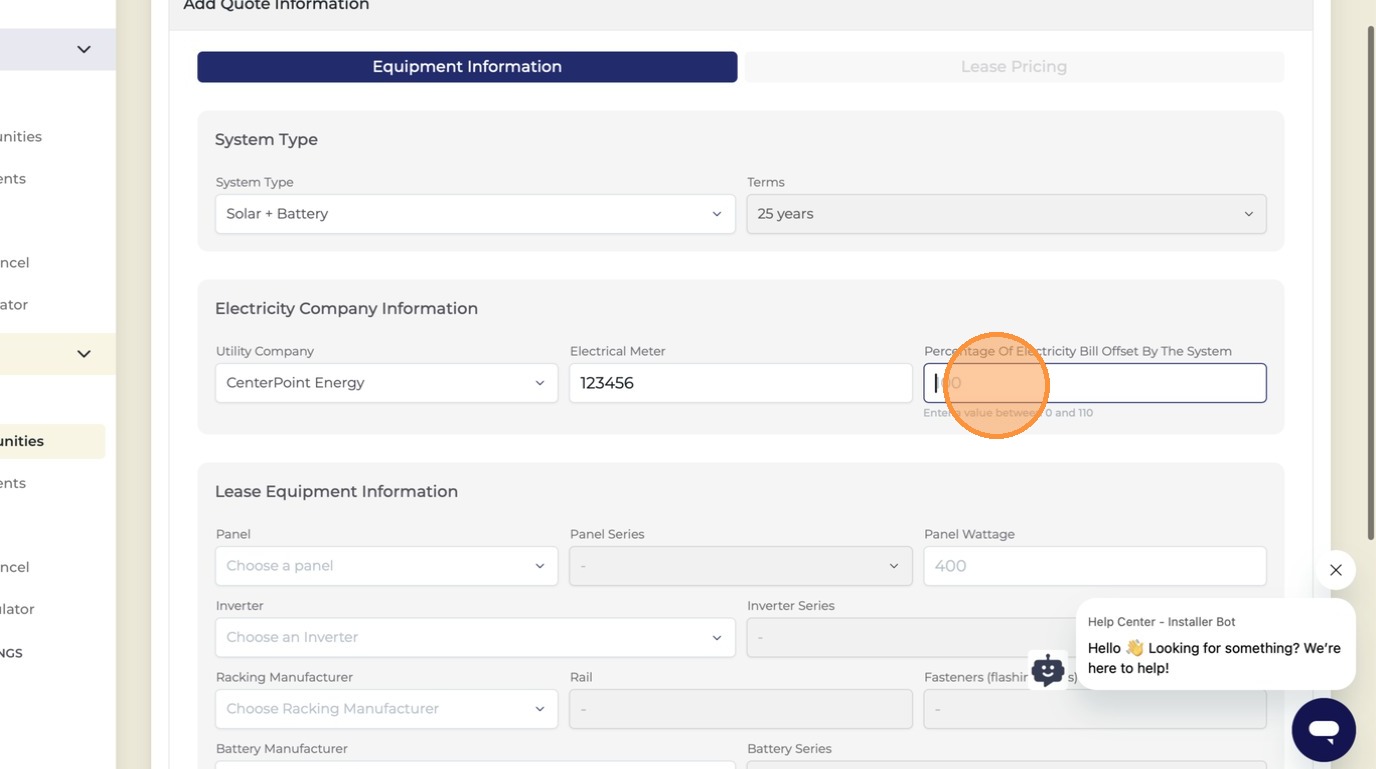
Select the utility provider and enter the meter number and percent offset
Choose the customer's electric utility company. Then enter their meter number (on their utility bill) and the percent offset — how much of their electricity the solar system covers.
Utility and meter fields
Where to find the meter number

The meter number is printed on the customer's monthly utility bill, usually near the top. It's also printed on the physical meter outside their home.
5
Review the utility information and confirm it looks correct
Double-check the utility name, meter number, and offset percentage before moving on. Errors here can affect how the quote is calculated.
Utility info review
6
Confirm the system details and scroll down to the equipment section
Once utility info is set, scroll down to start entering equipment details — starting with the panels.
Scroll to equipment
14 steps
7
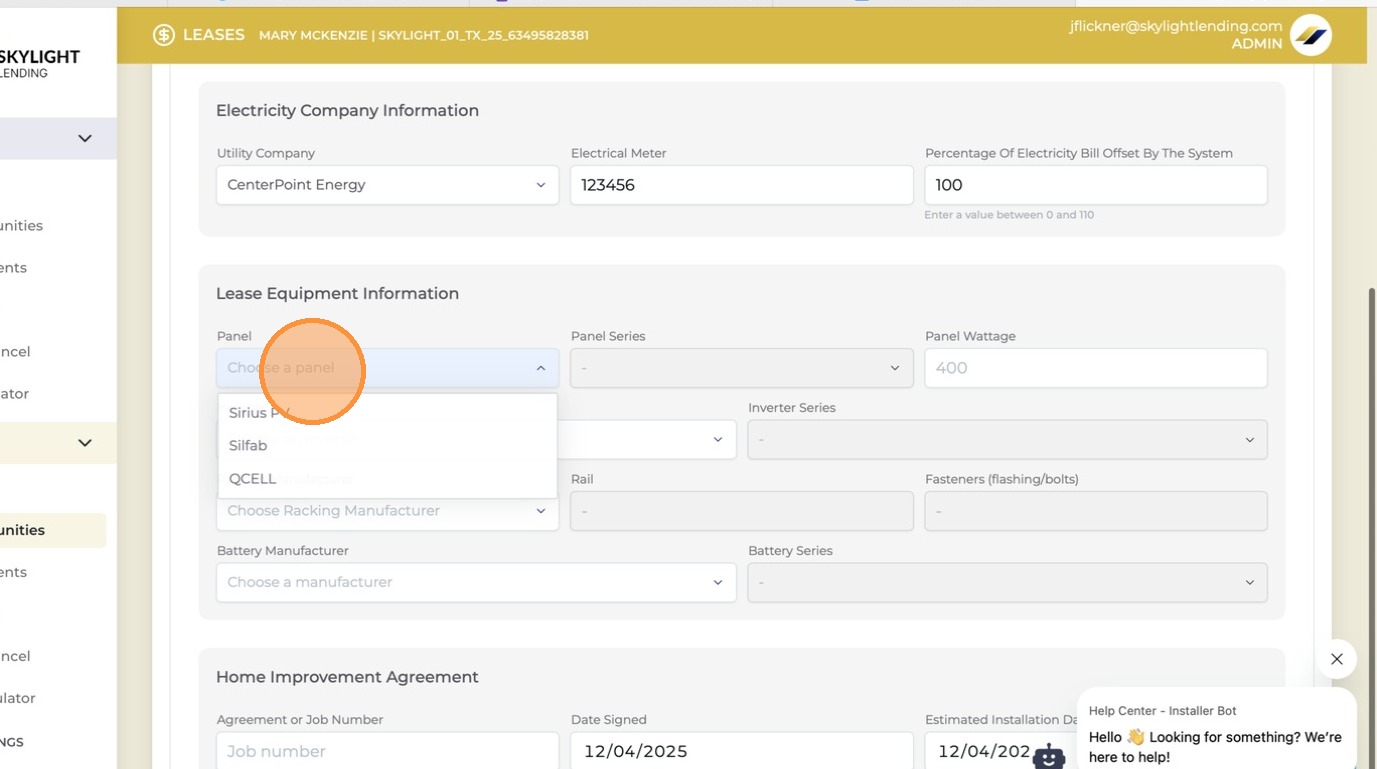
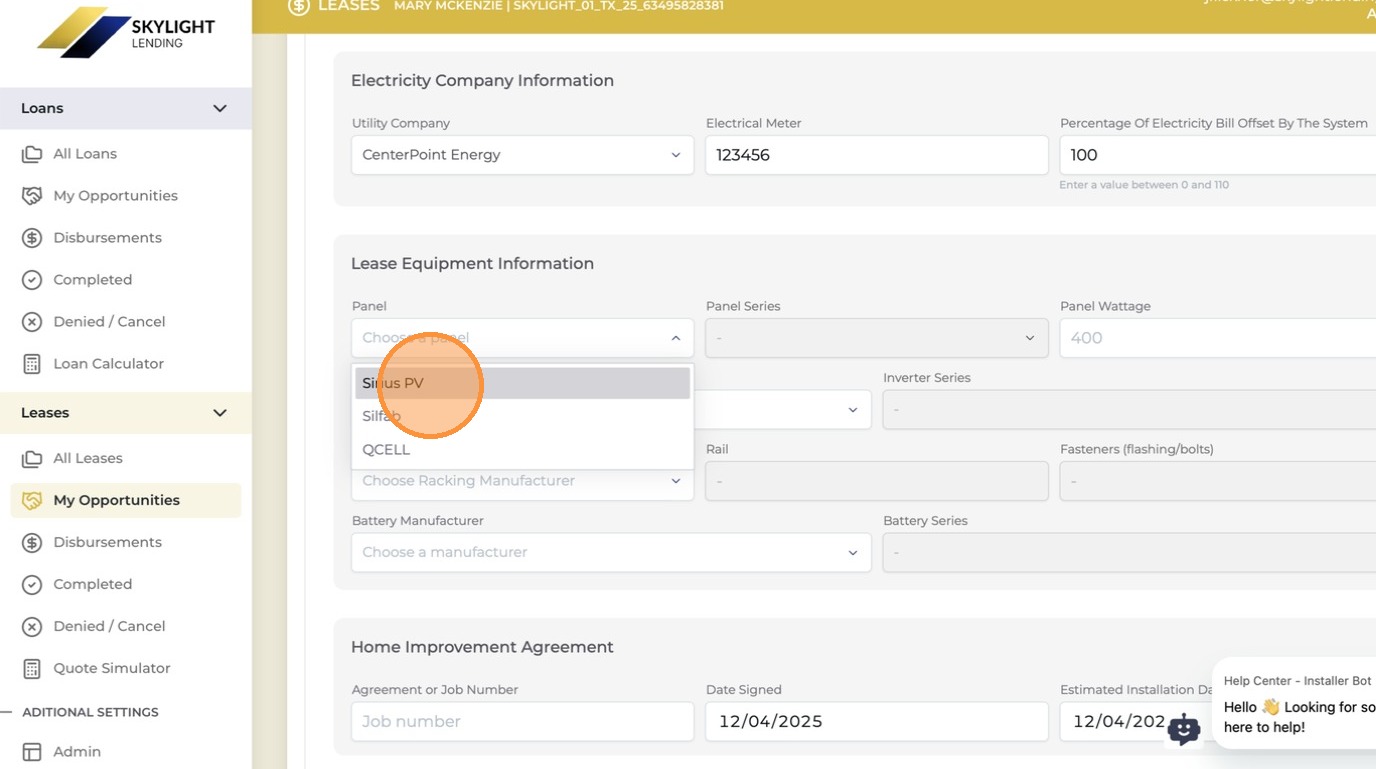
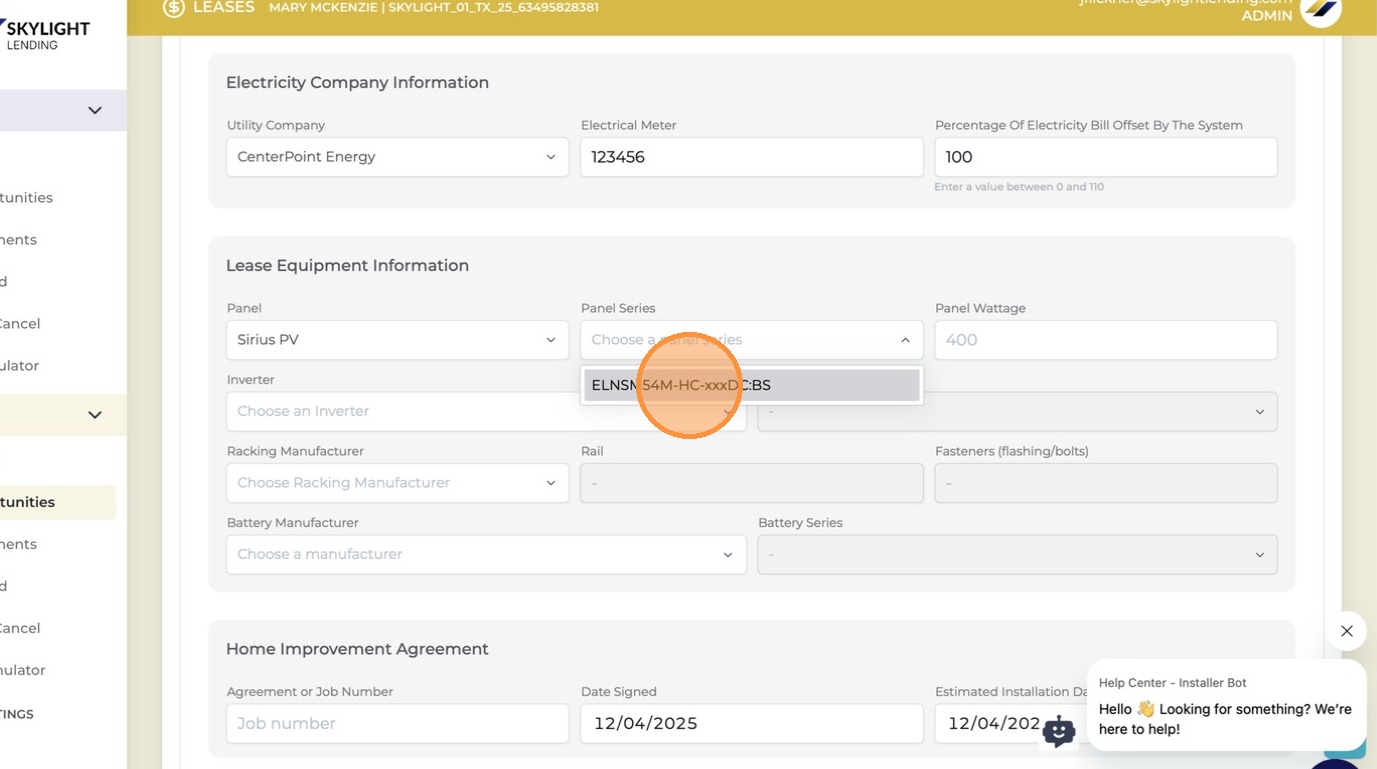
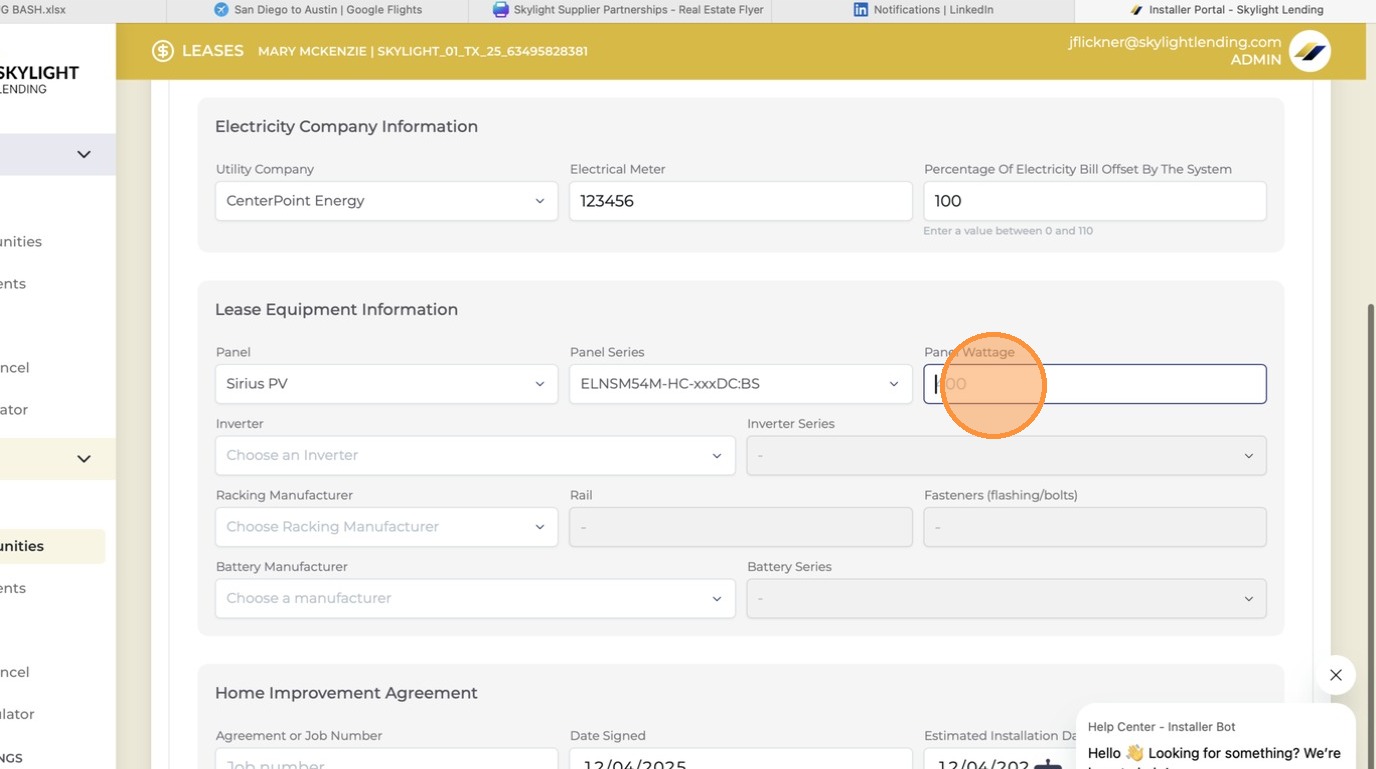
Select the panel manufacturer, series, and wattage
Use the dropdowns to choose the solar panel brand, product series, and wattage per panel. This must match your design proposal exactly.
Panel selection
8
Enter the number of panels
Type in the total number of solar panels being installed. This should match your system design.
Panel quantity
9
Review the panel summary and confirm the total system wattage
After selecting panels and quantity, the system calculates total wattage. Review this matches your design specs before moving on.
Panel summary
10
Scroll down to the inverter section
Once panels are confirmed, continue scrolling to fill in the inverter details.
Scroll to inverter
11
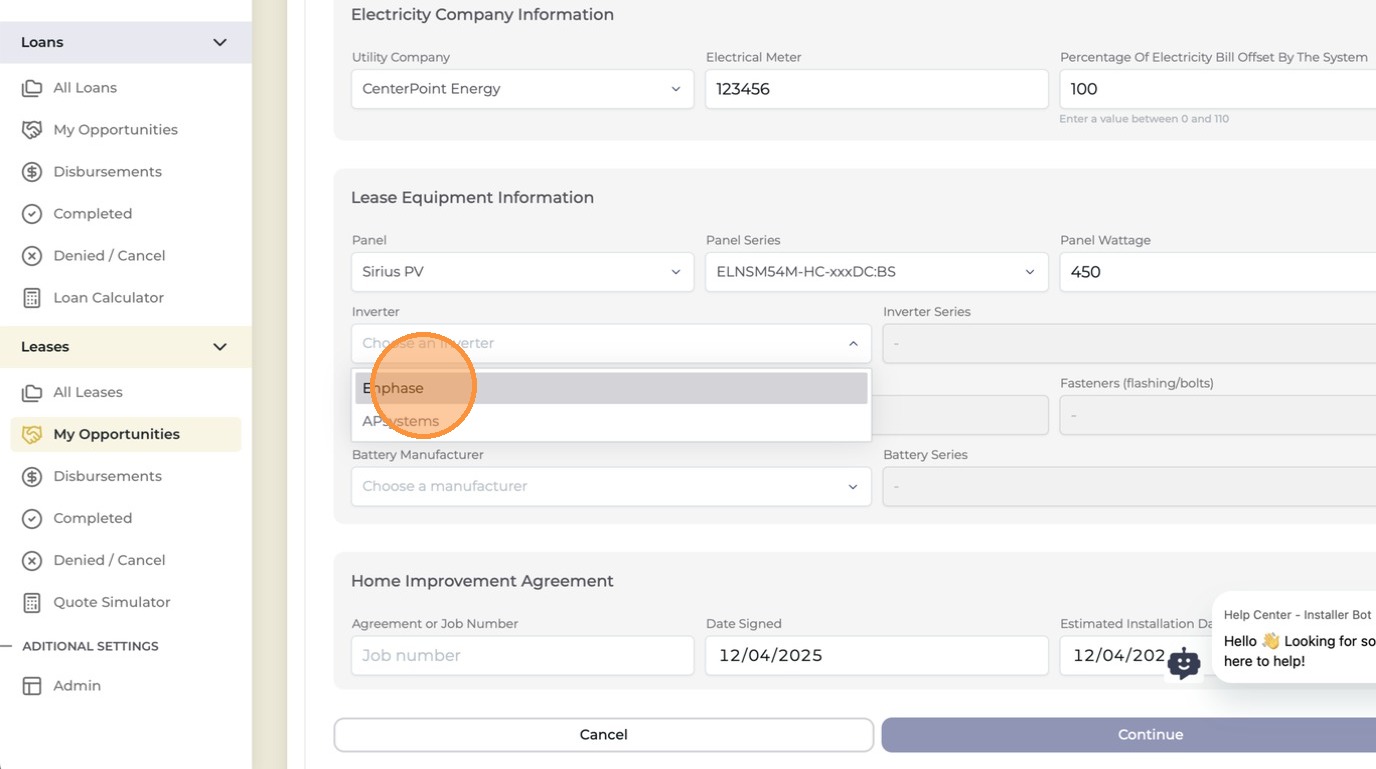
Select the inverter manufacturer and inverter series
Choose the brand and model series of the inverter being installed. The inverter converts solar energy from DC to AC to power the home.
Inverter selection
12
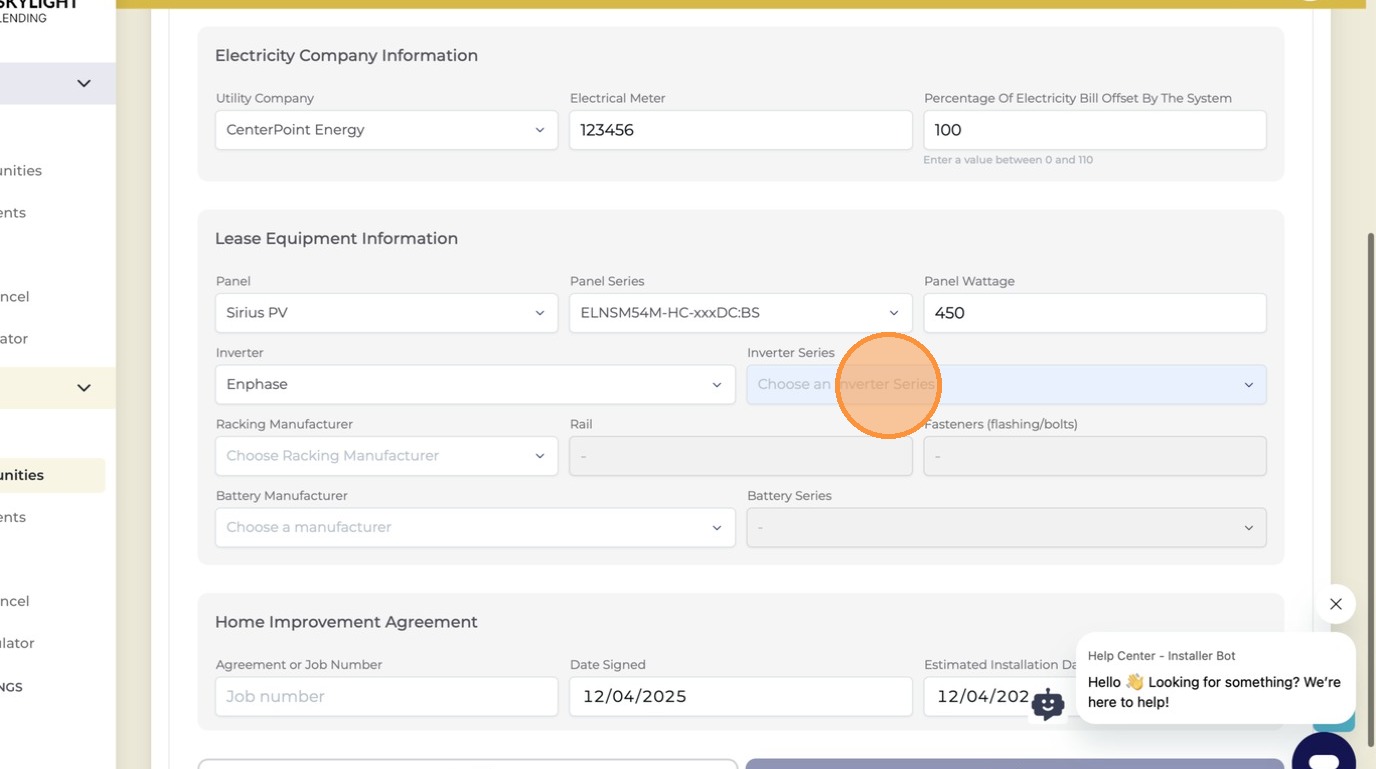
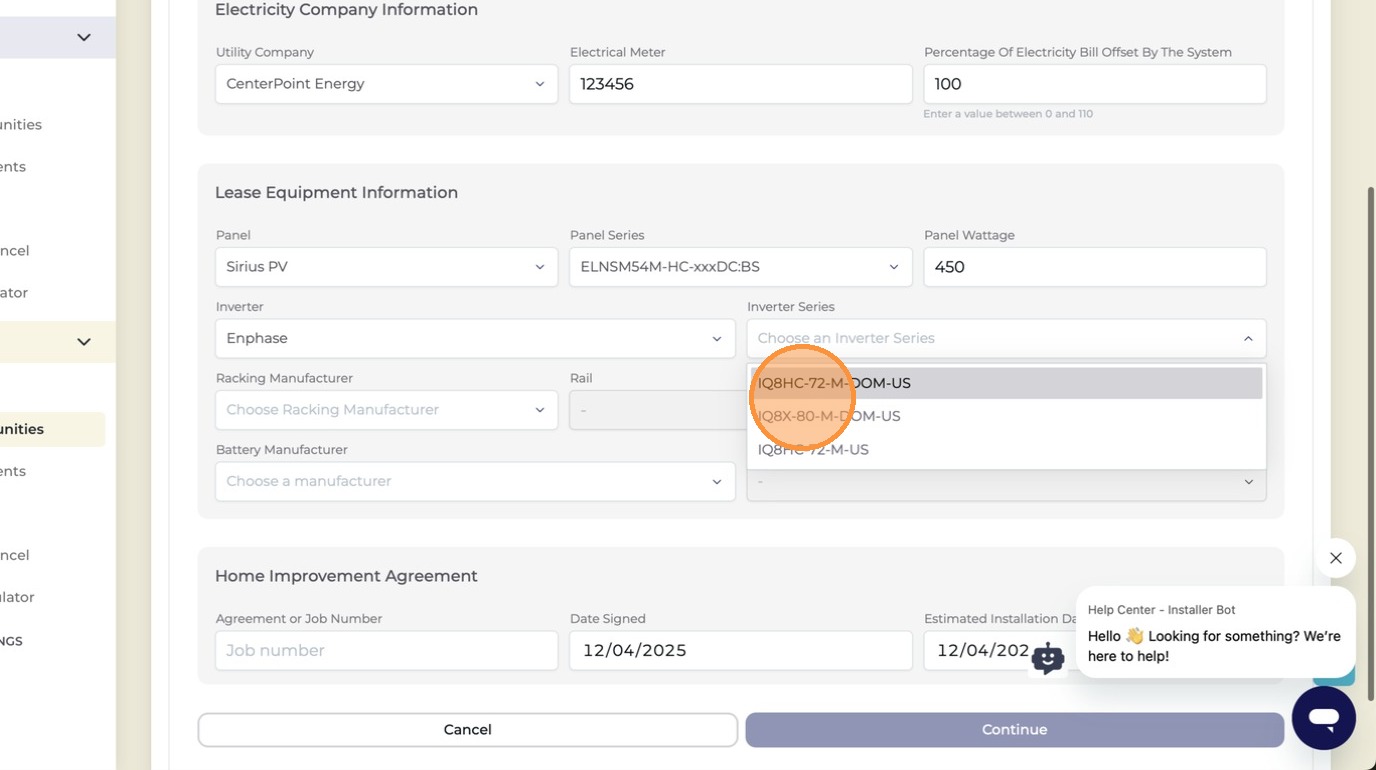
Select the inverter series and model
Choose the specific inverter series and model being installed. This is not a quantity field — select the correct model from the available options for the system.
Inverter quantity
13
Review inverter details and scroll to racking
Confirm the inverter info looks correct, then scroll down to enter racking details.
Inverter review
14
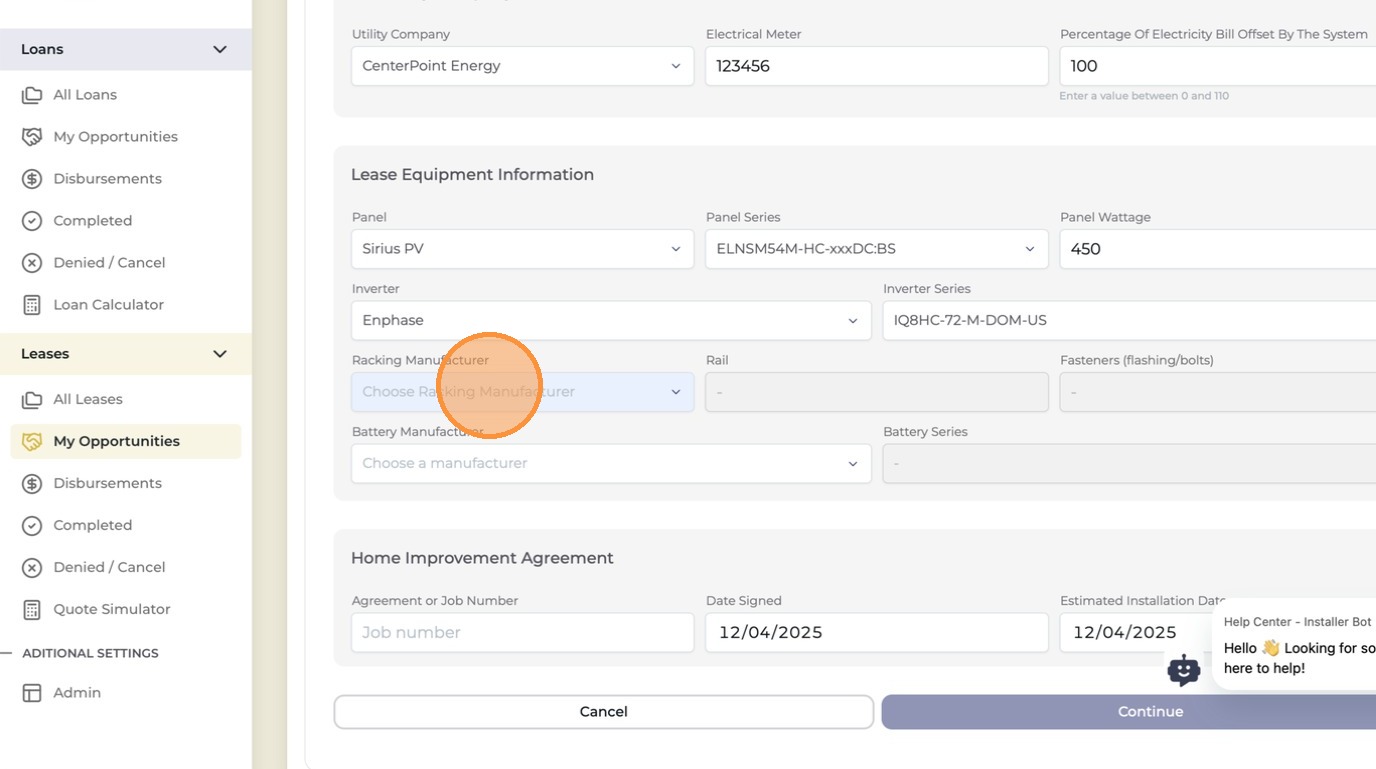
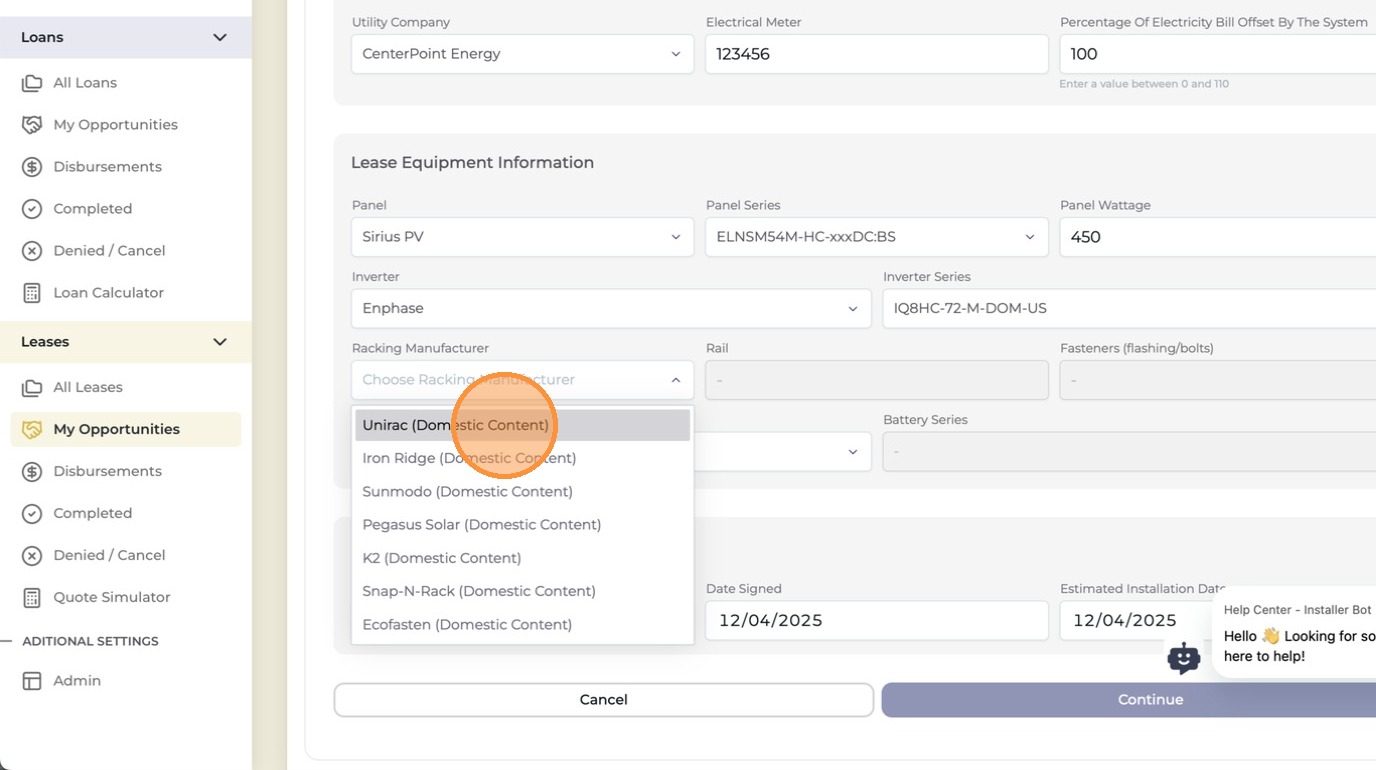
Select the racking manufacturer
Choose the brand of mounting hardware that will hold the solar panels to the roof. Required to complete the quote.
Racking manufacturer
15
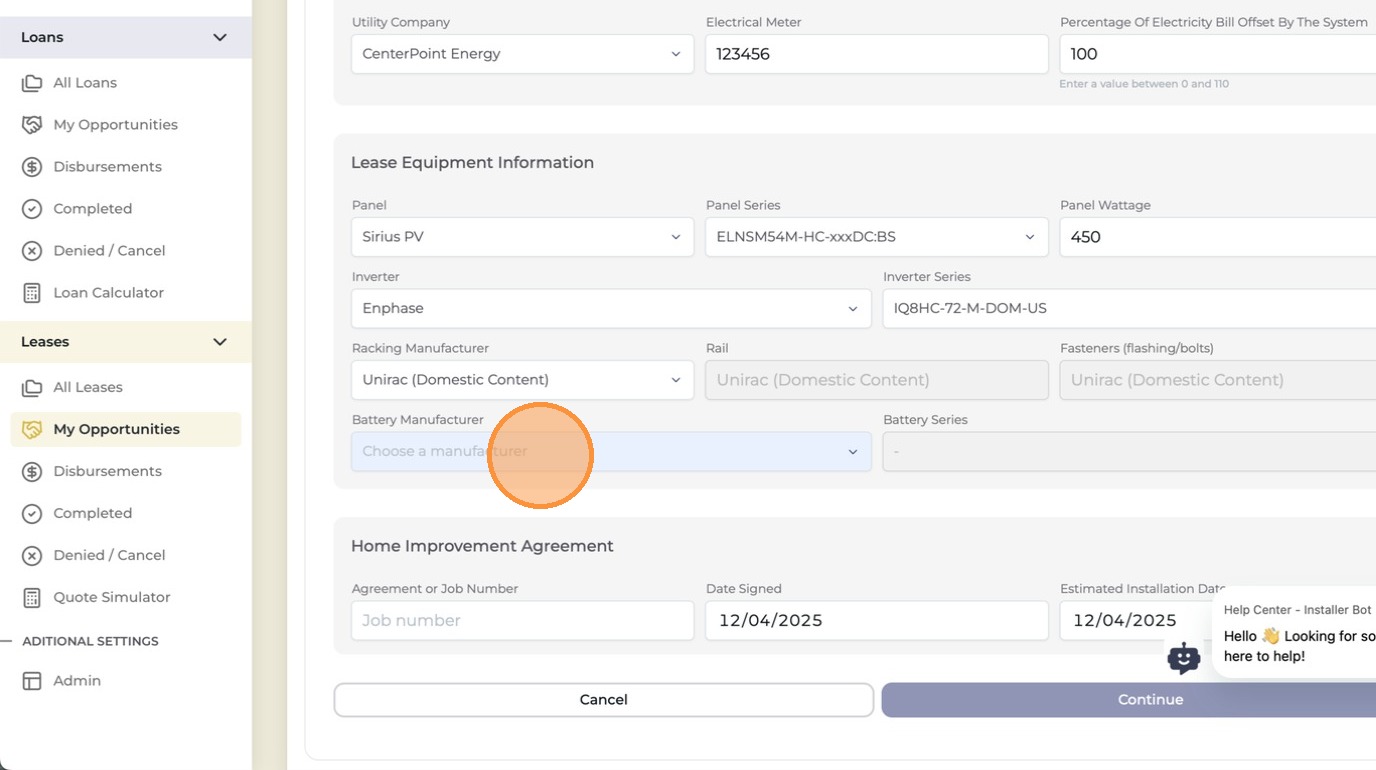
Confirm racking details and scroll to the battery section
Once racking is selected, scroll further down to find the battery equipment fields.
Scroll to battery
16
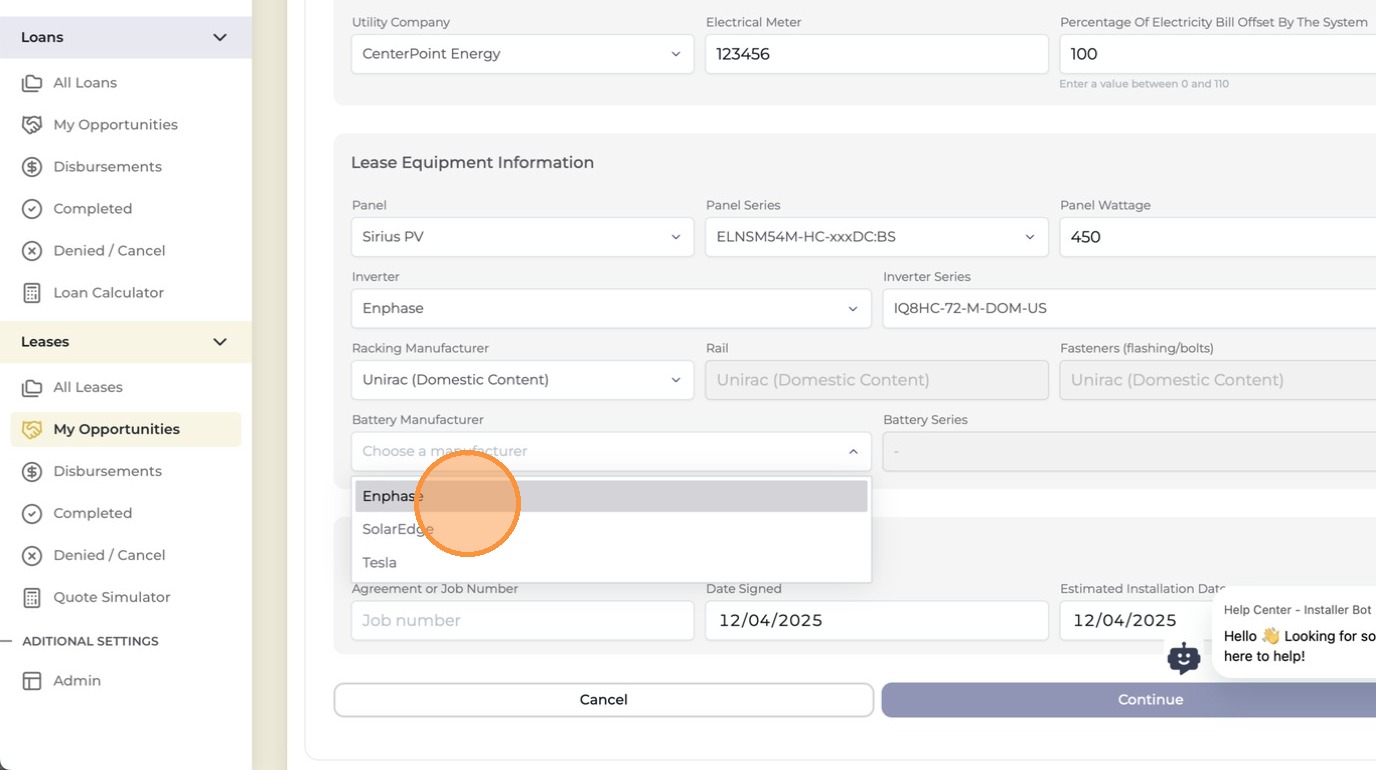
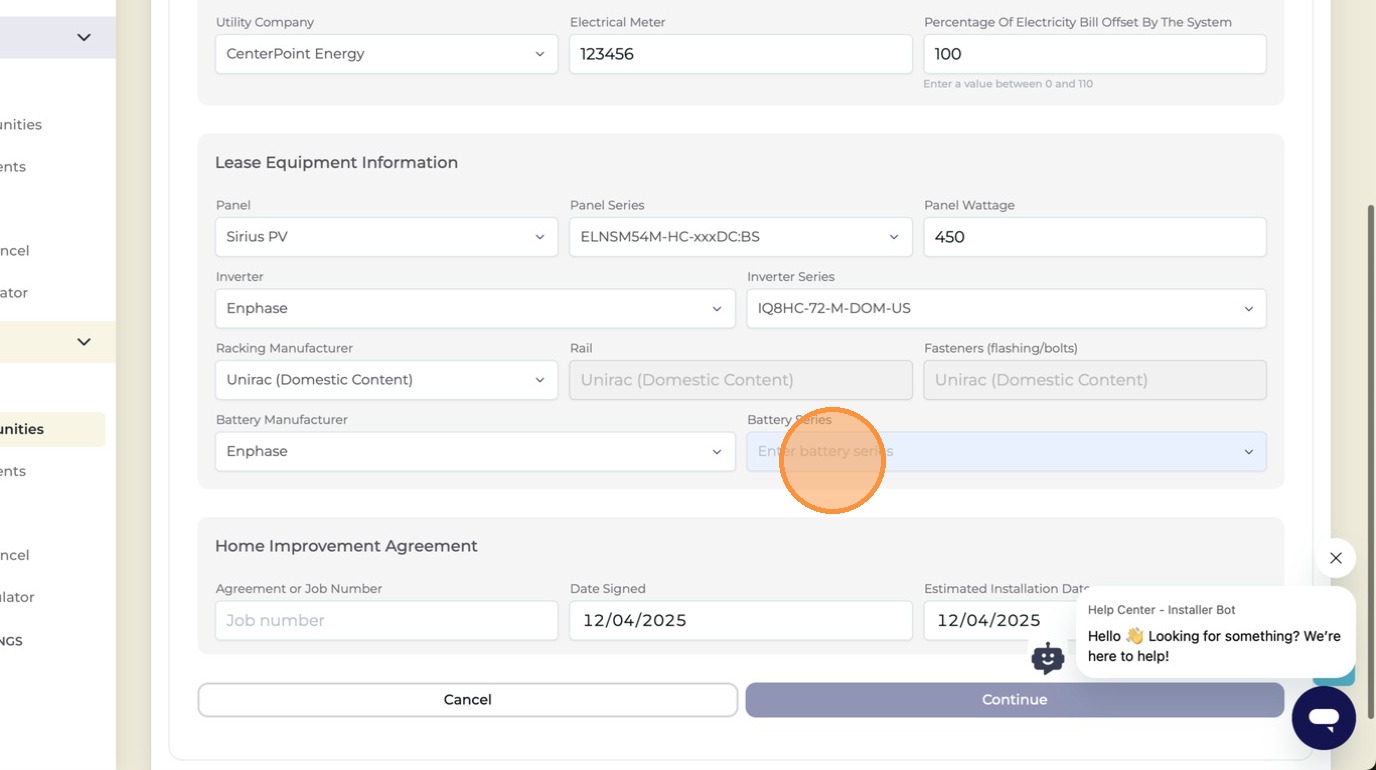
Select the battery manufacturer and battery series
Choose the brand and specific model series of the battery storage unit being installed. Current approved battery options include Tesla Powerwall, Enphase IQ Battery, and SolarEdge.
Battery manufacturer
17
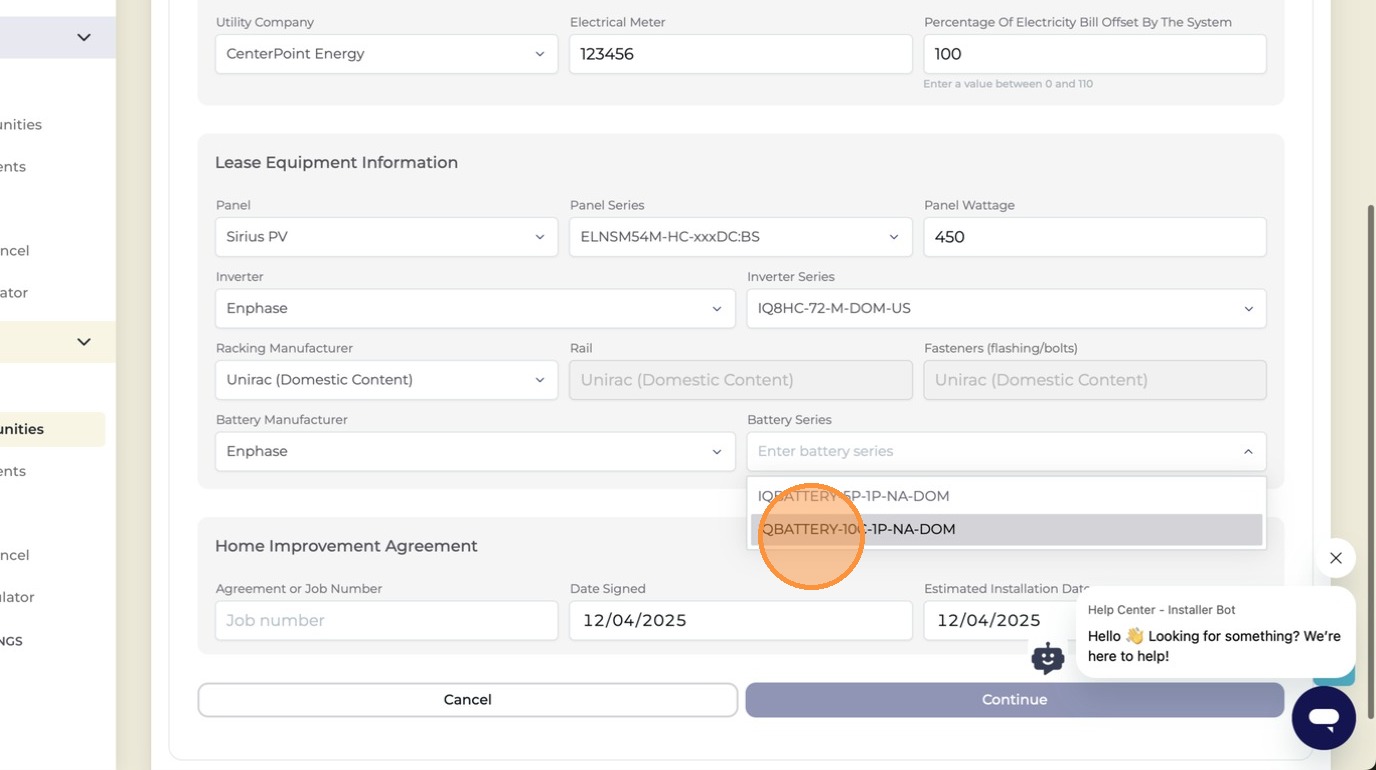
Select the battery model and confirm the storage capacity
Choose the specific battery model. The system will display the storage capacity (kWh) — confirm it matches what was proposed to the customer.
Battery model
18
Select the battery series and model
Choose the specific battery series and model being installed. This is not a quantity field — select the correct battery model from the available options for the system.
Battery quantity
19
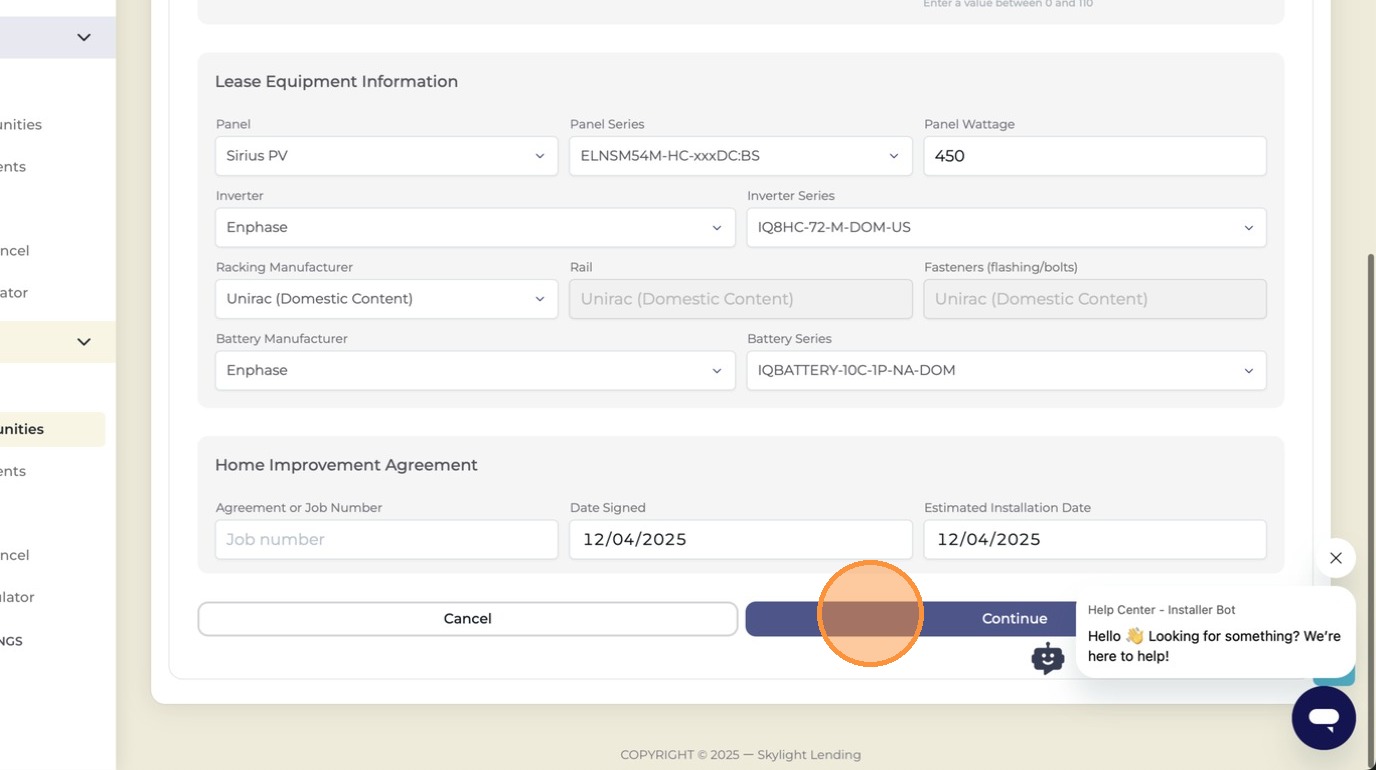
Review all equipment selections before continuing
Scroll back through and verify panels, inverters, racking, and batteries are all filled in correctly. Once you click Continue, you'll move to pricing.
Equipment review
20
Click "Continue"
When all equipment fields are complete, click Continue to move to the pricing and rate configuration section.
Continue
9 steps
21
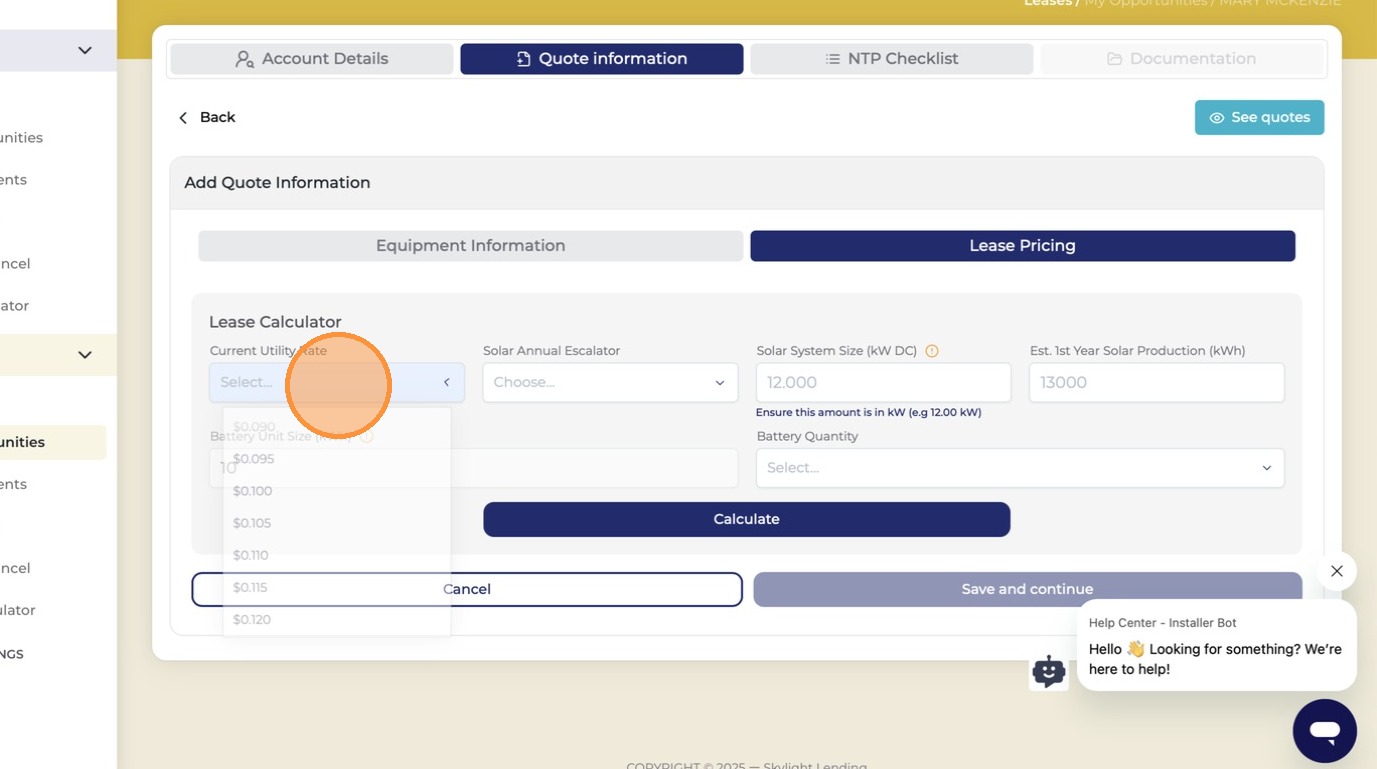
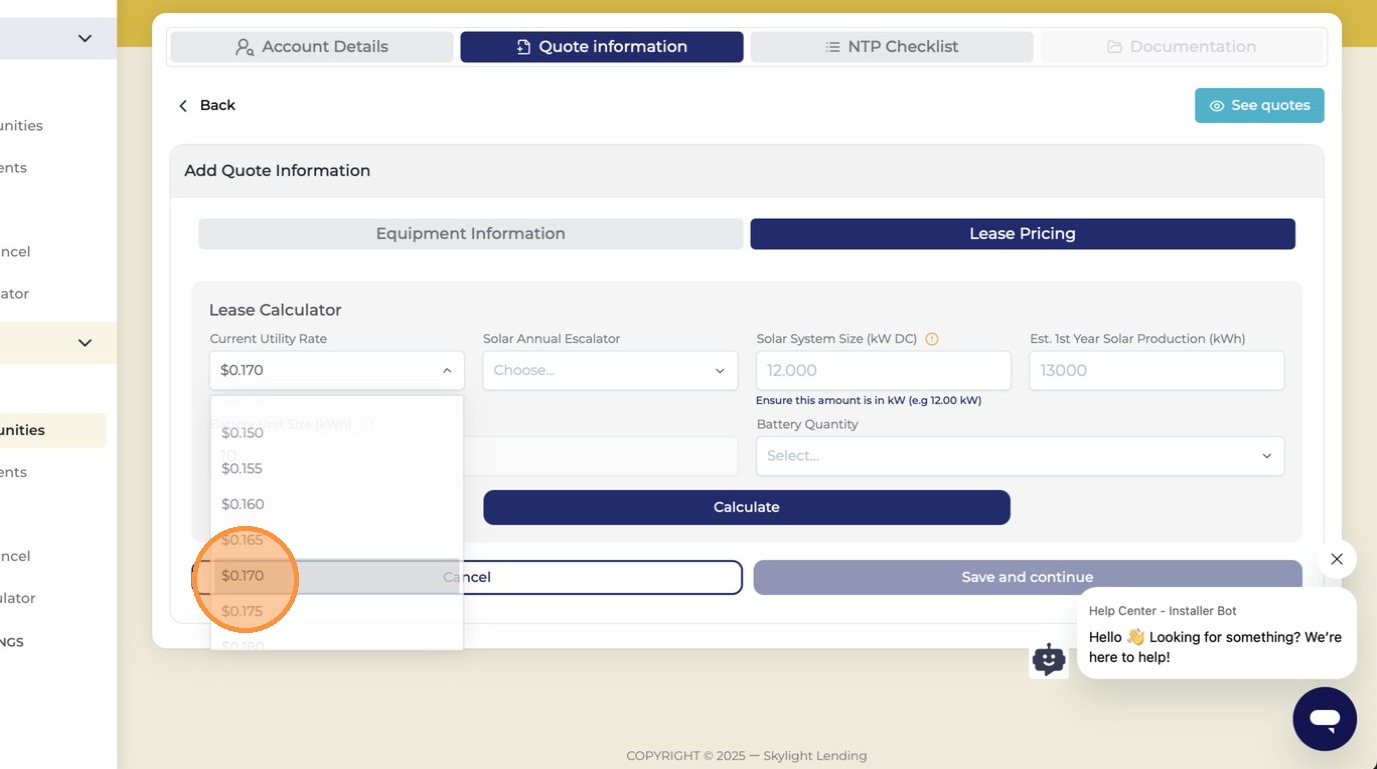
Select the customer's current utility rate
Choose the rate (in cents per kWh) the customer pays their utility company. Find this on their utility bill. The correct rate determines how savings are calculated.
Utility rate
Utility rate calculation varies by market

Calculation rules differ by state. If you are unsure of the correct method for your market, reach out to your designated Skylight account manager before selecting a rate.
22
Review the utility rate and confirm it's correct
Double-check the selected rate matches what's on the customer's bill before moving on.
Rate review
23
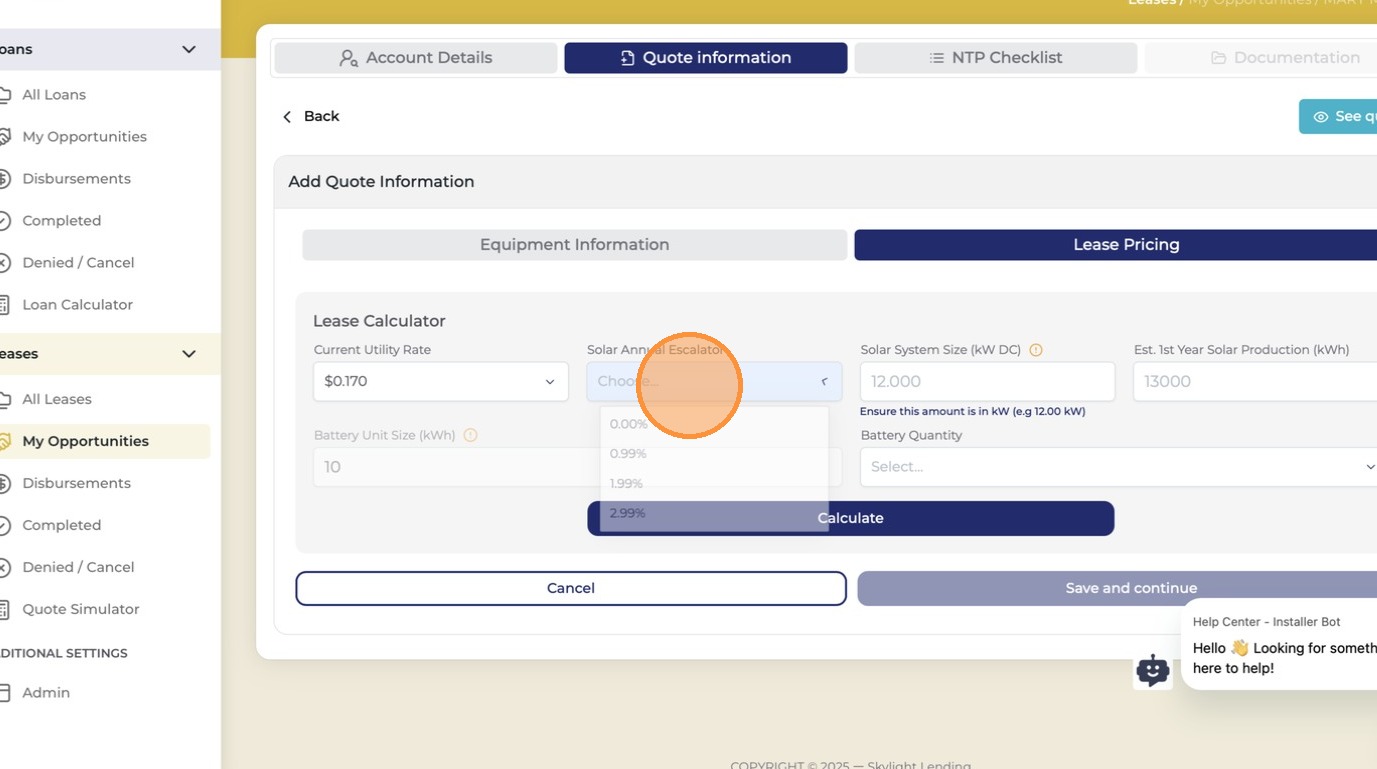
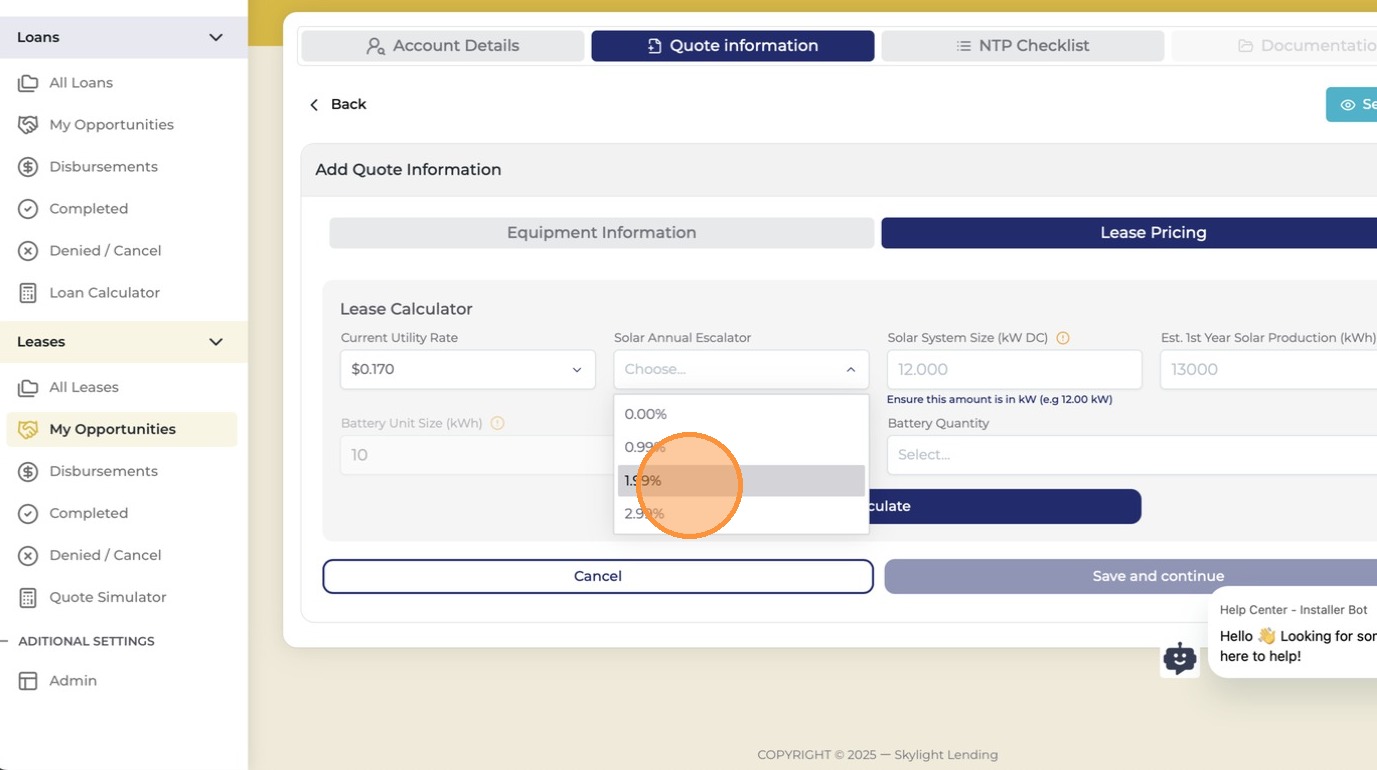
Select the solar escalator rate
The escalator is the annual percentage increase applied to the lease payment each year. Note: the same escalator applies to both the solar and battery payment — they are linked.
Solar escalator
Heads up — one escalator for both

The escalator you pick here automatically applies to both solar and battery payments. There is no separate escalator for the battery portion.
24
Review the escalator selection and scroll to system size
Confirm the escalator rate looks right, then scroll down to enter system size and production details.
Escalator review
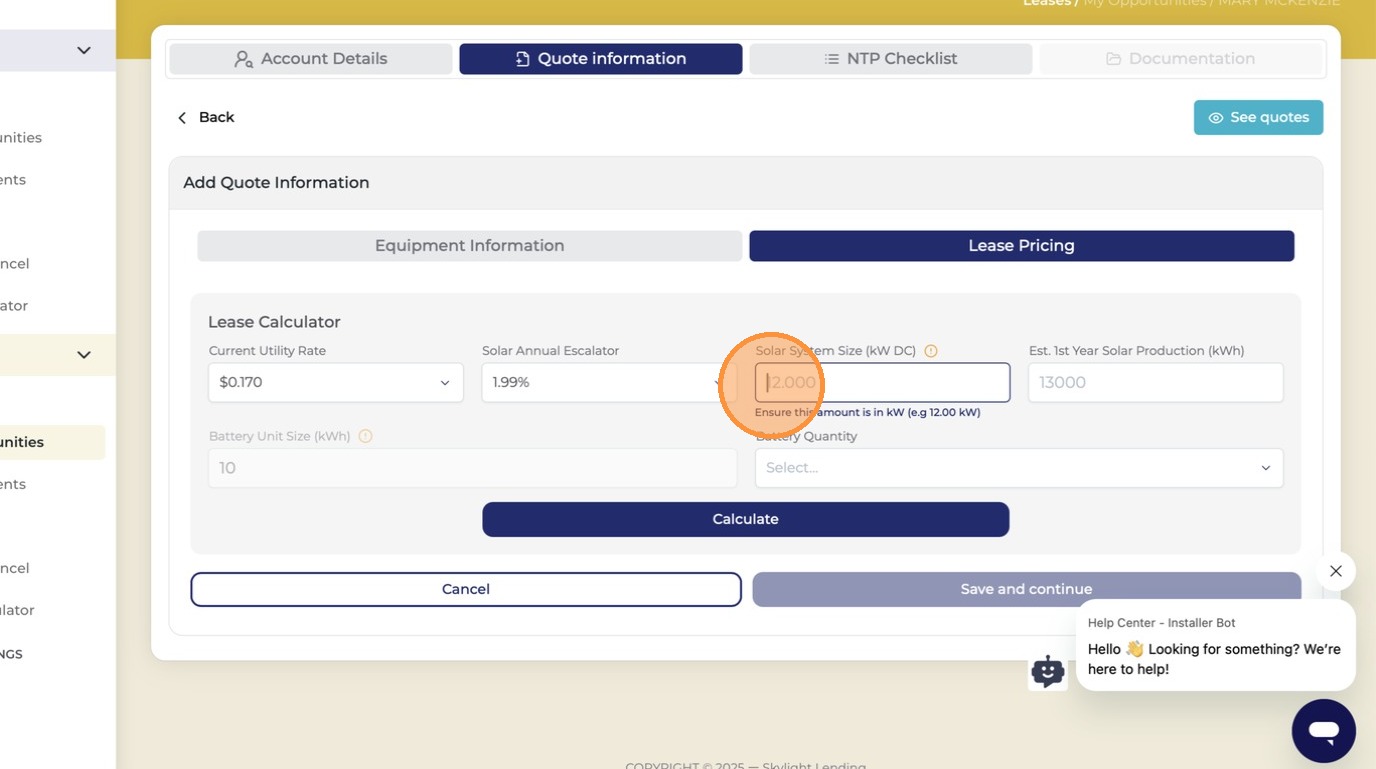
25
Enter the system size in kW
Type in the total system size in kilowatts. This comes from your system design — e.g., 10 panels at 400W each = 4.0 kW.
System size kW
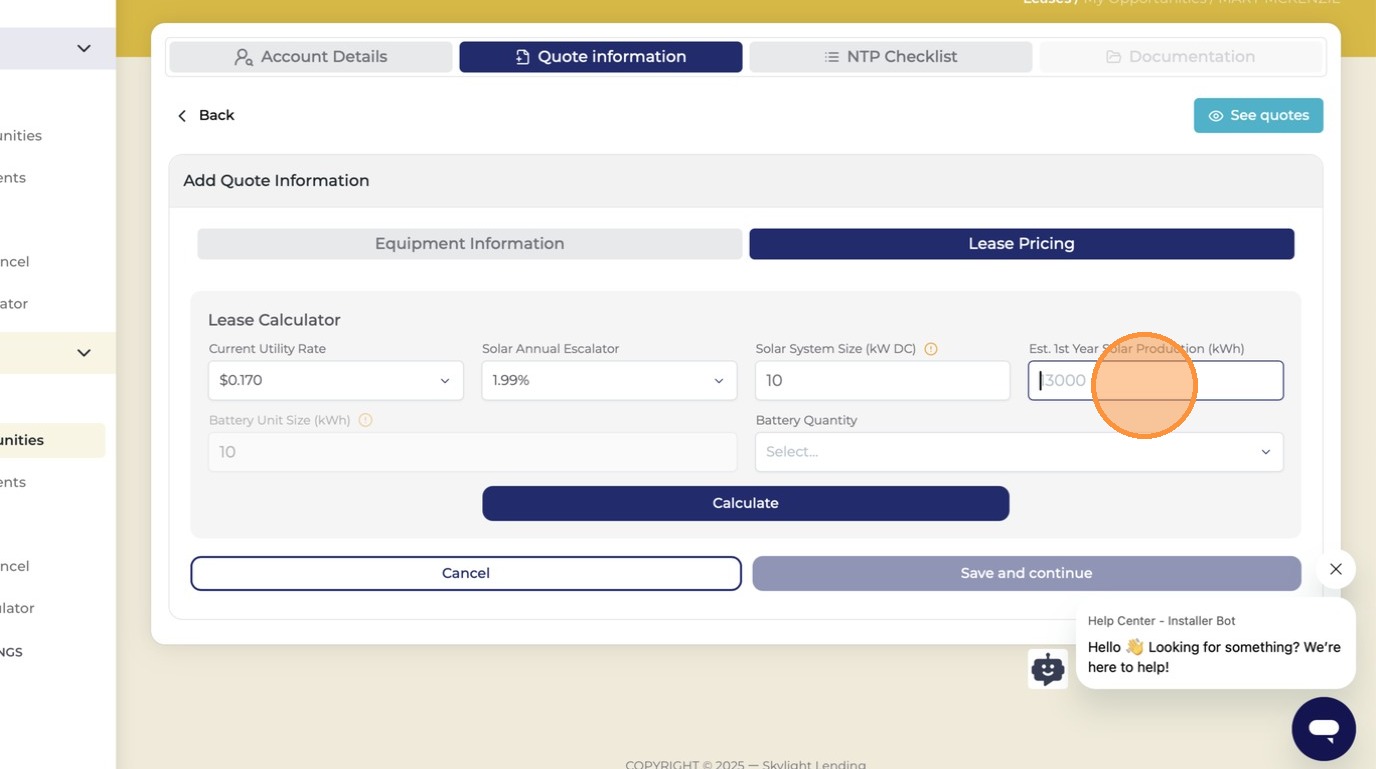
26
Enter the 1st year annual production
Enter the estimated kWh the system will produce in year 1. This number comes from your solar design software (Aurora, PVWatts, etc.) — not just the system size.
Annual production
27
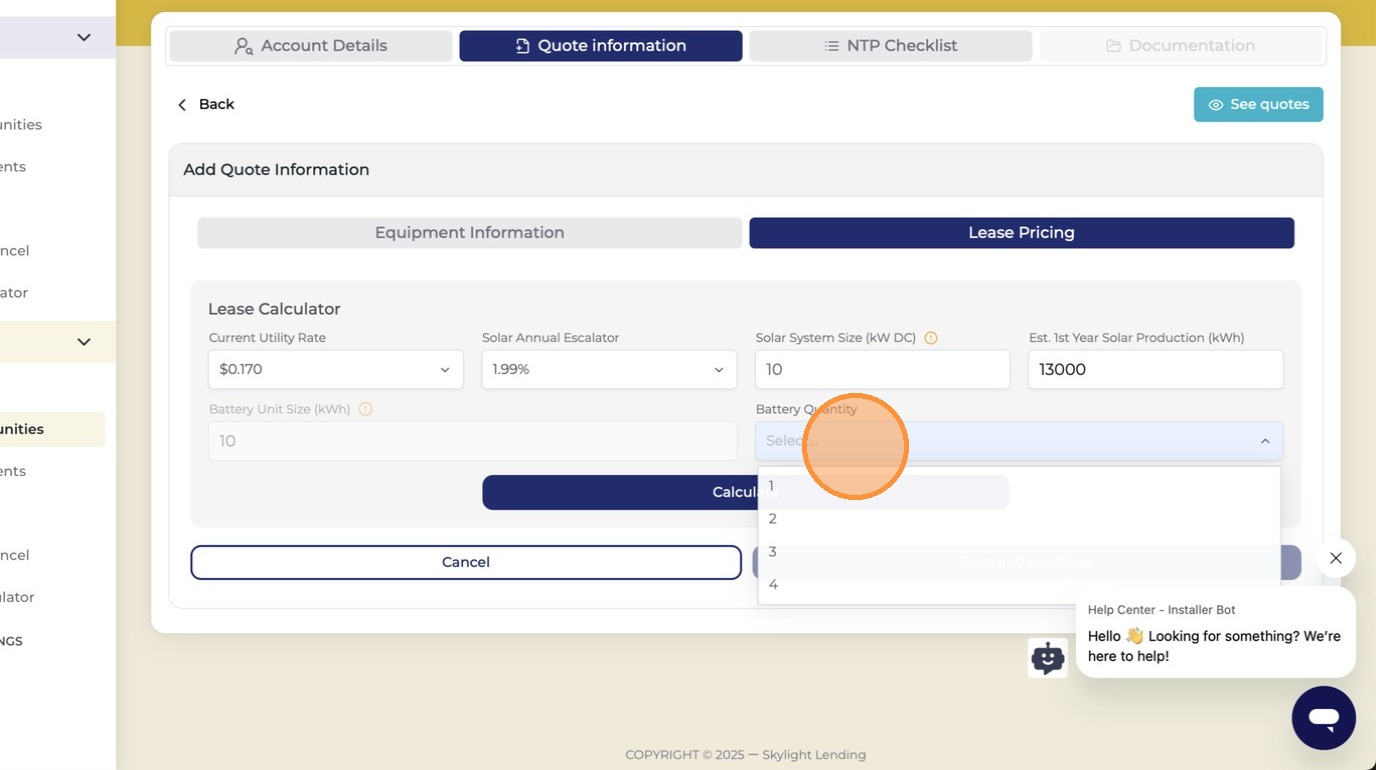
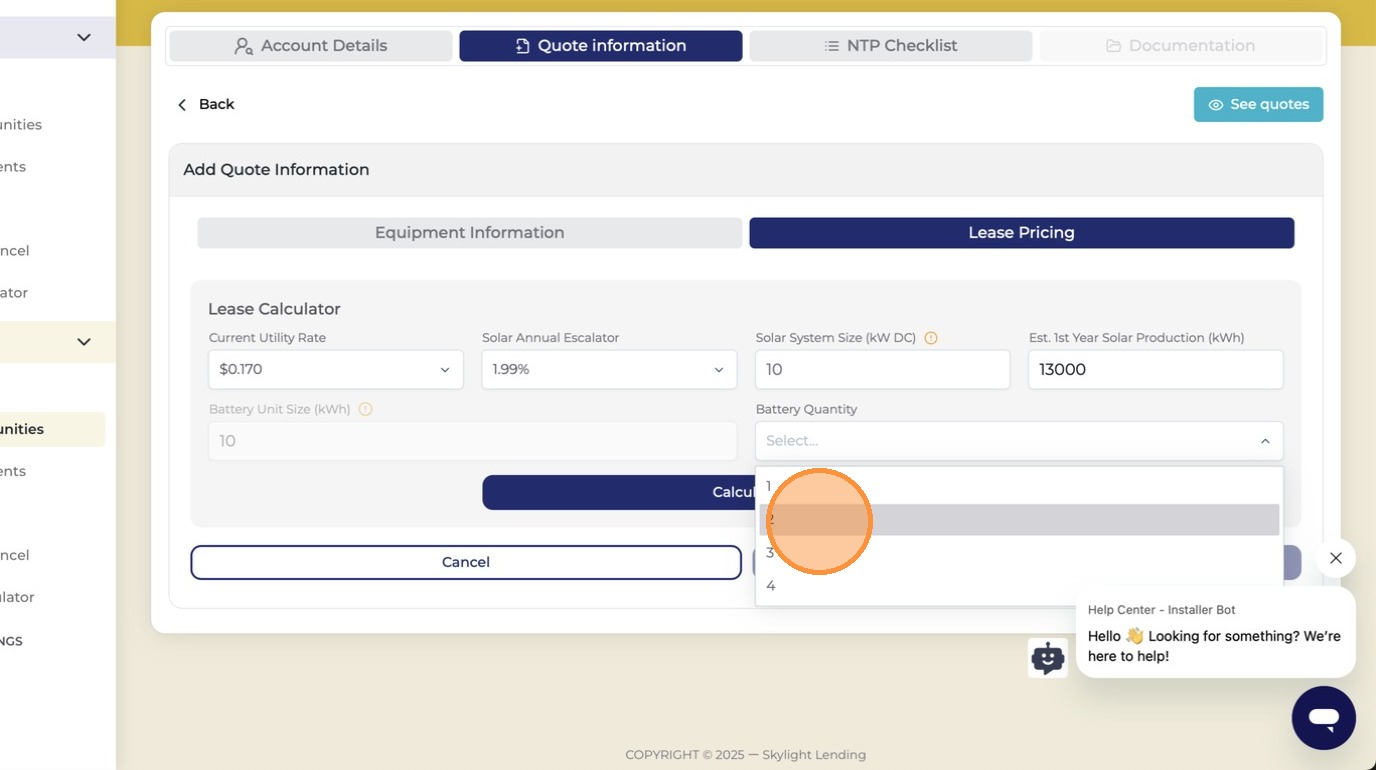
Select the quantity of batteries
Use the dropdown to select how many battery units are included. Must match what you entered in the equipment section.
Battery quantity
28
Review all inputs before calculating
Take a final look at system size, production, battery quantity, utility rate, and escalator. Once you hit Calculate, the Max EPC and pricing will generate from these numbers.
Final review
29
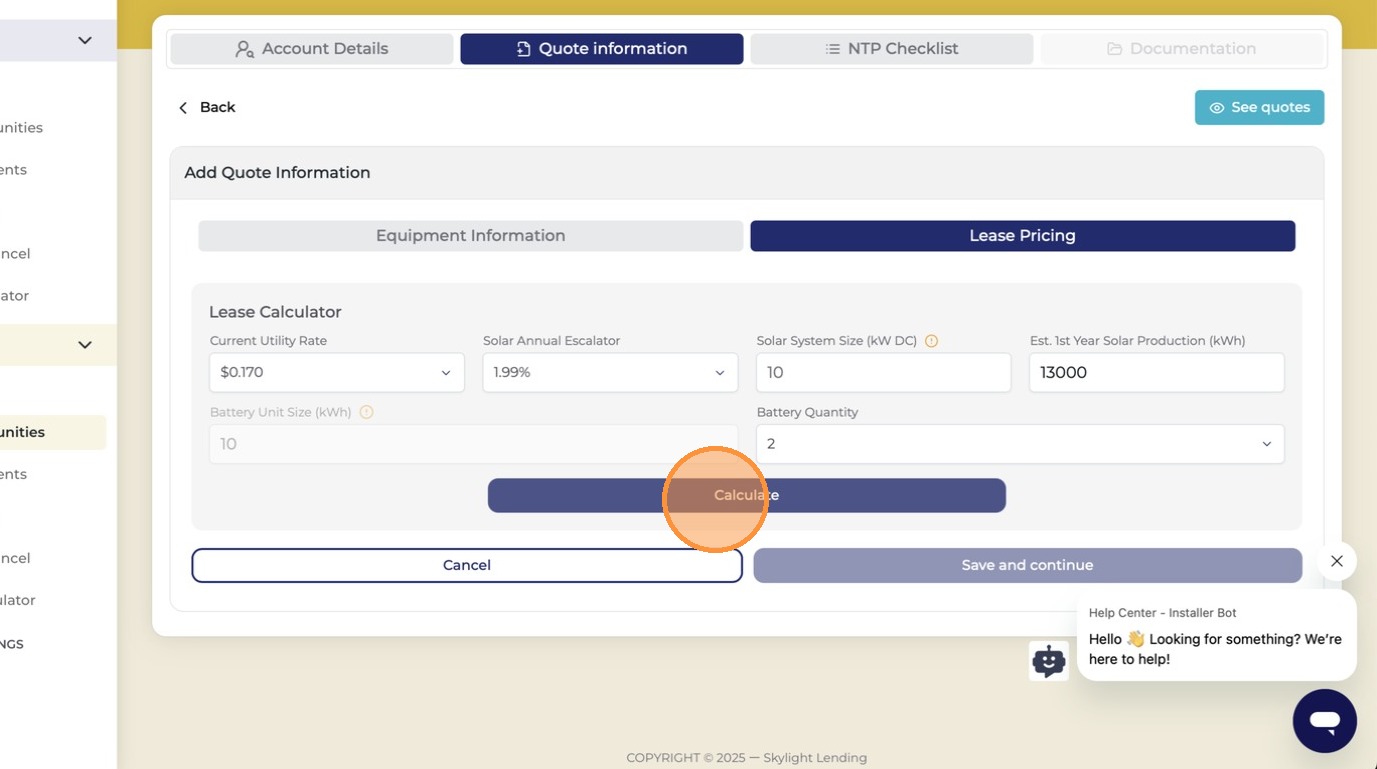
Click "Calculate"
Hit Calculate to generate the Max EPC for both solar and battery. The combined EPC payout will appear in a banner at the top of the screen.
Calculate button
11 steps
30
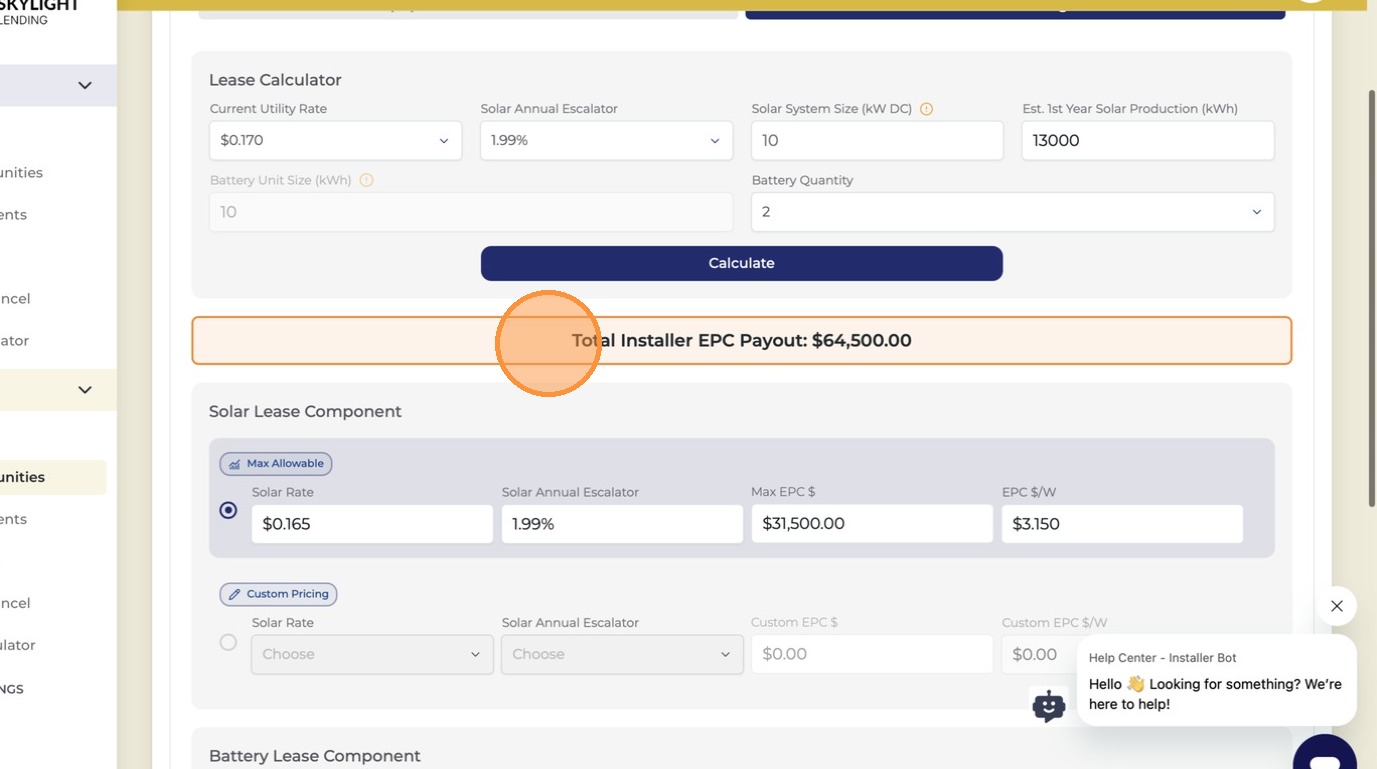
Review the Max EPC and combined EPC payout in the banner
After calculating, a banner shows the Max EPC (highest project cost allowed) and the total combined EPC payout for solar and battery. Review before making custom pricing adjustments.
EPC banner
Custom pricing limits

When entering custom pricing, the following maximums apply and cannot be exceeded:

ComponentMaximum allowed
Battery$1.65 per kilowatt-hour (kWh)
Solar$5.50 per watt
Pro tip — shift cost to the battery to lower the payment

Shifting more of the total project cost to the battery portion and less to solar can meaningfully lower the customer's monthly payment. For example, a $22,000 cost shift on a $62,000 project dropped the combined payment from $428 to $389/month — without changing the total project amount.

31
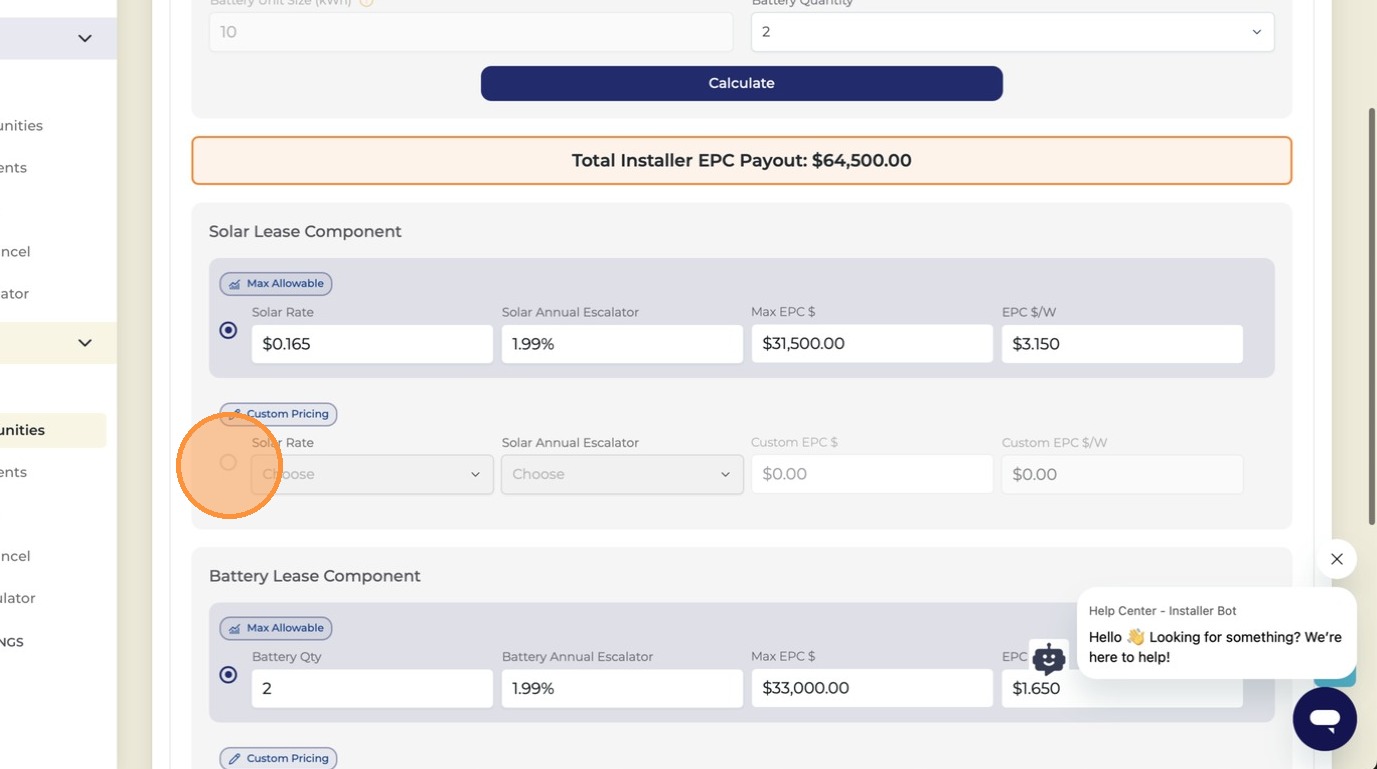
To customize solar pricing, click the radial button under "Custom Pricing"
By default the system uses standard pricing. Click Custom Pricing to unlock the solar rate fields and adjust them for this specific project.
Custom pricing radio
32
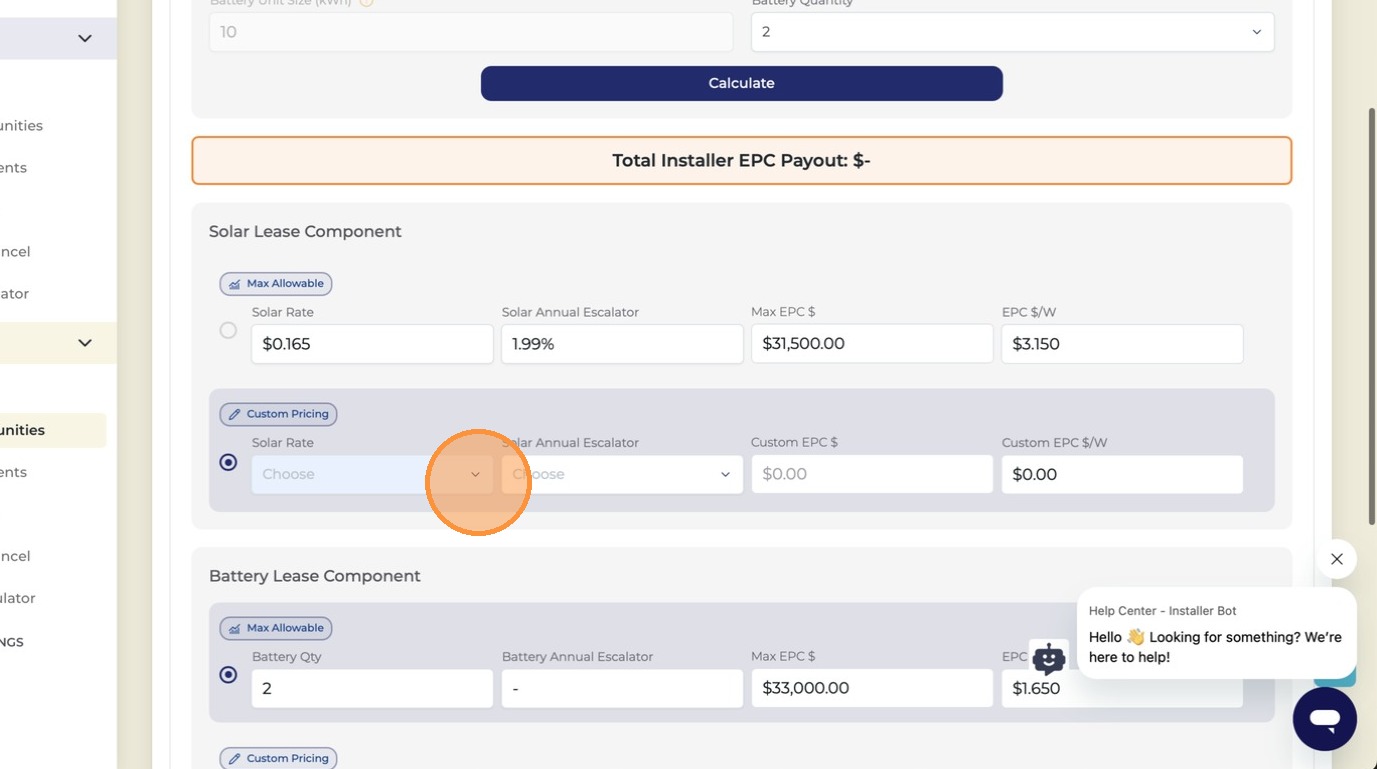
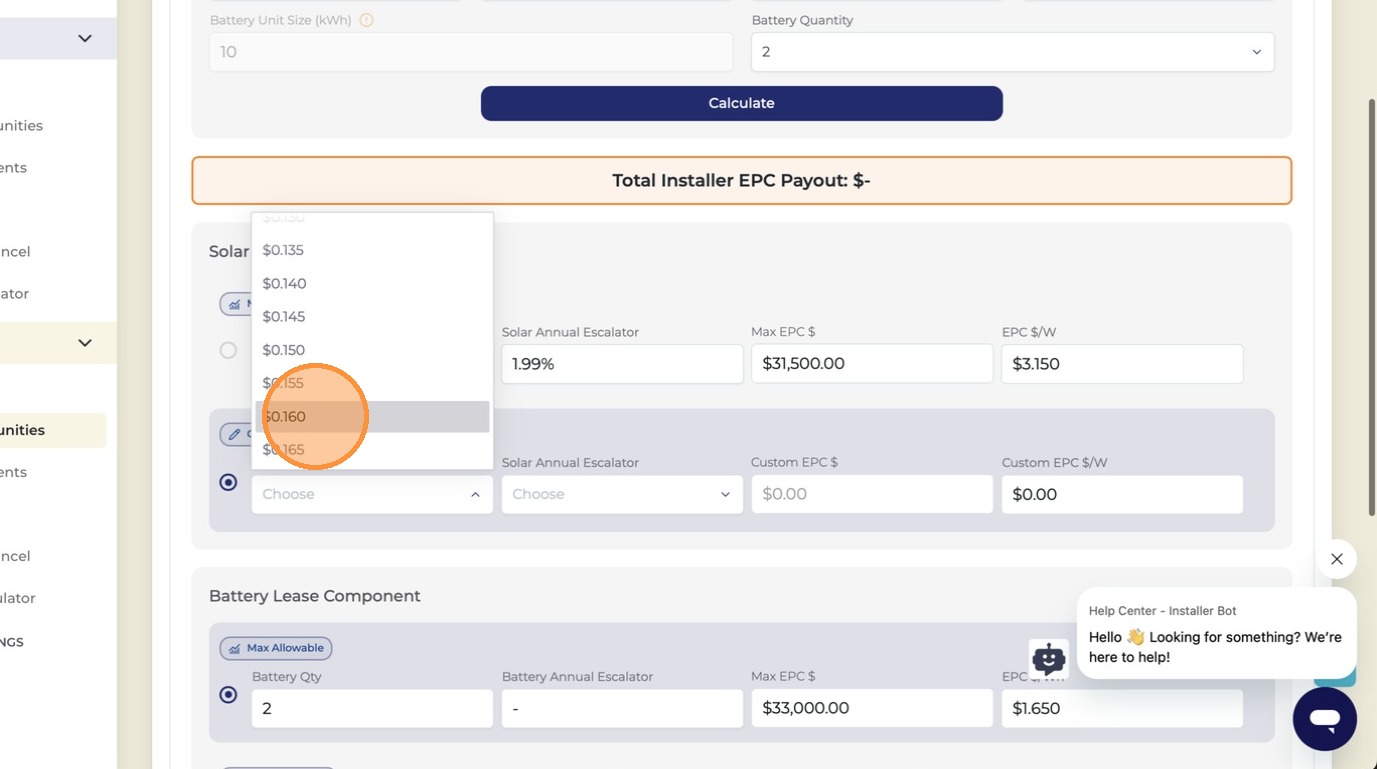
Choose the solar rate and solar annual escalator
Select the per-kWh solar rate and confirm the annual escalator. These two settings determine the customer's monthly solar payment and how it grows year over year.
Solar rate and escalator
Heads up — one escalator for both

The escalator you pick here automatically applies to both solar and battery payments. There is no separate escalator for the battery portion.
33
Review the updated solar monthly payment
After selecting the solar rate, the estimated monthly solar payment updates automatically. Confirm it looks right before moving on to battery pricing.
Solar monthly payment
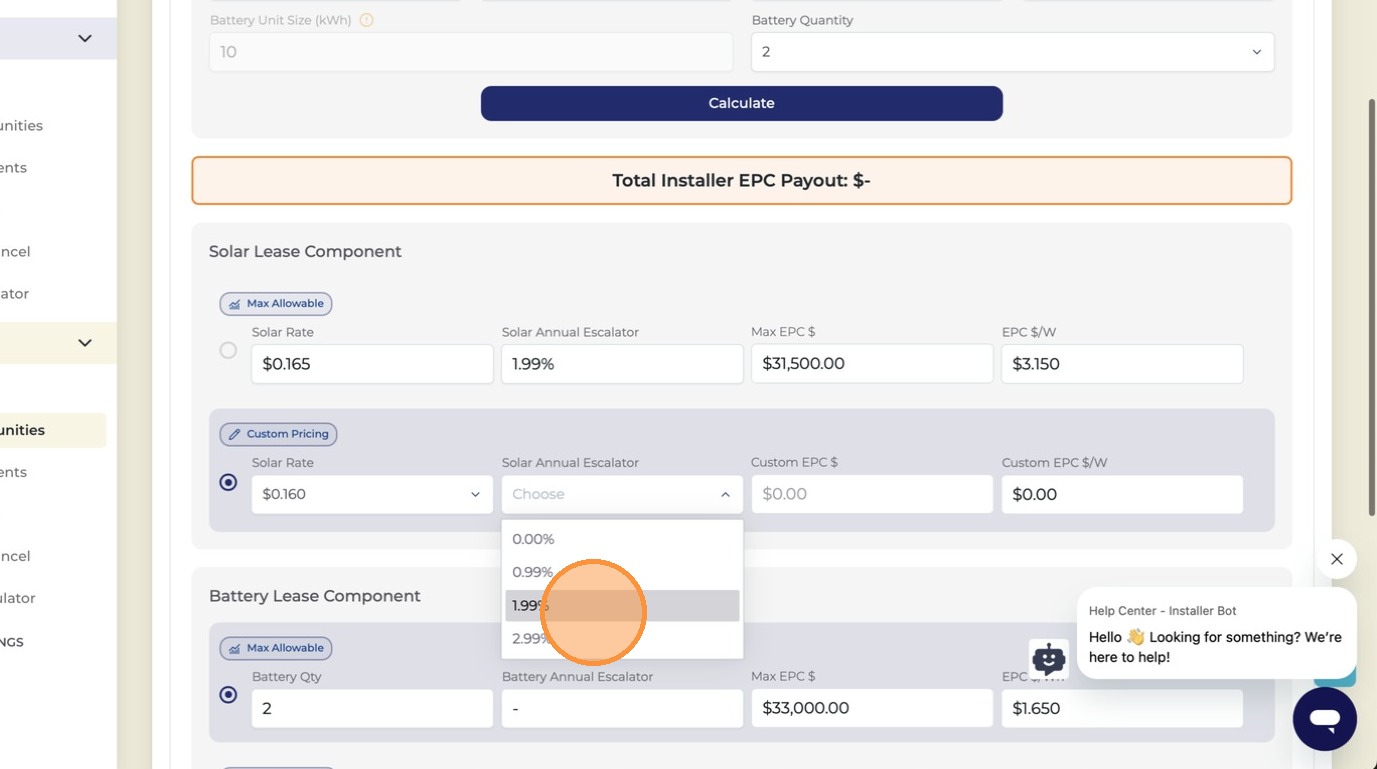
34
Choose the escalator that works best for your pricing and client payment
Select the annual escalator rate that best fits the customer's needs and your pricing structure. The customer's solar payment will increase by this percentage each year over the life of the lease.
1.99% escalator
35
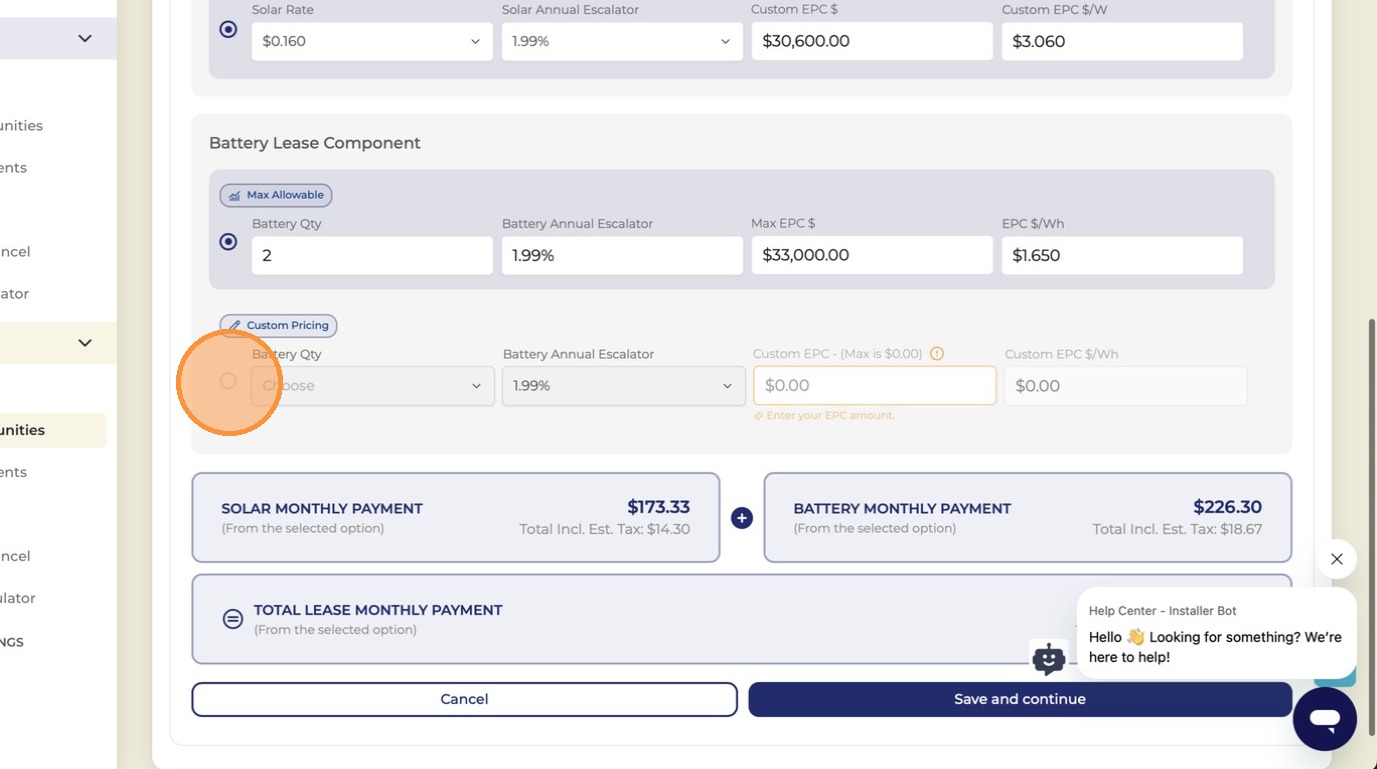
To customize battery pricing, click the radio button under "Custom Pricing"
Just like solar, click the Custom Pricing radio button in the battery section to unlock battery-specific pricing fields.
Battery custom pricing
36
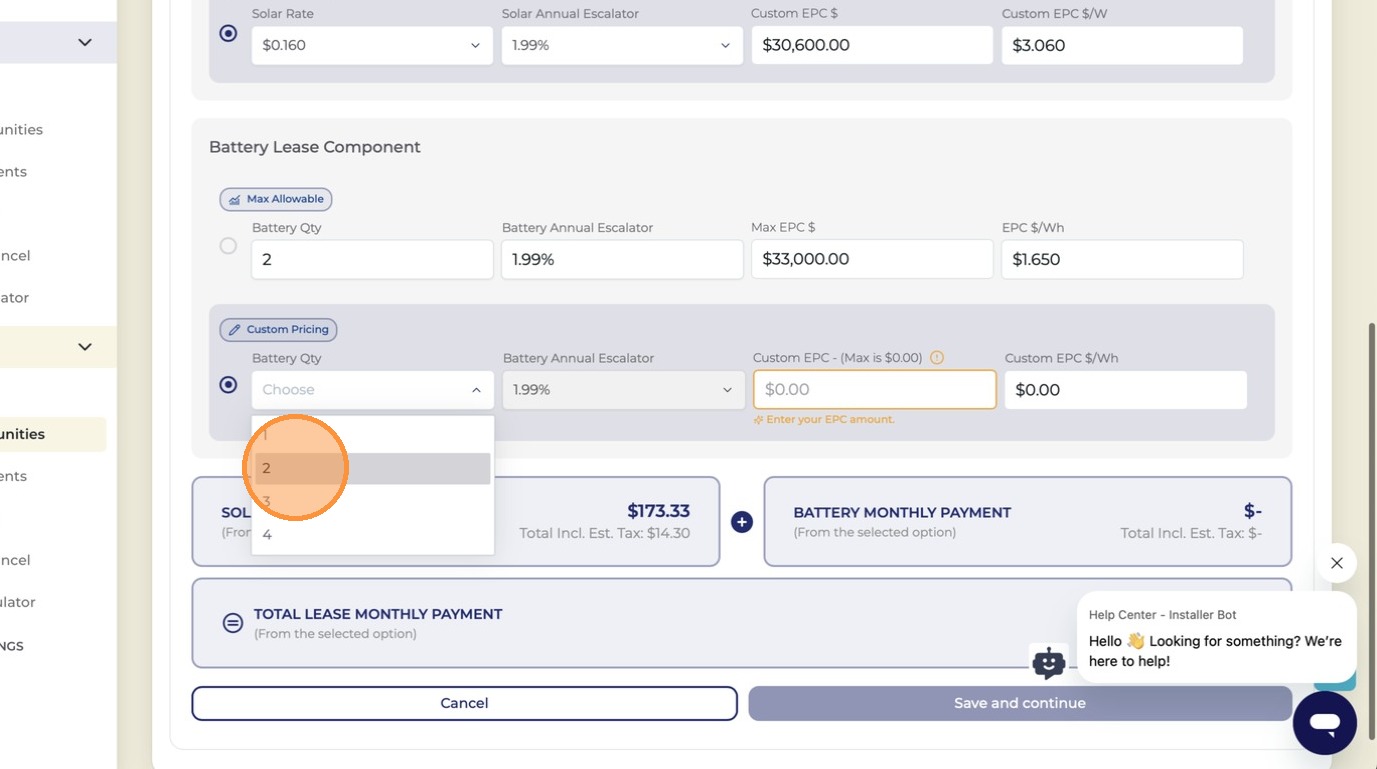
Select the battery quantity
Confirm the number of batteries. Should match what you entered in the equipment section.
Battery quantity
37
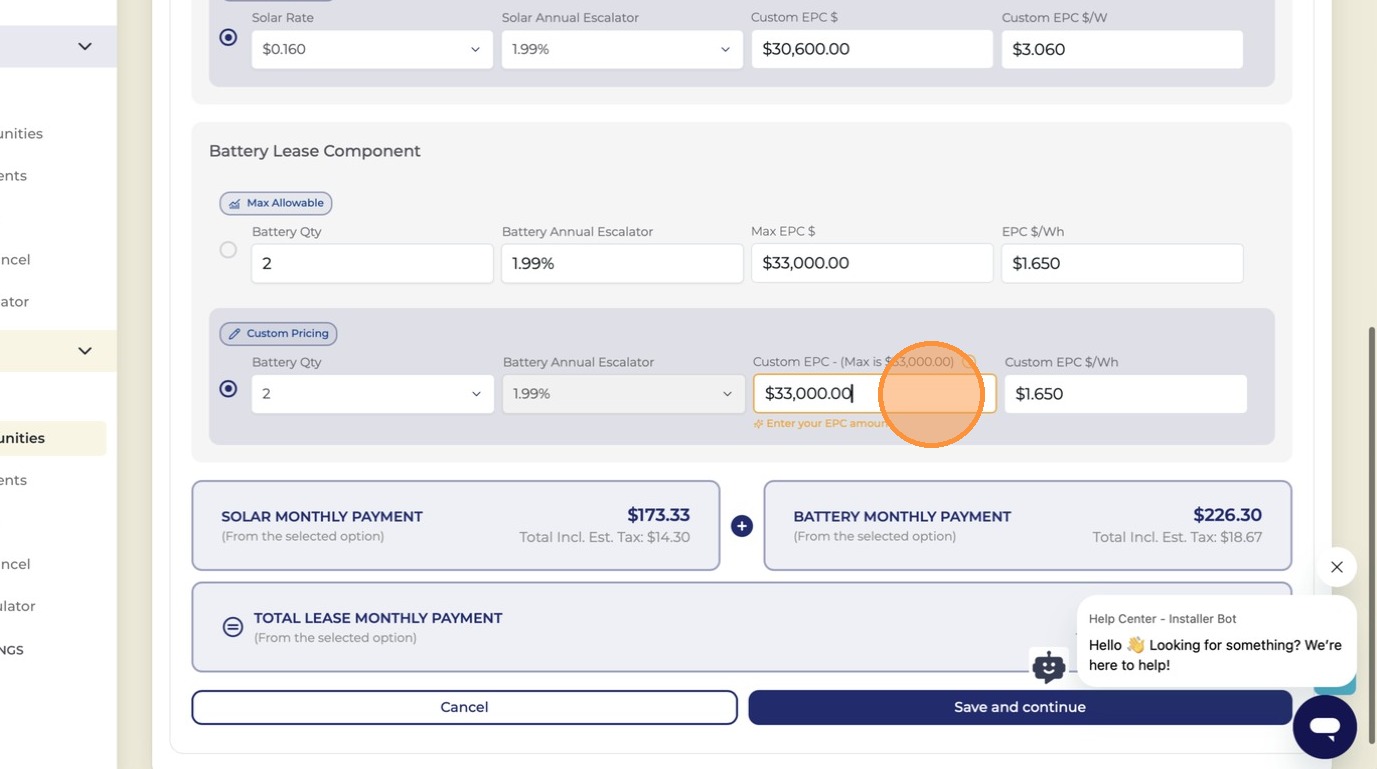
Click "Custom EPC" to enter a custom price for the battery
Click Custom EPC to manually enter a specific project cost for the battery portion. This lets you fine-tune the battery payment independently.
Custom EPC
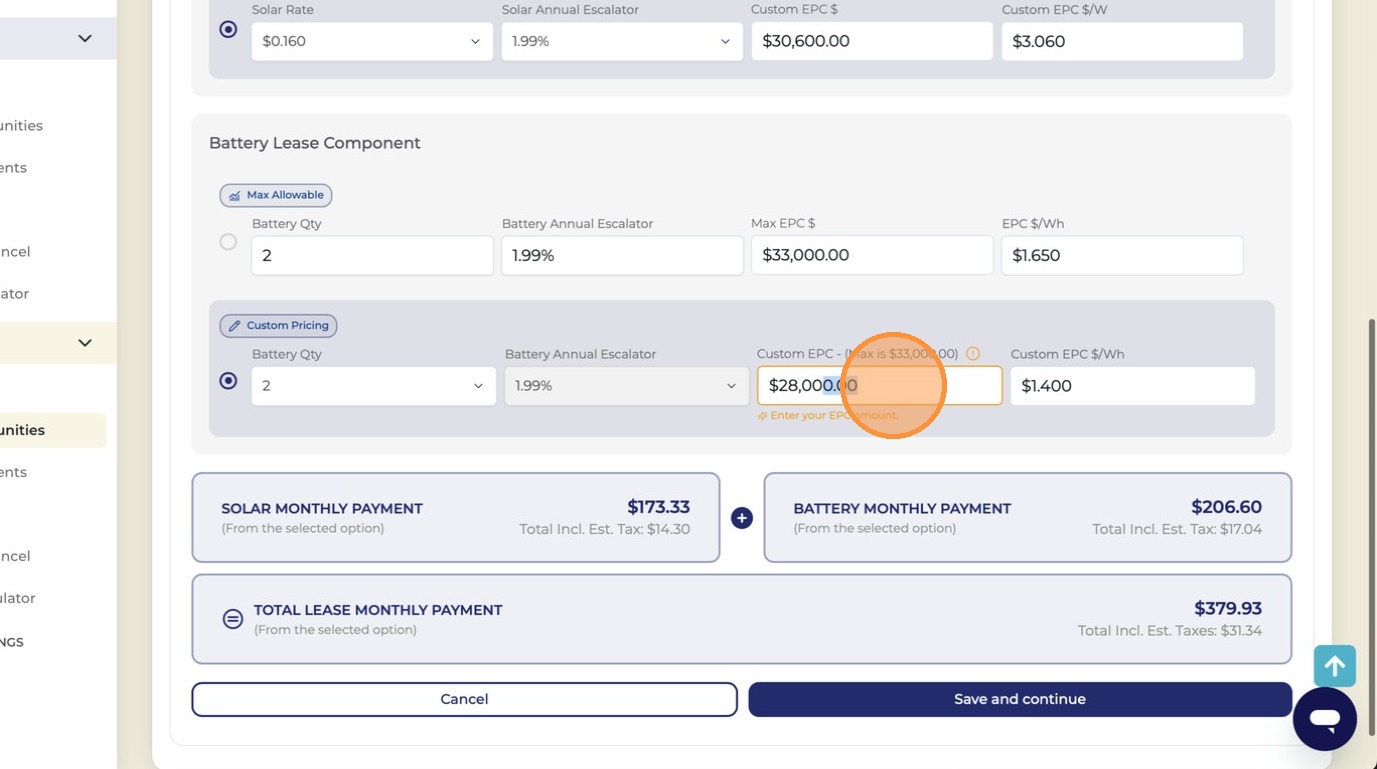
38
Enter the custom battery EPC — the monthly payment updates automatically
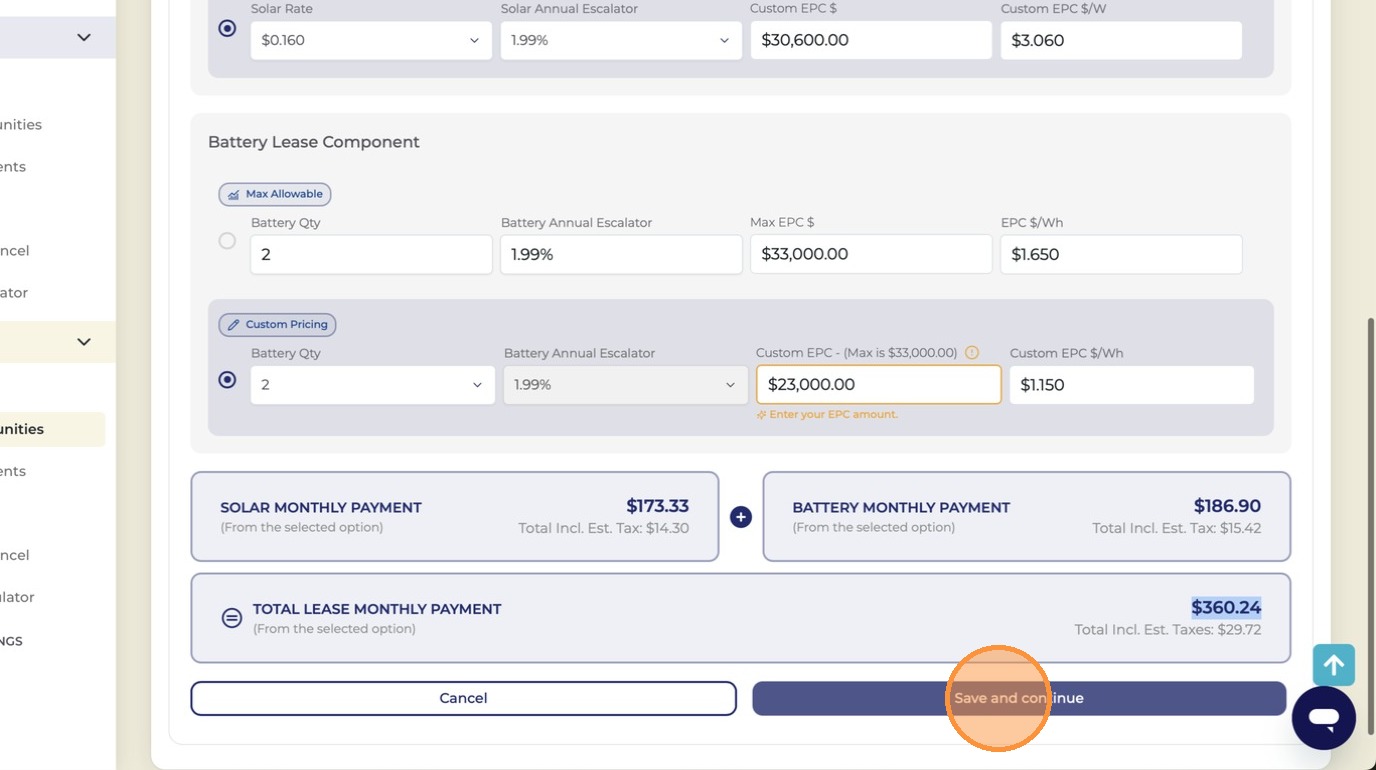
Type your desired battery project cost. The estimated monthly battery payment will update in real time as you type. Remember the maximum is $1.65 per kWh — the system will alert you if you exceed it.
Battery EPC field
39
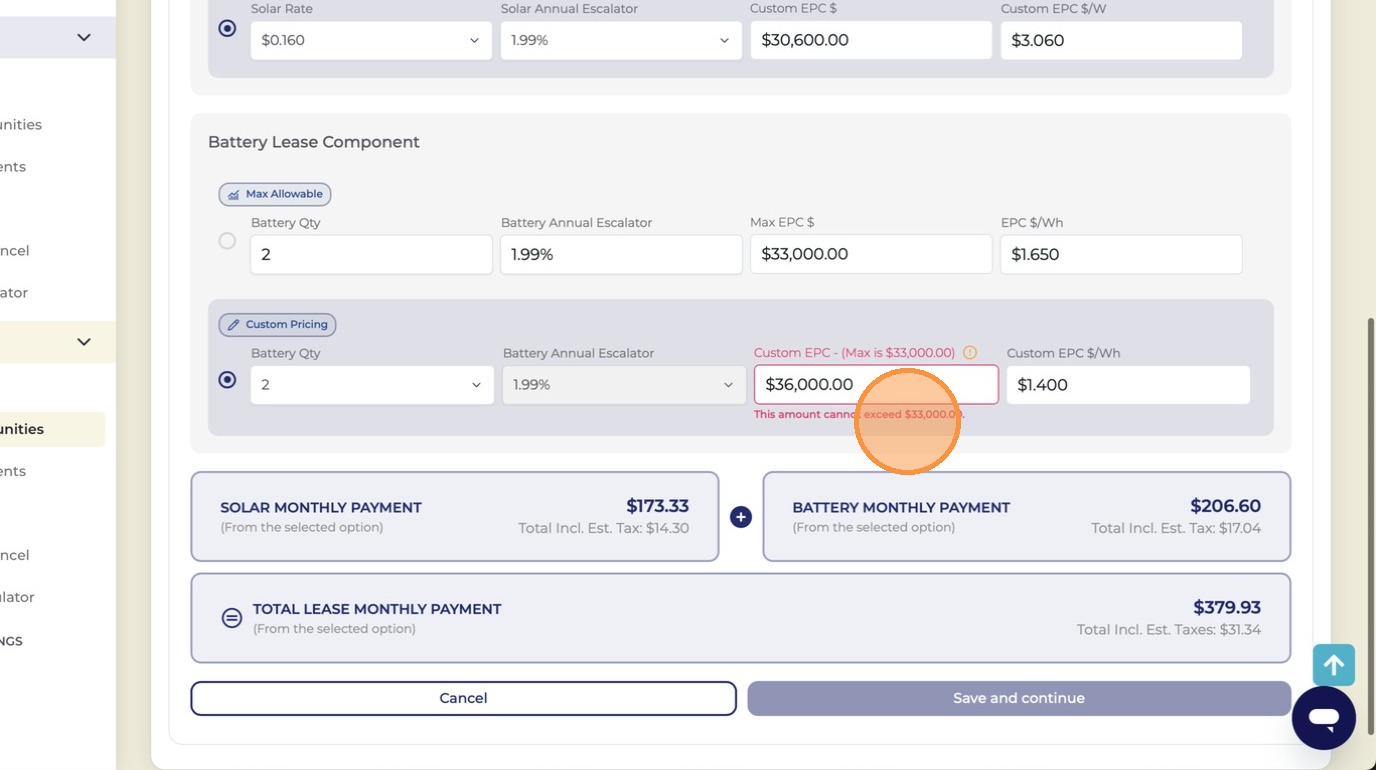
Watch for the pricing limit alert if you enter too high a number
The system validates your custom EPC against the allowed maximum. If you exceed the limit, a red alert banner appears. Lower the price until the alert disappears before continuing.
Pricing limit alert
Pricing limit exceeded?

If you see the alert banner, your custom EPC is above the allowed maximum. Reduce the amount until the banner disappears. You cannot save or continue while the alert is showing.
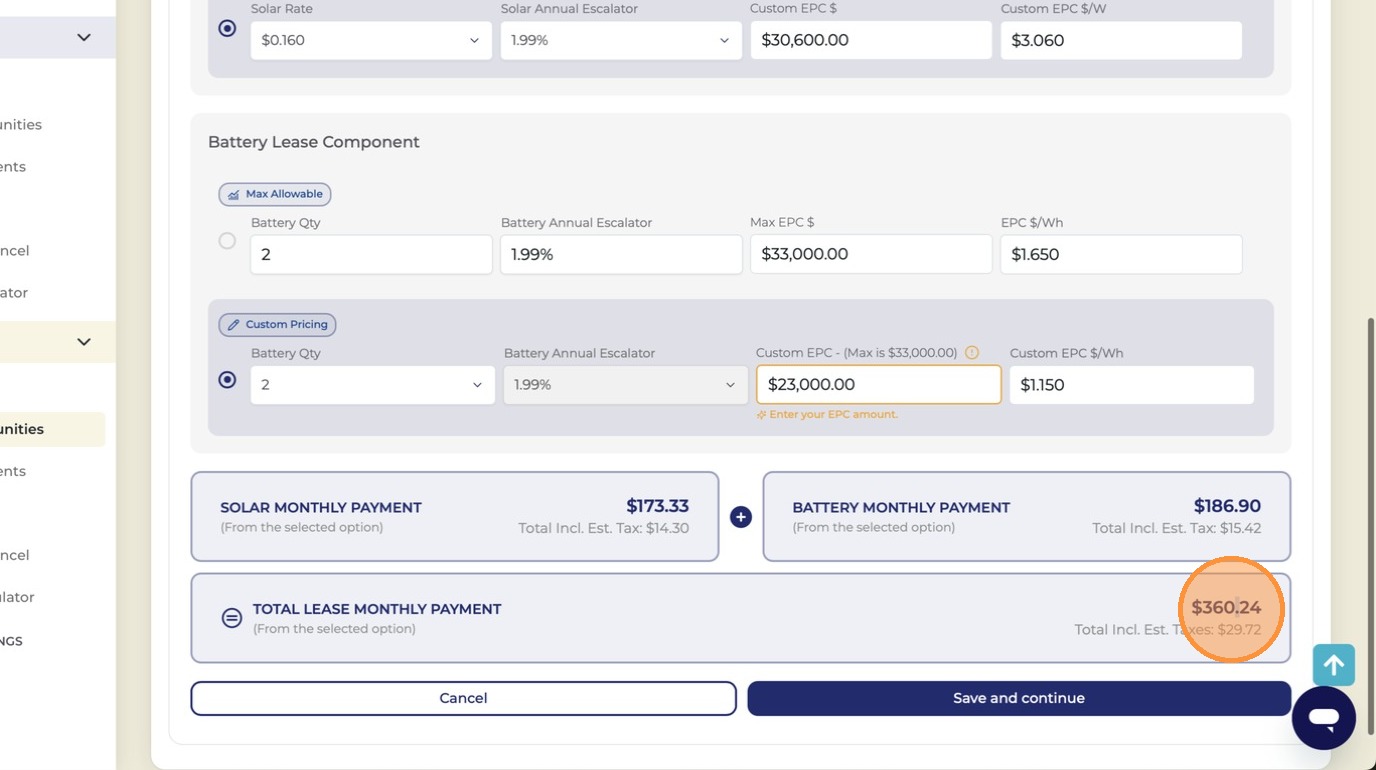
40
Confirm the final battery monthly payment looks correct
Once the EPC is within the allowed range, confirm the monthly battery payment shown matches what you discussed with your customer.
Battery payment confirmation
3 steps
41
Once both solar and battery pricing are set, click "Save and Continue"
When you're satisfied with both solar and battery pricing configurations, click "Save and Continue" to go to the full quote review screen.
Save and Continue
42
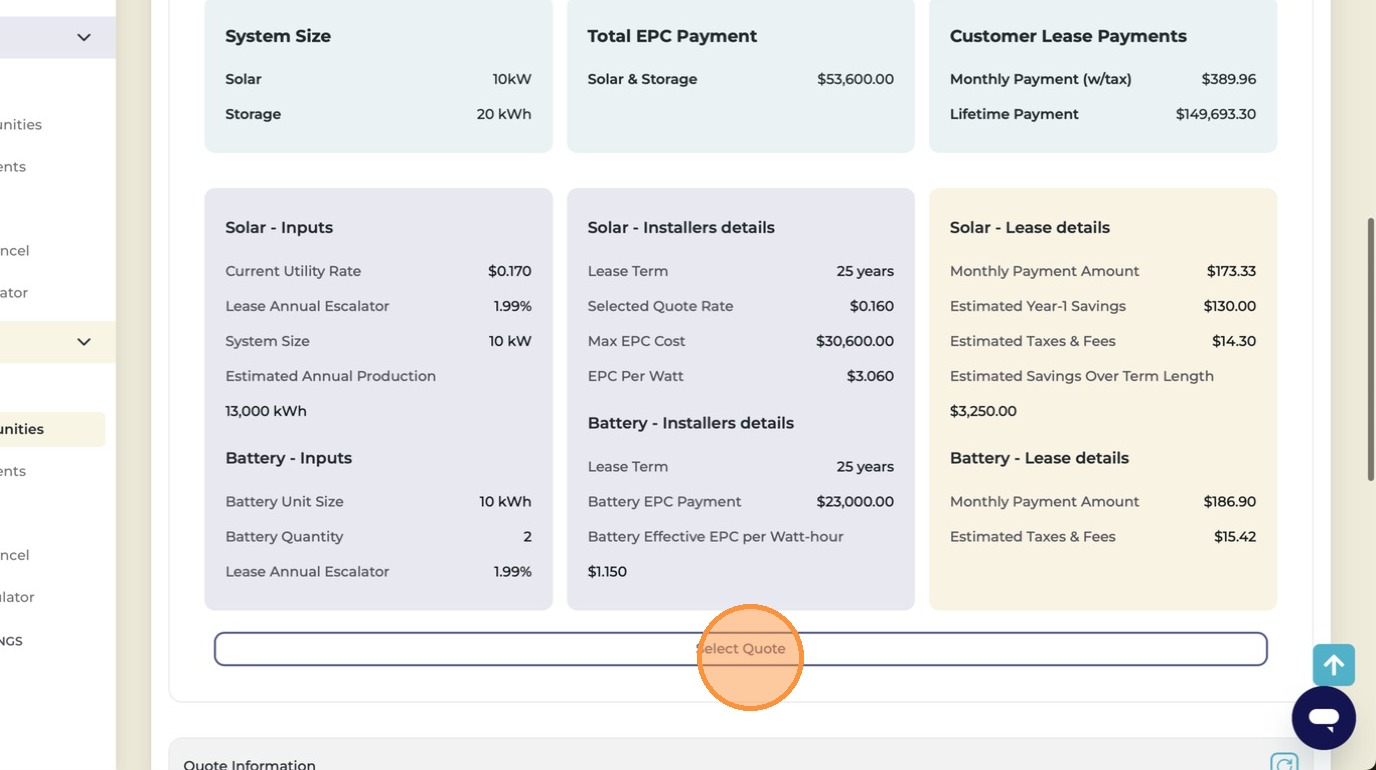
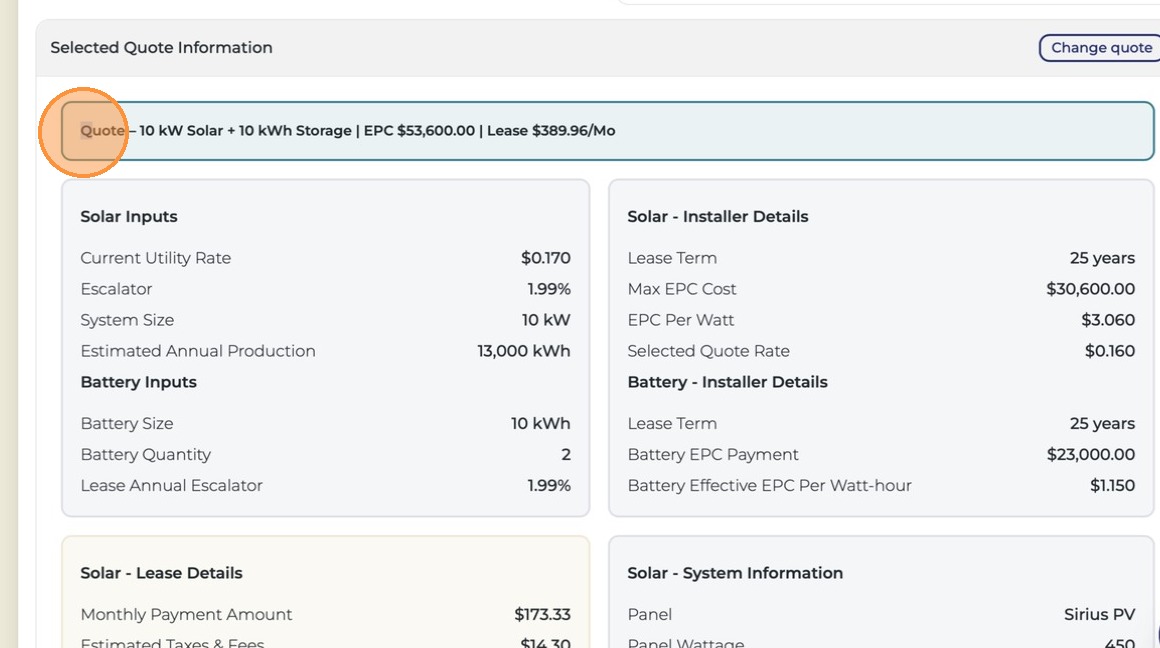
Review the complete quote, then click "Select Quote"
A full summary is displayed — monthly payments, escalator, system size, EPC, and all equipment. Review everything with your customer, then click "Select Quote" to lock it in.
Quote review
Review with your customer

Walk through the quote side by side — confirm monthly payments for both solar and battery and make sure they understand the escalator before you select the quote.
43
A blue confirmation banner will appear — your quote is selected!
Once you click "Select Quote," a confirmation banner appears. The opportunity is now ready to move forward to the next stage of the process.
Quote confirmed
You're all done!

Your Solar + Battery lease quote is complete and selected. The opportunity is ready for the next steps. Great work!